Jump to content
SAU Community

Recommended Posts

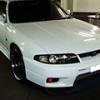
I currently have a 1998 R33 GT-R V-Spec (Series III) with some minor modifications...

- Haltech Platinum Pro ECU

- HKS Priest Exhaust

- Trust 105mm Front Mount Intercooler

- Greddy Profec B Spec II Boost Controller

- Slotted Rotors/Project Mu Brakepads

- Other minor things

This was good for 222awkw (rwkw would be slightly more but I didn't dyno that). I have only owned the car for 3 months and I personally had the ECU fitted along with the dyno tune and some other bits.

However, the usual story... I have quickly grown used to the power. More power needed! :P

I have been doing some research and I feel that I should be able to reach 320awkw with stock internals. These are the proposed mods...

- HKS 2530 turbos

- Tomei Pon Cams and Adjustable Cam Gears

- Tomei Fuel Pump

- Nismo 600cc Injectors

- Nismo GTR AFM's

- HKS Stainless Dump Pipes

A couple things of concern are the injectors and the AFM's. I initially planned to go with 700cc injectors to allow for future upgrades but I was advised to go with 600cc due to my power goals and the fact that they are a straight fit. What do you guys think? What sort of power are 600cc injectors good for (in case I want to add more later)? Should I just go for the 700cc straight up?

In regards to the AFM's, I was informed that the Nismo GTR AFM's offer better airflow (and a direct fit) than the Z32 version. Is this the best way to go?

Any other comments or advice on the above, please feel free to do so.

Edited by Shinrai
  • Replies 64
  • Created
  • Last Reply

Top Posters In This Topic

If the R33 afm's are the same as R34 units, you dont need to buy any other air flow meters. My R34 was tuned with the stock units and it's made almost 330awkw.

Cams are also not necessary as well to make that power.

6 or 700cc are fine, I think I would use 700s, just in case if you want to go more power later. Im using 800s atm, bit of an overkill as the duty is only on 55% but I plan to go over 400kw in the future.

If the R33 afm's are the same as R34 units, you dont need to buy any other air flow meters. My R34 was tuned with the stock units and it's made almost 330awkw.

:thumbsup:

You can tune beyond their "range" but I would not risk doing it. I would go the Nismo AFM's if I had to, but I went with MAP sensor.

Edited by bigmikespec

for a strong 300awkw i would keep stock cams, adjustable cam gears to adjust the power curve etc, nismo AFM's and tomei/nismo in tank fuel pump like you stated, 700 or so cc injectors (herd its better to go the biggest you can to allow for future power increases) and 2530's would be perfect and wont be laggy like running twin GTRS turbos etc

:)

:)

You can tune beyond their "range" but I would not risk doing it. I would go the Nismo AFM's if I had to, but I went with MAP sensor.

What do you mean by MAP sensor? This means that the ECU measures air flow, right?

I think my ECU has that feature also, it is a Haltech Platinum Pro and the specifications state... "Selectable onboard internal MAP sensor rated to 150kPa (up to 1.5 Bar or 22psi boost". Does this mean I can use my ECU instead? Which is the better way to go?

hmmm i think you dont have to run afms with that ecu, its like the power fc d-jetro wich uses map sensors instead....best to look on there website and find out for sure

if u dnt hav to run afms, dont. some say their a restriction on the inlet path (they got mesh inside)....twin steel airtake pipes with filters clamped on the ends would be the best way :)

Edited by SiR_RB
:)

You can tune beyond their "range" but I would not risk doing it. I would go the Nismo AFM's if I had to, but I went with MAP sensor.

If you're not aware, they can go further than 330kw actually, so why waste money on something that's not really necessary.

What do you mean by MAP sensor? This means that the ECU measures air flow, right?

I think my ECU has that feature also, it is a Haltech Platinum Pro and the specifications state... "Selectable onboard internal MAP sensor rated to 150kPa (up to 1.5 Bar or 22psi boost". Does this mean I can use my ECU instead? Which is the better way to go?

map sensor measures "manifold air pressure" not the airflow :). it would probably be more expensive to swap to a map sensor than to get new afm's

If the R33 afm's are the same as R34 units, you dont need to buy any other air flow meters. My R34 was tuned with the stock units and it's made almost 330awkw.

Cams are also not necessary as well to make that power.

6 or 700cc are fine, I think I would use 700s, just in case if you want to go more power later. Im using 800s atm, bit of an overkill as the duty is only on 55% but I plan to go over 400kw in the future.

You didn't get the work done at PowerTune by any chance did you? I have just been talking with them as they did the previous work on my car and I am very happy with the service.

Anyway, they said they just tuned a R34 with an Apexi PowerFC, 800cc injectors, Pon Cams, Adjustable Cam Gears and a set of Garret 2560-5's. Apparently it made 328awkw (20psi boost), which is the figure you mentioned with some of the parts you also just mentioned.

Edited by Shinrai

Yes, they have been good to me also.

By they way, it wasn't them that recommended the 600cc injectors. That was somebody I was looking at sourcing my parts through.

Back to the AFM meter thing, PJ from PowerTune did mention your tune to me as a reference and he also said that if I wanted to achieve a higher power figure that the AFM would hold it back with the other mods I am considering. I think that the R34 units might be different to the R33 too.

When the bug bite's it bite's hard! It would be turbos only for me!, next upgrades, fuel pump, injectors, cams, cam gears, AFM, dumps, clutch, catch can, gearbox, suspension etc = $$$$ + possible shit heap on the road, I would keep it simple for now, enjoy and maybe wait till you do an engine.

You mention that you've already got the haltech ecu ya? If thats the case, maybe check if you're actually running AFM now. The models seems to be able to run on map sensors but maybe the map sensors are additional items which users have to purchase seperately (like de-jetro, ecu itself is around 1k and if you include sensors looms etc the real cost of the package is around 1.7k).

In any case, tuning a car without afm takes longer according to a couple of tuners. It can be done but if you're not after huge power (imo anything above 500awhp is huge), I personally wouldnt recommend map. Like what Eugene said, why pay for something extra which you dont need?

If you're not aware, they can go further than 330kw actually, so why waste money on something that's not really necessary.

Once they run out of resolution that is it, the tuner is guessing, how good is the tuner? Not good enough for me (personally) wanting to risk it.

You are saving money if you buy (or already have) an ECU that is capable of using a MAP sensor instead of AFM's. Instead of getting a new ECU and AFM's as well...? Which is wasting money that is not really necessary!

Mike

edit: between MAP and AFM's there is f**k all difference between drivability too.

Edited by bigmikespec

Of course. If you're already running map, there's no point in going getting another ecu just for AFM. I'm just saying if you dont have anything for starters. Reason being time spent on tuning when the same outcome.

Not buying an ecu its a saving on its own.

Yes, I do have a Haltech Platinum Pro which has a MAP sensor.

I apologise for not putting two and two together earlier. I thought I still needed an AFM until talking a bit more with you guys here. So, the good news is that the AFM debate is null and void in my case... Yay!

I am waiting to get a quote back from the workshop and then I have to convince my Wife to put all that money aside for my baby (I think some jewellery, clothes and shoes etc. may be needed to get her on side :) ).

Awesome... Thanks. I was beginning to think that it might need to wait a while as it has all added up to more than I wanted to spend at this stage.

I might just look at the turbo's and the neccessary mods at this stage. :)

Create an account or sign in to comment

You need to be a member in order to leave a comment

Create an account

Sign up for a new account in our community. It's easy!

Register a new account

Sign in

Already have an account? Sign in here.

Sign In Now


  • Similar Content

  • Latest Posts

    • Hi, is the HKS  Tower Bar still available ? negotiable ? 🤔
    • From there, it is really just test and assemble. Plug the adapter cables from the unit into the back of the screen, then the other side to the car harness. Don't forget all the other plugs too! Run the cables behind the unit and screw it back into place (4 screws) and you should now have 3 cables to run from the top screen to the android unit. I ran them along the DS of the other AV units in the gap between their backets and the console, and used some corrugated tubing on the sharp edges of the bracket so the wires were safe. Plug the centre console and lower screen in temporarily and turn the car to ACC, the AV should fire up as normal. Hold the back button for 3 sec and Android should appear on the top screen. You need to set the input to Aux for audio (more on that later). I put the unit under the AC duct in the centre console, with the wifi antenna on top of the AC duct near the shifter, the bluetooth antenna on the AC duct under the centre console The GPS unit on top of the DS to AC duct; they all seem to work OK there are are out of the way. Neat cable routing is a pain. For the drive recorder I mounted it near the rear view mirror and run the cable in the headlining, across the a pillar and then down the inside of the a pillar seal to the DS lower dash. From there it goes across and to one USB input for the unit. The second USB input is attached to the ECUtec OBD dongle and the 3rd goes to the USB bulkhead connected I added in the centre console. This is how the centre console looks "tidied" up Note I didn't install the provided speaker, didn't use the 2.5mm IPod in line or the piggyback loom for the Ipod or change any DIP switches; they seem to only be required if you need to use the Ipod input rather than the AUX input. That's it, install done, I'll follow up with a separate post on how the unit works, but in summary it retains all factory functions and inputs (so I still use my phone to the car for calls), reverse still works like factory etc.
    • Place the new daughterboard in the case and mount it using the 3 small black rivets provided, and reconnect the 3 factory ribbon cables to the new board Then, use the 3 piggyback cables from the daughterboard into the factory board on top (there are stand offs in the case to keep them apart. and remember to reconnect the antenna and rear cover fan wires. 1 screw to hold the motherboard in place. Before closing the case, make a hole in the sticker covering a hole in the case and run the cable for the android unit into the plug there. The video forgot this step, so did I, so will you probably. Then redo the 4 screws on back, 2 each top and bottom, 3 each side and put the 2 brackets back on.....all ready to go and not that tricky really.      
    • Onto the android unit. You need to remove the top screen because there is a daughterboard to put inside the case. Each side vent pops out from clips; start at the bottom and carefully remove upwards (use a trim remover tool to avoid breaking anything). Then the lower screen and controls come out, 4 screws, a couple of clips (including 3 flimsy ones at the top) and 3 plugs on the rear. Then the upper screen, 4 screws and a bunch of plugs and she is out. From there, remove the mounting brackets (2 screws each), 4 screws on the rear, 2 screws top and bottom and 3 screws holding in the small plates on each side. When you remove the back cover (tight fit), watch out for the power cable for the fan, I removed it so I could put the back aside. The mainboard is held in by 1 screw in the middle, 1 aerial at the top and 3 ribbon cables. If you've ever done any laptop stuff the ribbon cables are OK to work with, just pop up the retainer and they slide out. If you are not familiar just grab a 12 year old from an iphone factory, they will know how it works The case should now look like this:
    • Switching the console was tricky. First there were 6 screws to remove, and also the little adapter loom and its screws had to come out. Also don't forget to remove the 2 screws holding the central locking receiver. Then there are 4 clips on either side....these were very tight in this case and needed careful persuading with a long flat screw driver....some force required but not enough to break them...this was probably the fiddliest part of the whole job. In my case I needed both the wiring loom and the central locking receiver module to swap across to the new one. That was it for the console, so "assembly is the reverse of disassembly"
×
×
  • Create New...