Jump to content
SAU Community

Recommended Posts

Hi everyone,

Has anyone else out there that is making good progress with their car projects this christmas-new year break?

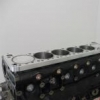
This week has been the first week of holidays Ive had in 3 years, so ive been making the most of it. So far Ive completed my RB31dett engine build, wired a V500 ECU into one of my other cars and am continuing with the cars assembly. I havent made progress like this in months!

I've found that find that when your project(s) come to a stand still its often hard to get motivated again, and often seeing someone elses success helps get you back on track again.

So with that in mind, post up your holiday break success stories. Here are a few pics of mine.

Cheers,

Ian

post-26553-1262220772_thumb.jpg

post-26553-1262220797_thumb.jpg

post-26553-1262220960_thumb.jpg

My engine crane is still being used by my dad, so was a bit bored this weekend while I wait to pull the engine out...

So started this:

post-40424-1262423537_thumb.jpg post-40424-1262423624_thumb.jpg

Camera phone pics help hide the poor quality of my work on that...

Thats hard work polishing those covers up! Ive seen a few people go crazy tring to get that perfect finish. Had you considered having them ceramic coated instead? www.competitioncoating.com.au do a chrome style ceramic coating that looks great and is zero maintenance down the track too. They do tinted colours as well.

Maintaining polished metal in an engine bay is a right pain in the ass. The 11 blade magnesium alloy porshce fan that is polised on the engine pic that I posted needs to be re-polished every 2 weeks because the combination of engine bay air and heat really accelerates oxidization.

Yeah I can see how people would go crazy doing it... It's one of those things that seem like a good idea at the time you start doing it, and about 1/4 of the way through the first part you ask yourself what the hell you are doing lol...

Ceramic coating would be nice, but it wasn't in the budget - the wet and dry sandpaper I got was $6.50 at supercheap :geek:

That porka motor looks the goods, my motor wont look anywhere near that clean I'm sure, but I'm more worried about the rebuild than keeping it clean at this stage. Besides with the "polished" (I'm using that term loosely for my handywork) covers I'll at least be able to see the dirt, as opposed to the standard black ones. On the timing belt cover I started sanding off the grease initially, was wondering why the paint wasn't coming off as easy as on the valley cover lol. Didn't have any degreaser around, so used the industrial strength hand wash on it instead, worked a charm...

Yeah the cermaic coating are expensive, but they do work and look great. I posted up a dead link too... I'll try that agian...

http://competitioncoatings.com.au/

Once youve finished rubbing those covers with 600 + 1200 grit paper you'll find you have no finger prints. Something else to look forward too...

Might as well post :geek:

I Promised Myself id at least get my project S3 Rx7 "Driveable" (Be able to move under its own power at least) By the time i go back to work after my break, not going to happen seeing i go back on monday! But I Gave it a crack, just been so busy with other stuff, i need another week off!

Was pretty much just a shell 4 weeks ago, Got all the Brakes In With s5 BMC, Dropped Engine in (Fully Prepped and Painted it up in True Rotary Style :P) its rediculous how much little things need doing when u start from a shell, Today i Got the fuel pump and wiring sorted out, put the tailshaft in and put the oil cooler in (sortof) so to start it now ive just got a bunch of wiring to sort out/hide in the bay, and fill it up with fluids :)

Things was fully stripped and painted, the colour looks fantastic in the sun!

Pics;

As it sat not very long ago. :)

rx7ln.jpg

How The Motor and Box Looked When i pulled it outta the donor vehicle :) (terrible)

19122009279.jpg

And How The Same Motor (Different Box) Looks in The New Shell :) No emmissions crap and fully painted up

30122009300.jpg

So yes thats been keeping me busy! Maybe a few more weeks?

Nice looking project! You'd like my mates car. Same Series RX7 as your car with some custom bodywork and a Dyson built 13B making aroung 600hp on its high boost tune. Here is some video his car at a go-woah event at a local car show. His car is at 40 seconds and again later in the video.

i would usually condemn a bodykit on an oldschool mazda but i really like his front bar :geek: suits it nicely!

Was going to go all out with the engine on mine, but couldnt bring myself to do it, because it will only get me in trouble, and knowing me ill probly sell it not long after its done haha, so thought i'd just leave it as a cruiser with a nice reliable setup, just got a freshend up 12a in her

The really perverse thing about Mike's front bar on his RX7 is that it is actually a modified aftermarket commodore fiberglass front bar. Your right that it really does suit it though. Its a one of a kind.

I really like the custom flame work that has been done on the front of that car too. The harlequin flames appear and disappear when you look at the car from diferent angles.

There's nothing wrong with a well built 12A either. Great little motors they are.

Ive got a couple of projects going...

A full wiring job on a big $$ stadium off roader...(V88 Vi-PEC, MoTeC dash, 1UZ-FE V8 etc)

Making the worlds 3rd fastest GTR lighter to have a crack at the record (lots of carbon and a few other goodies)

Finishing off a VL drag car (V88 Vi-PEC, 2 x M&W Drag 6 CDI's and coils, 12 injectors etc)

ill take some shots and upload them soon.

EDIT: and fixing my PPG dogbox i broke today racing.

Post up some pics of the Stadium truck Paul. Amazing vehicles those are with their massive suspension travel. Great little motors too those 1UZFE's. I had fun messing around with a twin turbo'd one a few years ago. They LOVE a little forced induction.

worlds 3rd fastest gtr outright? pump fuel or unlimted? street tyres lol? more info needed :D

stadium car sounds sick aswell,

30-26 in the vl?

outright...7.78sec...lots of work to get it to 7.56...but i think we may give it a shake.

Photo's of the off roader later in the week (busy with the GTR for the next few nights) the budget is unlimited on this one and given my forced induction background id say ill be twisting an arm for some turbo(s).

Single cammer in the VL...big garrett turbo, 4 link rear end, Liberty clutchless 5 speed etc

My dogbox is also coming out tomm.

all this in 4 weeks... :)

Not a project, but a success story for me..

Changed the cambelt/waterpump etc etc.

Took me a good 6 hours, and seeing iv never changed a cambelt before, the fact i did it right was success!

And it fixed a worrying noise my RB25 has had on cold startups. Nice :banana:

moved my grey 32 under it's own steam for the first time in well over a year. was very pleased to see it come up nice and quick with 9 bar of oil pressure after sitting for so long! the sound of it did give me a bit of a chubby. you are so right about the motivation thing. I could have finished it over a year ago, but other cars and the fact that it stalled for a bit just meant I couldn't be arsed doing anything. but I'm getting very keen again. :(

oh, and congrats on getting the ODE buttoned up. :( it looks great mate. can't wait to see what you do about the timing belt cover gap. I know you will do something good. :P

make sure your test rig can be bolted down as the torque you will have will easily see it dancing all over the room, or maybe just flipping itself over with the first good stab of the throttle!

Good to hear you finally getting your GTR running again. There is nothing like hearing an engine thats been dormant for a long time coming to life!

make sure your test rig can be bolted down as the torque you will have will easily see it dancing all over the room, or maybe just flipping itself over with the first good stab of the throttle!

Your 100% right there. I intend to bolt it to the concrete floor with those bolts that you have to hammer-drill into the concrete for (ramset? or whatever they are called). The test rig is all finished now with a VL auto bellhousing, gtr starter and radiator all mounted. I just need to wire a MAP based aftermarket ecu and install a fuel system on the rig which will be happening inside the next 2 weeks. I hope to have a video of the engine running shortly.

sounds good mate. I can't remember if you told me before but why have you decided to build a test rig for starting/running the engine on a stand? Just curious as of course without a dyno you wont be able to measure output and without some kind of engine brake or dyno you can't simulate load on the engine, so guessing it will just be basic starting, diagnosis, maybe some light running etc? or is it more a step for the future to be able to test start future engines etc?

sounds good mate. I can't remember if you told me before but why have you decided to build a test rig for starting/running the engine on a stand? Just curious as of course without a dyno you wont be able to measure output and without some kind of engine brake or dyno you can't simulate load on the engine, so guessing it will just be basic starting, diagnosis, maybe some light running etc? or is it more a step for the future to be able to test start future engines etc?

Get out of town - You finally installed the new engine?

sounds good mate. I can't remember if you told me before but why have you decided to build a test rig for starting/running the engine on a stand? Just curious as of course without a dyno you wont be able to measure output and without some kind of engine brake or dyno you can't simulate load on the engine, so guessing it will just be basic starting, diagnosis, maybe some light running etc? or is it more a step for the future to be able to test start future engines etc?

The test rig uses the standard gtr engine mounts and is made from 25x65 box section steel. It should be strong enough once bolted to the floor.

Your right in that the idea isnt to measure power, or even tune the engine. I just want to run it to hot a few times and check there isnt any cross contamination between the oil and water. If there is, its easier to investigate and fix if its on a stand than it would be if it were in a car. It should be fine though considering the tolerances the whole engine machined too but I prefer to be cautious.

Create an account or sign in to comment

You need to be a member in order to leave a comment

Create an account

Sign up for a new account in our community. It's easy!

Register a new account

Sign in

Already have an account? Sign in here.

Sign In Now


  • Similar Content

  • Latest Posts

    • As discussed in the previous post, the bushes in the 110 needed replacing. I took this opportunity to replace the castor bushes, the front lower control arm, lower the car and get the alignment dialled in with new tyres. I took it down to Alignment Motorsports on the GC to get this work done and also get more out of the Shockworks as I felt like I wasn't getting the full use out of them.  To cut a very long story short, it ended up being the case the passenger side castor arm wouldn't accept the brand new bush as the sleeve had worn badly enough to the point you could push the new bush in by hand and completely through. Trying a pair of TRD bushes didn't fix the issue either (I had originally gone with Hardrace bushes). We needed to urgently source another castor arm, and thankfully this was sourced and the guys at the shop worked on my car until 7pm on a Saturday to get everything done. The car rides a lot nicer now with the suspension dialled in properly. Lowered the car a little as well to suit the lower profile front tyres, and just bring the car down generally. Eternally thankful for the guys down at the shop to get the car sorted, we both pulled big favours from our contacts to get it done on the Saturday.  Also plugged in the new Stedi foglights into the S15, and even from a quick test in the garage I'm keen to see how they look out on the road. I had some concerns about the length of the LED body and whether it'd fit in the foglight housing but it's fine.  I've got a small window coming up next month where I'll likely get a little paint work done on the 110 to remove the rear wing, add a boot wing and roof wing, get the side skirt fixed up and colour match the little panel on the tail lights so that I can install some badges that I've kept in storage. I'm also tempted to put in a new pair of headlights on the 110.  Until then, here's some more pictures from Easter this year. 
    • I would put a fuel pressure gauge between the filter and the fuel rail, see if it's maintaining good fuel pressure at idle going up to the point when it stalls. Do you see any strange behavior in commanded fuel leading up to the point when it stalls? You might have to start going through the service manual and doing a long list of sensor tests if it's not the fuel system for whatever reason.
    • Hi,  Just joined the forum so I could share my "fix" of this problem. Might be of use to someone. Had the same hunting at idle issue on my V36 with VQ35HR engine after swapping the engine because the original one got overheated.  While changing the engine I made the mistake of cleaning the throttle bodies and tried all the tricks i could find to do a throttle relearn with no luck. Gave in and took it to a shop and they couldn't sort it. Then took it to my local Nissan dealership and they couldn't get it to idle properly. They said I'd need to replace the throttle bodies and the ecu probably costing more than the car is worth. So I had the idea of replacing the carbon I cleaned out with a thin layer of super glue and it's back to normal idle now. Bit rough but saved the car from the wreckers 🤣
    • After my last update, I went ahead with cleaning and restoring the entire fuel system. This included removing the tank and cleaning it with the Beyond Balistics solution, power washing it multiple times, drying it thoroughly, rinsing with IPA, drying again with heat gun and compressed air. Also, cleaning out the lines, fuel rail, and replacing the fuel pump with an OEM-style one. During the cleaning process, I replaced several hoses - including the breather hose on the fuel tank, which turned out to be the cause of the earlier fuel leak. This is what the old fuel filter looked like: Fuel tank before cleaning: Dirty Fuel Tank.mp4   Fuel tank after cleaning (some staining remains): Clean Fuel Tank.mp4 Both the OEM 270cc and new DeatschWerks 550cc injectors were cleaned professionally by a shop. Before reassembling everything, I tested the fuel flow by running the pump output into a container at the fuel filter location - flow looked good. I then fitted the new fuel filter and reassembled the rest of the system. Fuel Flow Test.mp4 Test 1 - 550cc injectors Ran the new fuel pump with its supplied diagonal strainer (different from OEM’s flat strainer) and my 550cc injectors using the same resized-injector map I had successfully used before. At first, it idled roughly and stalled when I applied throttle. Checked the spark plugs and found that they were fouled with carbon (likely from the earlier overly rich running when the injectors were clogged). After cleaning the plugs, the car started fine. However, it would only idle for 30–60 seconds before stalling, and while driving it would feel like a “fuel cut” after a few seconds - though it wouldn’t fully stall. Test 2 – Strainer swap Suspecting the diagonal strainer might not be reaching the tank bottom, I swapped it for the original flat strainer and filled the tank with ~45L of fuel. The issue persisted exactly the same. Test 3 – OEM injectors To eliminate tuning variables, I reinstalled the OEM 270cc injectors and reverted to the original map. Cleaned the spark plugs again just in-case. The stalling and “fuel cut” still remained.   At this stage, I suspect an intermittent power or connection fault at the fuel pump hanger, caused during the cleaning process. This has led me to look into getting Frenchy’s fuel hanger and replacing the unit entirely. TL;DR: Cleaned and restored the fuel system (tank, lines, rail, pump). Tested 550cc injectors with the same resized-injector map as before, but the car stalls at idle and experiences what feels like “fuel cut” after a few seconds of driving. Swapped back to OEM injectors with original map to rule out tuning, but the issue persists. Now suspecting an intermittent power or connection fault at the fuel pump hanger, possibly cause by the cleaning process.  
×
×
  • Create New...