

Announcements
-
Similar Content
-
-
Latest Posts
-
 Yea I mean I know it exists, but finding (specifically) female BSPT to male NPT (i.e, to plug a Nissan OEM sensor into a 'standard' NPT port) was truly difficult. I don't think I'll recreate the setup I had in the past unless it's (possibly?) advisable with a stronger T piece made of steel, but who knows if the aluminium threads in the block become the next weak point etc. Given it may need to be redrilled out and something tapped into it, it'll need to be Female BSPT to the something that ends uo coming out of the side of the block.
 -
 Sounds like a perfect time to harness up a couple of the dogs, show the horses what real power is about!
 -
 And I'm guessing my GTR might be feeling a bit unloved. Had to push it out to get the R33 out, but couldn't push it back in (its a bit uphill, haven't got around to installing that winch yet, and Kel complains that its "too hard" to help push cars uphill after her double back surgery....kids these days) Hopefully I can get that winch mounted and get her back inside before a pine tree falls on her in the storms coming this week.
 -
 Yea all the cars run 295 cause f**k having different sizes
 -
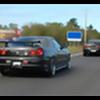
So, this happened today r33.mp4 No, I don't have much of a future on tic tac Yes, it needs a tune Yes, I cut the video just before I stalled it ....gotta be nice to fresh engine.
-


Recommended Posts
Create an account or sign in to comment
You need to be a member in order to leave a comment
Create an account
Sign up for a new account in our community. It's easy!
Register a new accountSign in
Already have an account? Sign in here.
Sign In Now