Jump to content
SAU Community

Recommended Posts

Hi Everyone!

I recently purchased an R34 GT-R :laugh: having owned a R33 GTS-t before i always loved the skyline!

Im planning on modifying just about everything and looking to have a nice tuff streetable and semi trackable GT-R by the end of it.

The car is a 1999 R34 GT-R V-Spec in factory white purchased from a private sale (carsales.com.au) car is very clean apart from a couple of very very minor things which nobody else would care about but me (im very picky i guess) they are easy DIY fixes,

but im very happy with the car money well spent in my eyes.

The car has done about 100000kms, the stock cluster was replaced with a nismo cluster at 80000kms

Its mostly stock with a few tastefull mods:

  • Apexi Power FC D-Jetro
  • Apexi N1 Evolution catback exhaust
  • Apexi Super induction kit
  • HKS EVC boost controller
  • HKS turbo timer Type 1
  • Skylab TSC
  • Nismo 330f steering wheel with works bell boss and quick release
  • Nismo 320km/h cluster
  • Nismo multifunction display
  • Nismo super coppermix twin plate clutch and flywheel (im very impressed with this clutch, its very light and easy to use, you wouldnt even know it was a twin plate)
  • Nismo side skirts and rear pods
  • Nismo LED Tailights
  • Nismo braided brake lines
  • Project Mu slotted rotors and pads
  • BJ Union HID Lights
  • Ganador Mirrors
  • Tein Super Street Coilovers

and a few other bits and pieces not really worth mentioning.

focusing on one area at a time first things first...

Ive decided to build the engine straight up because im a little bored of the factory power, im looking for something responsive and streetable, but something that can be violent at the same time, and reliable ofcourse.

Most of these ideas came from friends who have done this before, this is my first build.

Ive chosen the RB30, then got talked into stroking it to a 3.2l for the extra torque and a T04Z for some response hopefully.

Some of the parts are as follows...

  • Prepped RB30 block
  • Prepped RB26 head
  • Nitto 3.2l Stroker Kit
  • Nitto oil pump
  • N1 water pump
  • Tomei Procams 280 degree 11.5 IN and EX
  • Tomei cam pulleys
  • Darton sleeves
  • Supertech valves, springs, etc
  • 6boost exhaust manifold
  • Hypertune intake manifold <---- Still to be orderd
  • Rips Crank Girdle
  • Garrett T04Z .82 rear
  • Turbosmart 50mm Progate
  • Extended Sump

Engine is on the build, so it shouldnt be too far away unless we run into problems (knowing my luck) :dry:

it will be a little while before the engine goes in becuase i still need fuel system, intercooler, and so on.

While the engine is out i want to repaint the engine bay and have all the wiring hidden so everything is nice and neat.

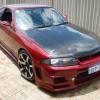
Heres some photos from carsales.com of the car just before it arrived

Ive had it for about 3 months now :D and im very pleased

post-67868-0-67300200-1293084079_thumb.jpg

post-67868-0-95435000-1293084092_thumb.jpg

post-67868-0-53938900-1293084101_thumb.jpg

post-67868-0-62974400-1293084108_thumb.jpg

post-67868-0-72089000-1293084118_thumb.jpg

post-67868-0-46153900-1293084126_thumb.jpg

Link to comment
https://www.sau.com.au/forums/topic/348395-r34-gt-r-project/
Share on other sites

  • Replies 44
  • Created
  • Last Reply

Top Posters In This Topic

Subscribed!

Pretty dam huge cams for a stroker. Personally i'd be aiming for something more in the step 1+2 range, to keep the usable torque band as wide as possible. Ive not read anything about the Nitto 3.2 kits before either. It would be interesting to know what the bore and stroke are that they are using.

+1, going to be one mental build

wow thanks for the quick reply guys :thumbsup:

i was told originally nitto was making a 3.4l aswell but it was scrapped and they are now only offering the 3.2l so i went with that

as for the bore and stroke of the kit im not sure to be honest but ill find out for you

the cams where recomended buy my friends, if they arnt suitable then they can always be changed i dont mind, like i said its my first build, but with people like you guys throwing me hints im sure ill be pointed in the right direction, its still a while before its going to be ready, plus i havent got the rest of the things i need like fuel system and so on...

ive learnt that all this building and modding is VERY EXPENSIVE pinch.gif lol its cost me an arm and a leg to get to where i am but i dont mind its been a bit of a dream of mine i want to get it out of my system!

thanks again for the quick reply and ill try and keep this as up to date as possible!

bore is 86.5mm and the stroke is 91mm pretty sure

I just found the kit on the high octane site and it says 90mm stroke x 87mm bore to make 3.212cc. Rod ratio is 1.69:1 with a 6" rod. At 8000 RPM that makes your piston speeds peak at 38.8m/s and an accelerate rate from TDC/BDC of 40.2m/s^2.

I suspect the reason Nitto abandoned the 3.4 project would be that piston speeds get pretty crazy with the 95mm stroke (43m/s^2 acceleration rate). But more importantly there is less material overlap between the mains and big ends which reduces crankshaft flexing and whipping.

The only way to make a 3.4 crank that would be as strong as a 3.2 or even a stock RB30 crank is to increase the diameter of the mains bearings another 5mm or so and then aligh bore the block block to support larger main bearings from something like a BMW or Ford Clevland engine. Oh boy are you taking big dollers then though. If I had to guess, RIPS probably did something like this with their 3.3lt engine.

  • 2 weeks later...

Create an account or sign in to comment

You need to be a member in order to leave a comment

Create an account

Sign up for a new account in our community. It's easy!

Register a new account

Sign in

Already have an account? Sign in here.

Sign In Now


  • Similar Content

  • Latest Posts

    • Hi, is the HKS  Tower Bar still available ? negotiable ? 🤔
    • From there, it is really just test and assemble. Plug the adapter cables from the unit into the back of the screen, then the other side to the car harness. Don't forget all the other plugs too! Run the cables behind the unit and screw it back into place (4 screws) and you should now have 3 cables to run from the top screen to the android unit. I ran them along the DS of the other AV units in the gap between their backets and the console, and used some corrugated tubing on the sharp edges of the bracket so the wires were safe. Plug the centre console and lower screen in temporarily and turn the car to ACC, the AV should fire up as normal. Hold the back button for 3 sec and Android should appear on the top screen. You need to set the input to Aux for audio (more on that later). I put the unit under the AC duct in the centre console, with the wifi antenna on top of the AC duct near the shifter, the bluetooth antenna on the AC duct under the centre console The GPS unit on top of the DS to AC duct; they all seem to work OK there are are out of the way. Neat cable routing is a pain. For the drive recorder I mounted it near the rear view mirror and run the cable in the headlining, across the a pillar and then down the inside of the a pillar seal to the DS lower dash. From there it goes across and to one USB input for the unit. The second USB input is attached to the ECUtec OBD dongle and the 3rd goes to the USB bulkhead connected I added in the centre console. This is how the centre console looks "tidied" up Note I didn't install the provided speaker, didn't use the 2.5mm IPod in line or the piggyback loom for the Ipod or change any DIP switches; they seem to only be required if you need to use the Ipod input rather than the AUX input. That's it, install done, I'll follow up with a separate post on how the unit works, but in summary it retains all factory functions and inputs (so I still use my phone to the car for calls), reverse still works like factory etc.
    • Place the new daughterboard in the case and mount it using the 3 small black rivets provided, and reconnect the 3 factory ribbon cables to the new board Then, use the 3 piggyback cables from the daughterboard into the factory board on top (there are stand offs in the case to keep them apart. and remember to reconnect the antenna and rear cover fan wires. 1 screw to hold the motherboard in place. Before closing the case, make a hole in the sticker covering a hole in the case and run the cable for the android unit into the plug there. The video forgot this step, so did I, so will you probably. Then redo the 4 screws on back, 2 each top and bottom, 3 each side and put the 2 brackets back on.....all ready to go and not that tricky really.      
    • Onto the android unit. You need to remove the top screen because there is a daughterboard to put inside the case. Each side vent pops out from clips; start at the bottom and carefully remove upwards (use a trim remover tool to avoid breaking anything). Then the lower screen and controls come out, 4 screws, a couple of clips (including 3 flimsy ones at the top) and 3 plugs on the rear. Then the upper screen, 4 screws and a bunch of plugs and she is out. From there, remove the mounting brackets (2 screws each), 4 screws on the rear, 2 screws top and bottom and 3 screws holding in the small plates on each side. When you remove the back cover (tight fit), watch out for the power cable for the fan, I removed it so I could put the back aside. The mainboard is held in by 1 screw in the middle, 1 aerial at the top and 3 ribbon cables. If you've ever done any laptop stuff the ribbon cables are OK to work with, just pop up the retainer and they slide out. If you are not familiar just grab a 12 year old from an iphone factory, they will know how it works The case should now look like this:
    • Switching the console was tricky. First there were 6 screws to remove, and also the little adapter loom and its screws had to come out. Also don't forget to remove the 2 screws holding the central locking receiver. Then there are 4 clips on either side....these were very tight in this case and needed careful persuading with a long flat screw driver....some force required but not enough to break them...this was probably the fiddliest part of the whole job. In my case I needed both the wiring loom and the central locking receiver module to swap across to the new one. That was it for the console, so "assembly is the reverse of disassembly"
×
×
  • Create New...