Jump to content
SAU Community

Recommended Posts

Hi Guys and Girls,

I made a promise to one of the SAU VIC members that if we could use his car as a demonstration vehicle at a recent detailing Clinic for SAU members, I would detail up the car for him.

Well, lucky for me (and him) he took the bait and we finally got round to doing the car a few months ago.

So here we go...

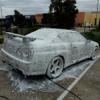
First we foamed the car with CarPro Iron X Soap Gel to break down any contaminants on the paint surface and dissolve any iron fallout embedded in the paint.

DSC_0289.jpg

We didn't just use Iron X as we wanted to give the car a good clean at the same time. Here it is left to dwell and do its thing on the vehicle.

DSC_0290.jpg

The car was then clayed to remove any residue contamination and make the paint feel silky smooth.

DSC_0294.jpg

Next was a proper wash using a variety or brushes to get out any old wax and polish left from previous Detailers.

DSC_0296.jpg

DSC_0297.jpg

The car wash then foamed again, this time with a mix of All Purpose Cleaner and Car Wash to strip off any remaining waxes and protection on the paint.

DSC_0298.jpg

DSC_0300.jpg

We dried up the car and masked it up to protect rubbers, edges of panels and other delicate parts of the car.

DSC_0303.jpg

Now we can see the Swirls that we hiding under the contaminants and old protection layer.

DSC_0308.jpg

DSC_0311.jpg

The car was then polished using a rotary polisher, Lake Country Kompressor Pads and Menzerna Polishes. Here is the front quarter straight after the paint correction and jeweling step.

DSC_0316.jpg

We then applied Wolfang Deep Gloss Sealant 3.0 to give both protection and warm glow to the finish.

DSC_0315.jpg

This looked good but we wanted more depth out of this custom respray so we then topped the sealant with Pinnacle Signature Series 2 Wax.

DSC_0317.jpg

Link to comment
https://www.sau.com.au/forums/topic/369938-detailed-r33-skyline/
Share on other sites

Great Job Antonio.How do you find the kompressor pads? I find the can cut alot quicker than their standard "equivalent" I'm addicted to the constant pressures unless do a heavy cut.

How long did you leave between coats on the wax?

Regards,

Mitch

Wow, that is amazing. Love the cars styling too. That red and the bonnet look mint. I miss my CF bonnet :( Come to Sydney and do my car or if anyone here can recommend any details in Sydney who will do a top notch job, please PM me. How much does this type of job usually cost?

Edited by SargeRX8

Wow, that is amazing. Love the cars styling too. That red and the bonnet look mint. I miss my CF bonnet :( Come to Sydney and do my car or if anyone here can recommend any details in Sydney who will do a top notch job, please PM me. How much does this type of job usually cost?

check out detailparadise.com.au there are some from syd on there.

Edited by immacreflections

the pads can be quite abrasive on plastics and no doubt rubbers too..

I polished my ute with them for practice and didnt mask it up..I ended up with fine scratches in some of my plastic chrome work ..also it has an unpainted black plastic bumper that has some swirls marks in it now that I cant seem to clean out....good thing I practiced on my work ute hey :)

On a side not these polishers are GREAT at cleaning up yellowing headlights..Dont ever sand your headlights with sandpaper, get someone with a polisher to do it and they come out looking brand new without scratches that sandpaper leaves..I think i just used a power gloss and a power finish, ..wiped them down with windex and coated them with proper UV sealant..wish I had taken before photos but heres a quik pik.

post-65674-0-76268400-1310120624_thumb.jpg

I imagine Antonia

(or any more qualified detailer) may have different advice and the pads I used were probably a bit to abrasive a really soft one would be better ,but it worked really well for my old lights which were yellow as any..

the pads can be quite abrasive on plastics and no doubt rubbers too..

I polished my ute with them for practice and didnt mask it up..I ended up with fine scratches in some of my plastic chrome work ..also it has an unpainted black plastic bumper that has some swirls marks in it now that I cant seem to clean out....good thing I practiced on my work ute hey :)

Ah ok I missed the part where he said he was using a rotary to polish, I do mine by hand and am extra careful around those parts.

Thanks :cheers:

Edited by Dani Boi

Create an account or sign in to comment

You need to be a member in order to leave a comment

Create an account

Sign up for a new account in our community. It's easy!

Register a new account

Sign in

Already have an account? Sign in here.

Sign In Now


  • Similar Content

  • Latest Posts

    • For once a good news  It needed to be adjusted by that one nut and it is ok  At least something was easy But thank you very much for help. But a small issue is now(gearbox) that when the car is stationary you can hear "clinking" from gearbox so some of the bearing is 100% not that happy... It goes away once you push clutch so it is 100% gearbox. Just if you know...what that bearing could be? It sounding like "spun bearing" but it is louder.
    • Yeah, that's fine**. But the numbers you came up with are just wrong. Try it for yourself. Put in any voltage from the possible range and see what result you get. You get nonsense. ** When I say "fine", I mean, it's still shit. The very simple linear formula (slope & intercept) is shit for a sensor with a non-linear response. This is the curve, from your data above. Look at the CURVE! It's only really linear between about 30 and 90 °C. And if you used only that range to define a curve, it would be great. But you would go more and more wrong as you went to higher temps. And that is why the slope & intercept found when you use 50 and 150 as the end points is so bad halfway between those points. The real curve is a long way below the linear curve which just zips straight between the end points, like this one. You could probably use the same slope and a lower intercept, to move that straight line down, and spread the error out. But you would 5-10°C off in a lot of places. You'd need to say what temperature range you really wanted to be most right - say, 100 to 130, and plop the line closest to teh real curve in that region, which would make it quite wrong down at the lower temperatures. Let me just say that HPTuners are not being realistic in only allowing for a simple linear curve. 
    • I feel I should re-iterate. The above picture is the only option available in the software and the blurb from HP Tuners I quoted earlier is the only way to add data to it and that's the description they offer as to how to figure it out. The only fields available is the blank box after (Input/ ) and the box right before = Output. Those are the only numbers that can be entered.
    • No, your formula is arse backwards. Mine is totally different to yours, and is the one I said was bang on at 50 and 150. I'll put your data into Excel (actually it already is, chart it and fit a linear fit to it, aiming to make it evenly wrong across the whole span. But not now. Other things to do first.
    • God damnit. The only option I actually have in the software is the one that is screenshotted. I am glad that I at least got it right... for those two points. Would it actually change anything if I chose/used 80C and 120C as the two points instead? My brain wants to imagine the formula put into HPtuners would be the same equation, otherwise none of this makes sense to me, unless: 1) The formula you put into VCM Scanner/HPTuners is always linear 2) The two points/input pairs are only arbitrary to choose (as the documentation implies) IF the actual scaling of the sensor is linear. then 3) If the scaling is not linear, the two points you choose matter a great deal, because the formula will draw a line between those two points only.
×
×
  • Create New...