Jump to content
SAU Community

Recommended Posts

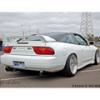
So I thought I'd finally post up my build thread on here

Name:

Roman

Model:

180SX Type X

Colour:

White

Engine Type:

SR20DET Blacktop(Non-VCT)

Engine Mods:

Pod

ARC Sidemount Super-Intercooler

Power:

123.8kW(When I first got it, maybe 130kWs now)

Exhaust:

3" Nismo Catback

3" Dump and front pipe

Gearbox:

5-Speed Manual

Extreme HD Organic Clutch

Extreme HD Preasure Plate

Diff:

4.1:1 Weldy

4.3:1 Weldy(spare)

Brakes:

R33 GTS-T 4 pots front, 2 pots rear, drum handbrake

Motul Brake fluid

TRW Lucas brake pads front

Project Mu handbrake shoes

Suspension:

5 Stud conversion

S14 front LCAs

S14 tie rod ends and rack ends

Whiteline swaybars front and rear

Stock Swaybar front

adjustable camber, toe and caster

BC RM Coilovers 8/6kg(with 5" 10kg Swift front springs)

Solid subframe risers

Wheels/Tyres:

BBS LM 17x9 +5 set

BBS RS 17x8 +/-0 front pair

BBS RS 17x9 +20 rear pair

Work Equips 17x9 +18 set

Autostrada Monza 17x9 +21 set

Regamaster Evo 17x9 +18 set

BBS RS 17x9 +20 set (on the way from Japan)

Ultra rare set of Panasports (on the way from Japan)

BBS RS 16x8.5 +14 rear pair

Interior:

Cobra Imola 2 Bucket seat with Bride Low rail

Sheep skin seat covers(luxury spec tongue.gif)

Fire extinguisher

GReady Informeter

Blitz i-D Power Meter

Blitz i-D Boost Gauge

Stripped interior painted white

Jap half cage (needs to be replaced for next years change in VicDrift Regs)

Other Mods:

Zipties

Stereo:

Pioneer

Build Period:

Forever

Cost:

NFI

Future mods:

Paint BBS LM centers Diamond Black + polished lip

lengthened LCAs ormodified front cross member

bent toe arms

new camber arms

Custom exhaust tucked close to the body

Tub the front guards

ABS delete with new hard lines

Brake caliper rebuild

Fuse box relocation under the dash/in glovebox

and here is the visual timeline

bought it like this

IMG_0114.jpg

then bought some wheels

img_3118.jpg

then bought more wheels

25.jpg

bought coilovers

49.jpg

slammed it

59.jpg

62.jpg

after 2 month of dailying, maybe a tad too low...

63.jpg

wiring loom relocated

134.jpg

136.jpg

then it looked like this

139.jpg

and bought more wheels

190.jpg

did some drifting

March-practice-day-1131.jpg

washed the car

DPP_0233.JPG

fitted rear pods

199.jpg

driveway is the height limmiter

201.jpg

broke a dump pipe

210.jpg

got some photos done at a SAU meet

6724720643_7ea3587212_b.jpg

got bored and decided to see how low the coilovers can go...

405916_10150547361181378_656401377_9495010_390239685_n.jpg

tucking

216.jpg

car sees a lot of this

407282_372925922720139_224948380851228_1449101_409667113_n.jpg

bought more wheels..

460530_10150740839616378_656401377_10099369_1037180523_o.jpg

baptised them with some drifting

541162_402985829734435_112102425489445_1267311_1180265600_n.jpg

stripped all the sound deadening

468246_10150860907336378_1384775508_o.jpg

masked everything off

472272_10150863099796378_883290480_o.jpg

the fridge

479183_10150866014726378_1237127578_o.jpg

did the boot a week later

411062_10150879929611378_849516218_o.jpg

bought more wheels

600x450-2012060200013.jpg

and that pretty much brings this up to the current time.

I've broked 4 studs off the back of my turbo from the exhaust having no flex what so ever, so there is a whole lot of work that will be getting done over the next few months, as I do not plan to drive the car until November.

Sorry about the long photobomb post

Roman

Link to comment
https://www.sau.com.au/forums/topic/403850-romans-180-less-than-a-daily-now/
Share on other sites

small update, got this brake line splitter today, so I can remove the ABS and still run my ABS master cylinder

243615_10150932075361378_654668762_o.jpg

need to measure up the lengths for the new brake lines and order some during the week

  • 2 weeks later...

Took the turbo off on the weekend to fix the broken studs

This is going to be a PITA

486188_10150960029151378_173380672_n.jpg

Also clean the motor a little

283694_10150961933476378_581612156_n.jpg

The block is not actually painted black, thats just all the carbon from all the exhaust leaks I had due to broken studs

  • 5 weeks later...

So I'll update my progress

Removed the ABS shit

416016_10150988731646378_1634573230_o.jpg

also took off the callipers and started re-building them

331629_10150988846986378_993655731_o.jpg

Ordered some custom brake hard lines to be made up to suit my non-ABS setup, and they took 2 weeks of f**king around to make them

I kinda got borred of waiting at that time and shit got real all of a sudden

Decided to go a bit crazy with a mild wire tuck and fuse/relay box relocation as well as a new in-bay intercooler setup to go with the S15 turbo.

621205_10151005117561378_218582337_o.jpg

This is just the begining

415471_10151005312976378_1038618126_o.jpg

Looking pretty messy(should probably give the engine bay a good scrub/clean to get it back to it's original shiny white paint

219927_10151007644771378_1963479645_o.jpg

About to turn this into a spider web

259282_10151016274746378_642165416_o.jpg

Removed the ABS wiring from the engine bay and there is about 6 more meters of ABS wiring throughout the interior loom

181155_10151016335181378_427513767_n.jpg

What did i get myself into... trying to make sense of this mess

461825_10151016458541378_1583293701_o.jpg

The new fuse/relay box mock up..(tried to separate all the headlight stuff into a separate loom, so they can be independant off each other

621933_10151020198361378_1926705917_o.jpg

Plenty of soldering and chopping to do still, but the fusebox layout seems to be all planned out now.

Just need to remove the engine loom now and see how the 2 will mate together, so I know which parts will need to be chopped or extended to meet the new fuse/relay box location

Also picked up a set of S15 injectors, so I've now collected most of the neccessary parts to bolt everything together once the wiring and brake lines are finished.

and i'll leave you with this

Low life problems

471337_10150959777851378_1842458015_o.jpg

  • 1 month later...

Have not spend much money on this car as of late since I've been saving heaps to go to Japan at the end of October, but I'll get to that later

So what has been happening is i made up the new brake hardlines to convert to non-ABS brake system setup.

Then i decided i did not like the stock location of the charcoal canister, as it will get in the way of my new intercooler setup. I did not want to get rid of it completely

This is the photo of the final location with a custom bracket i made up for it and painted flat white primer.

466183_10151064229426378_1120909241_o.jpg

I also polished up some bolts... because racecar...

This is a photo about midway through, as you can see by the middle one some had some serious rust on them

456238_10151064267751378_368224086_o.jpg

Also chucked the S15 T28 BB turbo on, to see how everything fits up, but still need to get braided water lines for it to fit it.

301197_10151065452476378_20677696_n.jpg

The weather outside turned out to be awesome on this day, so i took the wiring outside to enjoy the sunshine

326415_10151072566111378_615366468_o.jpg

Just mocking up the new headlights wiring loom

323396_10151072625521378_1427552179_o.jpg

As you can see the interior is a nightmare atm as i had to unwrap the whole loom to completely de-pin any traces of ABS wiring.

615174_10151073636231378_1594747437_o.jpg

Onto more recent events, i baked my brake calipers after painting to cure the high temp paint, so this weekend i should hopefully get a chance to drop in some new seals in them

Finished rebuilding my brake calipers

nice and Fresh with new seals, cleaned housings and pistons, fresh paint and polished logo

337046_10151081051456378_1499795859_o.jpg

Now as I mentioned earlier, I am heading of to Japan at the end of October for 2 weeks of madness. I'm going there with a few mates and we are staying at the Ebisu Circuit for over a week.

Which brings me to my latest purchase...

This is my new car for the Japan trip that I will be thrashing all week long

10491_10151080327906378_1177047438_n.jpg

It has an extensive list of mods and pushes out around 250kWs at the wheels

This is almost double the power level of my car at home, so it will be a whole new experience

  • 4 weeks later...
  • 3 weeks later...

SO, I just got back from Japan Thursday afternoon after spending just over 2 weeks over there and OMG was it amazing fun.

I'll try to do a bit of a write up about my trip.

Day 1 Wed 31st

We left Melbourne on a flight to Gold Coast at 6am.

We were flying with Jetstar, so I was prepparing myself for the worst, but lucky we randomly got exit isly seats, so I did not have any problems with leg room.

Arriving in Gold Coast, we had 3hrs until our flight to Japan, so after collecting our baggage and checking in for the Japan flight we had some breakfast of Red Rooster and kicked back trying to pass the time.

For the Flight to Japan I have pre-booked exit isle seats, so i could stretch out and try and have a sleep on the flight.

But because the flight was durring the day time I was stuggling to get a decent sleep, maybe a couple of 1-2 hr stints of sleep.

We got to Japan at 7pm and the first thing we did after collecting our luggage and going through customs is get some BOSS Coffee

We then got out hire car and the hire car man assured us that the GPS was set to English.

At the airport we picked up one of the hotel brochures, as we did not have any accomodation arranged in Tokyo.

As we left the airport in the direction of Tokyo, we decided that we should try enter the phone number of the hotel into the GPS, so we could go there.

This was the point we lealised that the GPS buttons and the menus are all in Japanese. After poking a prodding the GPS for a while, we eventually found the correct page for entering the phone number and we were on our way. Lucky the GPS at least spoke the directions in English.

We wanted to stay off the tollways as we have heard that they could be rather expensive, so we took the "scenic" route.

On our way we came accross a few car dealer yards with some interesting cars in stock, Chasers, Mark 2s, S15s, S14s, 180sxs, AE86s.

We also stopped by our first Mos Burger where we used our finger pointing skills to order the food from the menu.

The burgers are good, but damn they are small.

We also stopped by some random shops, to check them out and see if they have free WiFi.

One shop had a large selection of Hyper Rev mags and I bought a Sivia/180sx issue.

We continued on to the hotel, arriving at which we have found that it was already closed for the night... this left us somewhere in Tokyo with no accomodation...

So we proceeded to drive around Tokyo trying to spot hotels or find WiFi where we could search for the hotels on the internet.

We did find an area full of hotels, but none of the reception clerks spoke english and did not want a bar of it...

At this point it was around 12am and we had to make some kind of a decision...

So after having a discussion we decided that we shall start driving in the direction of our first destination for our trip, R31 House.

As we set off driving we kept a look out for any other hotels on our way, albeit not having much luck we tried to stop in a carpark at Maccas to have a sleep in the car, but were woken up by a staff member who from what we could guess was telling us to move.

We continued forth with our journey stopping at Royal Host for a 2 or 3am snack(the chicken pieces I ordered were so damn delicious), then we finally came accross a carpark where we were able to get a decent 2-3hr sleep.

This whole journey we were staying off the toll ways and taking the 'national' roads.(bad idea)

Our breakfast was a stop at 7/11(7 and 'I' holdings) for some bouritos and hot BOSS coffee

We countinued along and realised that our current pace was way too slow to get to R31 House by mid-day, as most of the roads we have been traveling had speed limits <60 and the roads themselves would have made for some great touge. We took the next avaiable entry onto the toll way and were finally making some progress.

We were hovever surprised when everyones kept flying past us when we were doing 100 down the freeway, so we picked up the pace to move with the rest of the traffic.

It apears that everyone in Japan travels at 20ks over the speed limit and some even more.

As we have finally made it to the area that R31 House was in, we stopped by a large supermarket where everything was ridiculously cheap.

A friend bought a slab of BOSS coffe for a little over $20, while I stocked up on some beers.

As we were nearing R31 House, I spotted a nice looking R32 in a convenience store carpark, so we pulled over to check it out, as it was one of the first nice cars we have seen driving about on the street. The owner has just walked out of the shop and got in the car with his friends when we pulled in. He saw us taking a photo of the car as he was leaving the carpark, so he stopped in the middle of the road with traffic lining behind him and did a burnout. (Who said Japs don't do brakies?)

The people lining up behind him did not seem to mind at all.

We continued on and R31 House was just 500m or so down the road. You couldn't miss it, as there was a sea of R31s everywhere.

  • 1 month later...

So about time to chuck some updates

R31 House

599069_406267112780540_21110016_n.jpg

135292_10151535411754008_1131268942_o.jpg

703847_10151535404274008_119944490_o.jpg

703882_10151535398394008_739256045_o.jpg

703566_10151535392684008_1090252933_o.jpg

A few might recognize the orange car that has competed in Aus in Drift Australia some years ago

R31 House was simply amazing, as we parked up there was a lot of about 20 cars just parked next to the building and as you walked onto the property right across from the workshop was another lot, tightly packed with another 50 R31s. We approached a man who was working inside the workshop and asked if we could have a look around as we came all the way from Australia.

Of course this conversation was not as easy but with some hand gestures and a few tries he understood what we meant as he spoke very little english. He started showing us the cars inside the workshop which were all highly tuned making from 500hp to 800hp. He said he particularly enjoyed the sound of one of the cars that was making 600hp, so he proceeded to start the car and revv it hard.

Besides the cars inside the workshop, the parts storage area and the hoist/work area, there was an RC drift car track right inside. We then went outside and were shown the car lot across from the workshop. He described the special stand out cars, some which had RB26 swaps and one that had a rare NA RB26DE from a limited edition Autech 4 door R32. There were rare genuine Nismo edition R31 GTS-Rs, and even a Tommy Kaira Edition R31 GTS-R. The whole 50+ car lot was owned by R31 house and the 20 cars that were parked outside were their customer's cars.

Beyond the building was a fenced of grave yard/wrecking yard with 500+ cars(as the mechanic described). There was another 100car wrecking yard on the other side behind the building and as we were told another 200 car yard not too far away. We were told we could walk around on our own and explore the rest of the property, so we took a walk through one of the grave yards that was unlocked.

The cars there were amazing, old crashed demo widebody R34 with dished wheels, the donor Autech R32 4door that served as the heart transplant for the R31 mentioned earlier, a few AE86s, many GTS-R R31 skylines, a couple crashed highly modified S13s and loads of other car, just sitting there gathering dust and turning back to iron oxide. Most cars had aftermarket wheels we would all love to get, but there they just sat with no use..

After we explored we had a look at another building next to the workshop, which was like an old service station. it had a canopy out the front, but instead of fuel browsers you got another RC drift car track and inside the R31 House RC shop was full of shells and accessories. Behind the shop though, there was another workshop belonging to R31 House that had 4 hoists and mechanics working away on customer's cars.

We came back and asked the man that was so helpful to us earlier where we could find Shibata-san, the owner of R31 House.

We were directed to the 3rd building on the property, where we went up the stairs and knocked on the door. What happened next was an attempt to make some sort of communication. after we were invited inside, we tried to explain that we were from Australia and that one of my friends wanted buy some merchandise and parts from them.

They were still not having much luck and they tried to call someone who spoke english. Coincidentally enough the man he called was actually the man that my friend was talking to over email when planning our trip there. So after a quick conversation over the phone he spoke to Shibata-san and explained what we were after.

Shibata-san's wife spoke a little bit of english, so we were finally getting somewhere. As we got talking more her english practice got better and we were now communicating pretty well without any major stumbles. We were given 2 shirts each as a present from R31 house, some key rings and R31 House bags. We also purchased R31 House sticker packs and a friend bought a whole load of parts for his R31 back home, most of which were sold to us for huge discounts over the retail price. Some parts were sold to him for as low as 70% off discount.

After getting the parts and discussing his plans to come to Aus in the future we asked for 1 more favor... Since we had nowhere to sleep the night before, we still had no where to sleep for the next 2 nights either. So we asked if he could call us a hotel in Tokyo and book us some rooms. He was an absolute legend and booked us a hotel not far from Akihabara where we were planning to go the next day.

We thanked them so much, got a couple more photos and went back to our car to get on our way back home.

While drifting in Japan I seemed to have gotten myself into a Drift Tengoku magazine in my blue 180

705363_10151346439964574_1922796827_o.jpg

I ordered a copy of the magazine from Japan

I also recently bought a spare SR20DET motor for no particular reason.. I think I have a problem with impulse buying things...

I also bought a Ford G6 dual fuel for daily/towing... You can see my spending trend here...

705967_10151167281536378_1416074581_o.jpg

I also bought this ridiculously expensive Vertex steering wheel...

475516_10151186778486378_150499235_o.jpg

As for the 180 back home I have almost finished the wiring, put the brakes on and should start on getting the turbo back on the car.

And I will round off this post with the photo of my car in Japan

458346_444460048951195_1725424842_o.jpg

and the video to go with that photo

  • 1 month later...

I might post some more stories later, but for now some car updates..

Well not really car updates, I just bought some more wheels LOL

Bought this rare set

golf_23m-img600x450-1358920078edl3ex50597.jpg

OZ Futura 17x9 +24 (made for the GTR Skylines)

And then I bought another set of wheels....

OZ Racing Pegasus in 17x9 +24, to match my newly acquired OZ Futuras in the same specs above

404399_4392538288490_862926663_n.jpg

2 of my favorite OZ wheels ever made :D

  • 3 weeks later...

a bit of an update, I actually finished the wiring on the car and put it back together

860086_10151312549696378_1259988111_o.jp

859706_10151313781591378_1582909836_o.jp

got the exhaust modified

859731_10152569977460158_493836068_o.jpg

and she started up first go

859681_10151320062556378_447519981_o.jpg

Just need to re-bleed the brakes as the pedal is a bit soft, change a worn tierod end and get some tires with tread for the back....

Create an account or sign in to comment

You need to be a member in order to leave a comment

Create an account

Sign up for a new account in our community. It's easy!

Register a new account

Sign in

Already have an account? Sign in here.

Sign In Now


  • Similar Content

  • Latest Posts

    • So, I started this repair and got as far as "fixing" the holes with some fibreglass. God all those years working on boats came back quickly. I decided I'd reach out to some rust guys just to see what they would say about it. I came across a guy about 40 mins away and went to see him. He said the windscreen needs to come out, that there might be some more bits around the windscreen and he'd quote them at the time. But his quote was $300 to remove and replace windscreen and $3k for the damage he can see. He said he could respray the roof for $1200 and the bonnet for another $800 (somebody has previously rattle canned it, its horrendous). This is $5300 + any small additional bits. It's a lot, I get that and the name of one of my fave youtube channels 'Not Economically Viable' comes to mind.  I'm not being financially rational, but I've taken him up on the quote. He's opening a new shop in November with more room, so we're waiting for that. I'll leave the currently missing headliner out until then. I'm looking forward to it being fixed and having the paint looking nice again (lots of clear coat issues on the roof too). / flame suit on.
    • Oh and some up-and-comings; New rear drivers wheel bearing. I'll do that this weekend while the diff is out. The car is already up and the d/c axles and missing exhaust will help with space. This is the last bearing for me to do and I've been dragging my feet on it. I also have some new EBC blue stuff pads for the car and some new brake fluid. I haven't ever flushed the fluid in this car and looking forward to it. I have 600 degree fluid to put in. Not exactly "race fluid" but better than the typical stuff I have been using.
    • A proper clutch/plate type mechanical diff with quite a lot of pre-load and high locking % is better for drifting. Much more consistent in its behaviour. A helical can be annoyingly vague and inconsistent in how it responds under the sorts of abuse found in drifting.
    • Some updates here. I pulled the entire interior out, minus some trim to respray the seats with Colourlock dye. It turned out really nice though I accidentally let the dog in the car after and she scratched up the front seat.  This is what it looked like before, the colour was just washing out everywhere but thankfully the leather was in good nic. Then after the respray   And after the bloody dog jumped in The headliner is out waiting to be retrimmed, but it will stay out now until Nov - see why below. I replaced the stereo/headunit with a period-styled Android headunit. I have no after pics, but I'll get some. This is because of the missing pixels. I tried to fix this twice with replacement ribbon cables but couldn't. Also the bluetooth interface I'd bought for this was crap. Then there's the rusty roof. Pics and info in this other thread. I have decided to get this repaired professionally, but I'll update that thread. This is why the headliner will stay out for now. I'll be getting the roof and bonnet resprayed at the same time the rust is fixed. I also had an interesting issue with my drivers door lock.  For a small period I was having issues getting any 12v power to the car - I mean *any*. It would have no dash lights, nothing. It happened while I was at the shops and I couldn't get in the car. So, we had 2 problems. The most pressing here is that I was locked out. I have only a single physical key hole on the car, the drivers door and no amount of turning would unlock the car. Surely it doesn't need power for this? The second issue is why am I losing all power periodically, The battery isn't dead, its almost like the battery isn't even there. Two issues that were surprisingly easy to fix. You fellow BMW over-engineering lovers will appreciate this. The lock in the door has 5 states; mechanical lock, electric lock, neutral, electric unlock, mechanical unlock achieved at -90 degrees, -45 degrees, 0 degrees, 45 degrees and 90 degrees. Although, the unlock is towards the front of the car, so opposite for LHD countries. Sticking the key in and turning 45 left or right is what is used 99% of the time. It activates the central locking etc. 90 degrees is for dead battery access and, obvs, only un/locks the one door. But because the mechanical lock is never used and is 27 years old, it seizes up. I was totally unable to turn the key far enough to get to the mechanical unlock (At the time of locking myself out, I didn't even know this was a thing). I eventually did it with some vicegrips and teflon spray.  I made a quick vid for other E39 peeps.   The battery issue is totally new to me also - It wasn't making sufficient contact between the post and the terminal. The terminal was bolted on tight, but the car wouldn't have power. After checking the battery with my multimeter I accidentally contacted the terminal and the battery post and the car got power. The battery was only a few years old and in good condition. I cleaned the post and the terminal with a wire brush, bolted it back on tight and never had the issue again. I'm still surprised that despite having solid contact it didn't work. Also, the car was getting Warragamba sized pools of water in the back when it rained. My initial concern was another rust problem. But when I went out on Weds while it was raining and while I had no headliner in I could see a steady stream of water coming through the roof mounted aerial. As this aerial is for the (now removed) car phone I pulled it out and whacked a blanking grommet in the hole. It seems fine now. I'm thinking I might get the hole permanently filled when the rust is fixed. Moving forward and things in progress; The tailgate needs some attention. I have taken all the trim off to clean it all and address some small rust spots. I have partially done all of this but I'll finish it up hopefully this weekend. As all the trim are now entirely devoid of trim clips I have bought a heap of strong velcro and I'm hoping it does a good enough job as any of this trim in good condition is super expensive and usually in Europe as we dont have many of the wagons here. Suspension and brakes!!! This is exciting. In the front; New control arms New sway bar links New lower Eibach springs (the only modification I'm planning on this car) M Sport shocks (these came with the car and will replace the longer shocks in the car) New top mounts Used 540i calipers (stock brakes suck!) New 540i disks and pads (22x296 mm for 528 and 30x334 mm for 540i) New front wheel bearings (thank all that is holy for bolt on bearings!) Annnnd in the back; New control arms New sway bar links Adjustable air suspension arms (fool the car into what the current height is so the self levelling suspension can match the new front ride height) New ball joints I'll also be doing a brake fluid flush while I'm in there. I'm planning on switching the car over to the 16's that came with it so I can clean up and respray the M Sport 17's. They've lost a lot of colour over the years and have some gutter rash. None of this will start until the E90 is back.
    • You mean you will regret it for drifting duties? I don't quite follow.
×
×
  • Create New...