Jump to content
SAU Community

Recommended Posts

Hey all

I have a R33 GTR and a set of work XD9s 18 x 10 +18. the biggest widest and smallest offset XD9s you can get. But they are a bit to sunken for my liking.

I'm thinking of running spacers to make it flush.

But can you run staggered size spacers front to back? I know the tyre / running diameter must be the same, but can you stagger spacers?

As the rear could use a 10mm but the front could go 15mm to maybe 20mm?

Also can someone recommend good quality, safest spacers avaliable?

Thanks

Link to comment
https://www.sau.com.au/forums/topic/406862-gtr-and-spacers/
Share on other sites

i know what your saying, I've given up on offset on my R33 gtr , did have 10mm spaces just on the back, and didn't upset anything.

Don't think I'd go as far 20mm unless your going a bolt on, thats a lot of thread to lose in your wheel nut..

Link to comment
https://www.sau.com.au/forums/topic/406862-gtr-and-spacers/#findComment-6484157
Share on other sites

dont be rude or anything, but what makes them so good?

There tired and tested brands....That are bolt on and not ebay/backyards jobs.

www.google.com - penly of reviews to read through just for peice of mind

Edited by sydking
Link to comment
https://www.sau.com.au/forums/topic/406862-gtr-and-spacers/#findComment-6484981
Share on other sites

There tired and tested brands....That are bolt on and not ebay/backyards jobs.

www.google.com - penly of reviews to read through just for peice of mind

funny someone said ebay,

http://www.ebay.com.au/itm/NEOTECH-NISSAN-5-Stud-114-3-20mm-Bolt-Wheel-Spacers-/140822782086?pt=AU_Car_Parts_Accessories&hash=item20c9b12086

these are the ones I ran front and back on my R34 GTR V-SPEC II for 3 trackdays and nearly 10 months without an issue and they still look as good as the day I got them

only rolling diameter will upset the 4WD system, so you will be ok, ONLY GET BOLTON SPACERS and make sure they a torqued on propely

Link to comment
https://www.sau.com.au/forums/topic/406862-gtr-and-spacers/#findComment-6485441
Share on other sites

funny someone said ebay,

http://www.ebay.com....=item20c9b12086

these are the ones I ran front and back on my R34 GTR V-SPEC II for 3 trackdays and nearly 10 months without an issue and they still look as good as the day I got them

only rolling diameter will upset the 4WD system, so you will be ok, ONLY GET BOLTON SPACERS and make sure they a torqued on propely

any idea on the torque specs used? same as the stock lug nugs need?

When i was looking into spacers, Alot were sugesting its the speed of ratation that helps keep the wheels from falling off, Not soley on the nuts. Not sure in the truth in that.

Though, Tourqe the spacers, go for a drive, See if anything has come loose, then id be checking a week later or so just for peice of mind!!

Link to comment
https://www.sau.com.au/forums/topic/406862-gtr-and-spacers/#findComment-6486009
Share on other sites

any idea on the torque specs used? same as the stock lug nugs need? Yeah torque them to factory settings or a touch tighter, I can't remember the setting of hand but it is mentioned back a few posts

When i was looking into spacers, Alot were sugesting its the speed of ratation that helps keep the wheels from falling off, Not soley on the nuts. Not sure in the truth in that. there is some truth to this, but as wheels rotate in a different direction from side to side that would suggest that one side would tighten and the other would untighten, on my last truck it had right and left hand threads, one for each side for this reason, my current truck does not

Though, Torque the spacers, go for a drive, See if anything has come loose, then id be checking a week later or so just for piece of mind!! exactly what I was going to say

always use bolt on spacers not slip on, reason is then there is only one slip point ( the flat surface where hub and wheel meet ) the each set of studs have to secure not two

Link to comment
https://www.sau.com.au/forums/topic/406862-gtr-and-spacers/#findComment-6486879
Share on other sites

Create an account or sign in to comment

You need to be a member in order to leave a comment

Create an account

Sign up for a new account in our community. It's easy!

Register a new account

Sign in

Already have an account? Sign in here.

Sign In Now


  • Similar Content

  • Latest Posts

    • Yeah well per the video it took 15s for the stock unit to start up....even if I give it a few seconds discount for starting that is at least 12 sec before you get a reverse camera if you are trying to leave a park.  The android unit is way faster, but 2016 for the stock unit is a long time ago in consumer electronics
    • Yea that’s why I said ima test them with multimeter and see the reads.
    • Only at idle. Isn’t a problem when rev it seems.
    • @Haggerty This seems silly to ask, but are you confident in your ability to tune the Haltech?  
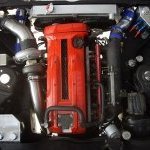
    • Next on the to-do list was an oil and filter change. Nothing exciting to add here except the oil filter is in a really stupid place (facing the engine mount/subframe/steering rack). GReddy do a relocation kit which puts it towards the gearbox, I would have preferred towards the front but there's obviously a lot more stuff there. Something I'll have to look at for the next service perhaps. First time using Valvoline oil, although I can't see it being any different to most other brands Nice... The oil filter location... At least the subframe wont rust any time soon I picked up a genuine fuel filter, this is part of the fuel pump assembly inside the fuel tank. Access can be found underneath the rear seat, you'll see this triangular cover Remove the 3x plastic 10mm nuts and lift the cover up, pushing the rubber grommet through The yellow fuel line clips push out in opposite directions, remove these completely. The two moulded fuel lines can now pull upwards to disconnect, along with the wire electrical plug. There's 8x 8mm bolts that secure the black retaining ring. The fuel pump assembly is now ready to lift out. Be mindful of the fuel hose on the side, the hose clamp on mine was catching the hose preventing it from lifting up The fuel pump/filter has an upper and lower section held on by 4 pressure clips. These did take a little bit of force, it sounded like the plastic tabs were going to break but they didn't (don't worry!) The lower section helps mount the fuel pump, there's a circular rubber gasket/grommet/seal thing on the bottom where the sock is. Undo the hose clip on the short fuel hose on the side to disconnect it from the 3 way distribution pipe to be able to lift the upper half away. Don't forget to unplug the fuel pump too! There's a few rubber O rings that will need transferring to the new filter housing, I show these in the video at the bottom of this write up. Reassembly is the reverse Here's a photo of the new filter installed, you'll be able to see where the tabs are more clearing against the yellow OEM plastic Once the assembly is re-installed, I turned the engine over a few times to help build up fuel pressure. I did panic when the car stopped turning over but I could hear the fuel pump making a noise. It eventually started and has been fine since. Found my 'lucky' coin underneath the rear seat too The Youtube video can be seen here: https://www.youtube.com/watch?v=uLJ65pmQt44&t=6s
×
×
  • Create New...