Jump to content
SAU Community

Recommended Posts

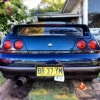
So recently i removed my lenses and sprayed the chrome surrounding in the headlights black, and after doing that my headlights fog up with any sight of moisture which is really annoying. I knew it was a possibility to happen but i took the risk anyway. So now i want to remove the outside lense completely like this. Anybody done it?

post-106657-0-97455100-1361740286_thumb.jpg

Link to comment
https://www.sau.com.au/forums/topic/420538-lensless-headlights-diy/
Share on other sites

If you took your lenses off then you know that the headlights aren't sealed. You wouldn't want to drive in the rain with them exposed. So, to do the lensless conversion correctly you'd need to convert to sealed headlamps. That's a pretty big deal as you'd have to totally change out the mounts and adjustment stuff.

Not saying impossible, but it would be a fair bit of work.

I have a banked up project to convert mine to projectors (can't justify the Series 3 expense) and I want to change a few other things when I'm in there. I'll eventually put up a thread when done, but prob won't be till next year.

Pretty hard to see in that picture. Might just be converted to slim rectangular sealed units. Lot of 80's and 90's cars used them before custom lenses with replacement bulbs became the norm.

The R32 Autostyle car had ones like this but they looked like sealed projectors.

1916_12mg.jpg

Read up on it. Search here on the forums, there is a DIY.

I removed mine to fix a broken adjustment bracket. Use a heat gun or oven to soften the glue then you have to work around it with screw drivers carefully not to crack the plastic.

Don't personally like that style I prefer two square lamps. Each to their own though. Im gonna try get hold of a dremel with a circular attachment or even one of those renovator tools and try cut out the outter lense along the little dip around the diameter of it. I will take pictures as I go and keep you updated. Fingers crossed it turns out reasonable haha!

Yeah obviously you'd get the RWC issues but hey, people run spacers, decats, high mounts, ffp's etc ;)

Yeah, I guess you have a point but...this mod will stick out like a sore thumb screaming for unwanted attention!

Yeah, I guess you have a point but...this mod will stick out like a sore thumb screaming for unwanted attention!

Definitely agree! On a noobish note, are R33 GTST series 1 and 2 headlights interchangeable/line up fine? On my phone so the search option isn't the best.

  • 10 months later...

If you took your lenses off then you know that the headlights aren't sealed. You wouldn't want to drive in the rain with them exposed. So, to do the lensless conversion correctly you'd need to convert to sealed headlamps. That's a pretty big deal as you'd have to totally change out the mounts and adjustment stuff.

Not saying impossible, but it would be a fair bit of work.

I have a banked up project to convert mine to projectors (can't justify the Series 3 expense) and I want to change a few other things when I'm in there. I'll eventually put up a thread when done, but prob won't be till next year.

So thread resurrection. Not really finished yet but I've had this project and doing a little here and there over the last year when I have the spare time. I've also got an motor rebuild happening so this is going to take a back seat for a few weeks since the parts are starting to come back in.

This is quite different from anything I've seen on R33's. I also have modified the grill to come out almost to the front of the bumper. The "eye lid" will extend the bonnet line. I will be finishing in fibreglass and then doing carbon overlay over the top.

IMG_2257.JPG

IMG_2263.JPG

IMG_2264.JPG

  • 2 weeks later...
  • 9 years later...

Create an account or sign in to comment

You need to be a member in order to leave a comment

Create an account

Sign up for a new account in our community. It's easy!

Register a new account

Sign in

Already have an account? Sign in here.

Sign In Now


  • Similar Content

  • Latest Posts

    • For once a good news  It needed to be adjusted by that one nut and it is ok  At least something was easy But thank you very much for help. But a small issue is now(gearbox) that when the car is stationary you can hear "clinking" from gearbox so some of the bearing is 100% not that happy... It goes away once you push clutch so it is 100% gearbox. Just if you know...what that bearing could be? It sounding like "spun bearing" but it is louder.
    • Yeah, that's fine**. But the numbers you came up with are just wrong. Try it for yourself. Put in any voltage from the possible range and see what result you get. You get nonsense. ** When I say "fine", I mean, it's still shit. The very simple linear formula (slope & intercept) is shit for a sensor with a non-linear response. This is the curve, from your data above. Look at the CURVE! It's only really linear between about 30 and 90 °C. And if you used only that range to define a curve, it would be great. But you would go more and more wrong as you went to higher temps. And that is why the slope & intercept found when you use 50 and 150 as the end points is so bad halfway between those points. The real curve is a long way below the linear curve which just zips straight between the end points, like this one. You could probably use the same slope and a lower intercept, to move that straight line down, and spread the error out. But you would 5-10°C off in a lot of places. You'd need to say what temperature range you really wanted to be most right - say, 100 to 130, and plop the line closest to teh real curve in that region, which would make it quite wrong down at the lower temperatures. Let me just say that HPTuners are not being realistic in only allowing for a simple linear curve. 
    • I feel I should re-iterate. The above picture is the only option available in the software and the blurb from HP Tuners I quoted earlier is the only way to add data to it and that's the description they offer as to how to figure it out. The only fields available is the blank box after (Input/ ) and the box right before = Output. Those are the only numbers that can be entered.
    • No, your formula is arse backwards. Mine is totally different to yours, and is the one I said was bang on at 50 and 150. I'll put your data into Excel (actually it already is, chart it and fit a linear fit to it, aiming to make it evenly wrong across the whole span. But not now. Other things to do first.
    • God damnit. The only option I actually have in the software is the one that is screenshotted. I am glad that I at least got it right... for those two points. Would it actually change anything if I chose/used 80C and 120C as the two points instead? My brain wants to imagine the formula put into HPtuners would be the same equation, otherwise none of this makes sense to me, unless: 1) The formula you put into VCM Scanner/HPTuners is always linear 2) The two points/input pairs are only arbitrary to choose (as the documentation implies) IF the actual scaling of the sensor is linear. then 3) If the scaling is not linear, the two points you choose matter a great deal, because the formula will draw a line between those two points only.
×
×
  • Create New...