Jump to content
SAU Community

Recommended Posts

Part Description Asking $ Pod filter with adaptor Needs new foam $30 Turbo custom intake pipe $50 Intake manifold $50 Custom turbo with internal gate HKS exhaust and Garret internals/wheels. Low mount good for over 285rwkw $550 Radiator $60 Engine mounts $50 Radiator overflow bottle $20 Aircon condenser With piping $80 Power steering pump $80 Alternator $80 Fuel pump No label but was fine for 285rwkw $80 Clutch master cylinder $50 Manual pedal set $60 Tail shafts $90 Exhaust Exhaust pipe Blitz 3in $200 Decat pipe Straight 3in bolt on $30 Wheels Impul NS-01 light weight racing 17in inc Federal tyres, 70% frt, 40% rr $700 Front 5 stud hubs $80 Spare space saver wheel $40 Stock Suspension Fronts Stock $75 Rears Stock $75 Front castor rods $75 Front upper control arms $50 Rear control arms $75 Brakes Discs Front $50 Master brake cylinder $50 Handbrake front section $40 Exterior Body shell Still complianced and registerable $400 Rear reinforcement bar $100 Bonnet latch $30 Rear bar Stock $100 Side skirts Stock or type M? $100 Rear pods Veilside $70 Spoiler - Series 1 No stop light and scratched $50 Bonnet Black - resprayed $120 Boot Black $80 Front wheel liner Front RH $20 Series 1 tail lights pair $120 Indicators Side - clear pair $40 Interior Front Recaro $160 Interior wiring loom $150 Rear seats $50 Instrument panel Standard black good condition $80 Center console with new boot $30 Headliner Excellent condition $50 Boot trim $30 Gear boot & surround Brand new boot $30 Taco gauge - 4in with shift light $60 Boost gauge - HKS with solenoid $60 Steering wheel Just wheel - needs recovering $50 Steering wheel Airbag $100 Pillar trims each $20

All parts are available for pickup in Macleod (VIC). Small things can be posted at extra expense.

Pics will be posted for each part upon request. Most things are still in excellent condition.

A slightly better format than the first:

Part Asking $

Pod filter with adaptor Needs new foam $30

Turbo custom intake pipe $60

Intake manifold $50

Custom turbo with internal gate

HKS exhaust and Garret internals/wheels. Low mount good for more than 285rwkw $550

Radiator $60

Engine mounts $50

Radiator overflow bottle $20

Aircon condenser With piping $80

Power steering pump $80

Alternator $80

Fuel pump No label but was fine for 285rwkw $80

Clutch master cylinder $50

Manual pedal set $60

Tail shafts $90

Exhaust

Exhaust pipe Blitz 3in $200

Decat pipe Straight 3in bolt on $30

Wheels

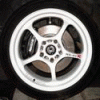
Impul NS-01 light weight racing 17in inc Federal tyres, 70% frt, 40% rr $700

Front 5 stud hubs $80

Spare space saver wheel $40

Stock Suspension

Fronts Stock $75

Rears Stock $75

Front castor rods $75

Front upper control arms $50

Rear control arms $75

Brakes

Discs Front $50

Master brake cylinder $50

Handbrake front section $40

Exterior

Body shell Still complianced and registerable $400

Rear reinforcement bar $100

Bonnet latch $30

Rear bar Stock $100

Side skirts Stock or type M? $100

Rear pods Veilside $70

Spoiler - Series 1 No stop light and scratched $50

Bonnet Black - resprayed $120

Boot Black $80

Front wheel liner Front RH $20

Series 1 tail lights pair $120

Indicators Side - clear pair $40

Interior

Front Recaro $160

Wiring loom $150

Rear seats $50

Instrument panel Standard black good condition $80

Centre console $20

Headliner Excellent condition $50

Boot trim $30

Gear boot & surround Brand new $30

Handbrake boot Brand new $10

Taco gauge - 4in with shift light Taco - 4in with shift light $60

Boost gauge - HKS with solenoid $60

Steering wheel Just wheel - needs recovering $50

Steering wheel Airbag $100

Pillar trims each $20

Do you still have the power steering pump? And also would you have the thermostat housing disconnected?

Hey mate, I've still got the power steering pump in good order but the thermostat housing went with the motor a while back.

Power steering pump $65. $80 delivered.

Got the power steering resovour? If so how's the condition? Pm me

Still got it and just gave it a quick wash. Condition is excellent with no issues, see pic.

$25 pickup and I'll give you the bracket and hoses with it.

post-7819-0-21167700-1391823695_thumb.jpg

Headlights?

Sorry buddy, Already SOLD. Tail lights and clear indicators are still available on the list though...

Sorry buddy, Already SOLD. Tail lights and clear indicators are still available on the list though...

No worries just after headlights cheers for the reply

interested in front brake disks and if u have the front washer pump (Below the bottle at the front, the one on the left).

interested in front brake disks and if u have the front washer pump (Below the bottle at the front, the one on the left).

Discs are at 28.7mm thickness from memory which is why they're priced fairly cheap with a bit of use lefy in them. I can confirm tomorrow for you.

Washer motors are sold.

Thanks

Intake manifold is still available. Top and bottom halves included. Throttle body not included.

It's not really an aging part so it's still in great condition.

What is the wheel width 17 X ? and colour

Hey mate,

The rears are 17 x 8.5 38 and the fronts are 17 x 7.5 35.

They're white and are awesome on any darker skyline (pic shows stock but previously had it lowered and looked a lot better). Have a look at the pics for the condition and style and do a search on the NS-01 impul rims for their details. One of the lightest rims you'll get.

post-7819-0-31712300-1392467115_thumb.jpg

post-7819-0-57246000-1392467185_thumb.jpg

post-7819-0-59044800-1392467203_thumb.jpg

post-7819-0-56398000-1392467721_thumb.jpg

you have pics of recaros mate?

It's currently listed on ebay but if it doesn't sell I'm happy to still sell it for my asking price here. If there's no interest it will be re-listed on ebay.

http://www.ebay.com.au/itm/111277311757?ssPageName=STRK:MESELX:IT&_trksid=p3984.m1586.l2649

Edited by Steg33

Create an account or sign in to comment

You need to be a member in order to leave a comment

Create an account

Sign up for a new account in our community. It's easy!

Register a new account

Sign in

Already have an account? Sign in here.

Sign In Now


  • Similar Content

  • Latest Posts

    • Hi, is the HKS  Tower Bar still available ? negotiable ? 🤔
    • From there, it is really just test and assemble. Plug the adapter cables from the unit into the back of the screen, then the other side to the car harness. Don't forget all the other plugs too! Run the cables behind the unit and screw it back into place (4 screws) and you should now have 3 cables to run from the top screen to the android unit. I ran them along the DS of the other AV units in the gap between their backets and the console, and used some corrugated tubing on the sharp edges of the bracket so the wires were safe. Plug the centre console and lower screen in temporarily and turn the car to ACC, the AV should fire up as normal. Hold the back button for 3 sec and Android should appear on the top screen. You need to set the input to Aux for audio (more on that later). I put the unit under the AC duct in the centre console, with the wifi antenna on top of the AC duct near the shifter, the bluetooth antenna on the AC duct under the centre console The GPS unit on top of the DS to AC duct; they all seem to work OK there are are out of the way. Neat cable routing is a pain. For the drive recorder I mounted it near the rear view mirror and run the cable in the headlining, across the a pillar and then down the inside of the a pillar seal to the DS lower dash. From there it goes across and to one USB input for the unit. The second USB input is attached to the ECUtec OBD dongle and the 3rd goes to the USB bulkhead connected I added in the centre console. This is how the centre console looks "tidied" up Note I didn't install the provided speaker, didn't use the 2.5mm IPod in line or the piggyback loom for the Ipod or change any DIP switches; they seem to only be required if you need to use the Ipod input rather than the AUX input. That's it, install done, I'll follow up with a separate post on how the unit works, but in summary it retains all factory functions and inputs (so I still use my phone to the car for calls), reverse still works like factory etc.
    • Place the new daughterboard in the case and mount it using the 3 small black rivets provided, and reconnect the 3 factory ribbon cables to the new board Then, use the 3 piggyback cables from the daughterboard into the factory board on top (there are stand offs in the case to keep them apart. and remember to reconnect the antenna and rear cover fan wires. 1 screw to hold the motherboard in place. Before closing the case, make a hole in the sticker covering a hole in the case and run the cable for the android unit into the plug there. The video forgot this step, so did I, so will you probably. Then redo the 4 screws on back, 2 each top and bottom, 3 each side and put the 2 brackets back on.....all ready to go and not that tricky really.      
    • Onto the android unit. You need to remove the top screen because there is a daughterboard to put inside the case. Each side vent pops out from clips; start at the bottom and carefully remove upwards (use a trim remover tool to avoid breaking anything). Then the lower screen and controls come out, 4 screws, a couple of clips (including 3 flimsy ones at the top) and 3 plugs on the rear. Then the upper screen, 4 screws and a bunch of plugs and she is out. From there, remove the mounting brackets (2 screws each), 4 screws on the rear, 2 screws top and bottom and 3 screws holding in the small plates on each side. When you remove the back cover (tight fit), watch out for the power cable for the fan, I removed it so I could put the back aside. The mainboard is held in by 1 screw in the middle, 1 aerial at the top and 3 ribbon cables. If you've ever done any laptop stuff the ribbon cables are OK to work with, just pop up the retainer and they slide out. If you are not familiar just grab a 12 year old from an iphone factory, they will know how it works The case should now look like this:
    • Switching the console was tricky. First there were 6 screws to remove, and also the little adapter loom and its screws had to come out. Also don't forget to remove the 2 screws holding the central locking receiver. Then there are 4 clips on either side....these were very tight in this case and needed careful persuading with a long flat screw driver....some force required but not enough to break them...this was probably the fiddliest part of the whole job. In my case I needed both the wiring loom and the central locking receiver module to swap across to the new one. That was it for the console, so "assembly is the reverse of disassembly"
×
×
  • Create New...