Jump to content
SAU Community

Recommended Posts

  • 2 weeks later...

Slow progress is slow. I finally got the gauges in, still need to do sensors and wiring. My car originally came with the pop-up screen so thanks to Charles89 for the gauge pod, it came up well!!

...

Ok it's all wired up now!

Couple of questions/niggles:

  1. The illumination is always on, irrespective of headlights/parkers. Which wire from the ignition should I connect it to instead?
  2. When shutting the car down the Defis lose power immediately when turning the key back, leaving the dials pointing to wherever they were at that time. Is this normal, or are they meant go back down to 0 when off?
  3. One of the gauges is darker than the other two, is there a brightness setting somewhere?
  4. The oil and water temps are around 80 in normal driving, what's a decent max/alert setting for these?

Thanks heaps guys, and sorry about the noob q's.

Link to comment
https://www.sau.com.au/forums/topic/441108-gauges/page/3/#findComment-7512556
Share on other sites

1.

Not to the ignition. To the illuminate wire for the radio is easiest.

2.doesn't sound normal but I'm not sure. Did you have to wire up to a constant 12v and ignition?

3.don't know.

4.over 100, how high is really up to you. Perhaps go for a thrash and figure out the usual max, then ad 5 to that.

  • Like 1
Link to comment
https://www.sau.com.au/forums/topic/441108-gauges/page/3/#findComment-7512568
Share on other sites

I am hijacking this because, well, I have a oil temp related gauge query.

I have to replace the stock oil pressure sender which screws into the block.

I have an oil temp gauge not connected to anything.

I want to use a brass t piece between the block and the factory oil pressure sensor, and put a oil TEMPERATURE sender into this T piece, and wire the gauge to that.

Is this a terrible plan, or is a simple 'fix' by means of a small adapter while I am down there going to literally ruin everything?

Link to comment
https://www.sau.com.au/forums/topic/441108-gauges/page/3/#findComment-7512814
Share on other sites

It's not a good plan. There is no oil flow in such an arrangement, so you will be waiting for the oil to conduct heat through itself for the temperature to change. It will read cold for ages after startup and then later when using the car, if the rest of the oil suddenly gets hot, the gauge won't show it for ages.

Link to comment
https://www.sau.com.au/forums/topic/441108-gauges/page/3/#findComment-7512947
Share on other sites

Looks like here -> http://www.sau.com.au/forums/topic/438407-fitting-an-oil-temp-sensor-without-sandwich-plate/

Which I've read many times, but only now actually seem to understand it that its been done a couple ways. One was the way I mentioned before which supposedly is 2-3 seconds lag which aint so bad.

Also in that thread is a link to an adaptor for the factory oil temp sensor plug, which seems like as good/better idea, for the same cost of a T piece anyway. At least it's in the location a Nissan Engineer decided was the best place to get oil temp from.

Just incase googlers end up here ;-)

Link to comment
https://www.sau.com.au/forums/topic/441108-gauges/page/3/#findComment-7513062
Share on other sites

What about the original suggestion in the thread? By using the factory position my means of a small adaptor, seemed simple and easy as well. Easier, even.

Or is it much the same as using a T piece? I opted to simply get that small adaptor and re-use a factory sensor location that's currently doing nothing. Just to make use of a gauge that was pre-installed when I picked up the car. (in my case I don't suspect oil temp to be the first 'point of failure' in terms of things getting too hot).

Link to comment
https://www.sau.com.au/forums/topic/441108-gauges/page/3/#findComment-7513128
Share on other sites

The stock location would have to be the best choice.

I put a sandwich plate on my RB20. So when I dropped the 25Neo into the car, I just left the gauge sensor on the sandwich plate and ignored the Neo's factory sensor location. But if you want to avoid a sandwich plate, then where the factory put their sensor would have to be the smartest choice.

Link to comment
https://www.sau.com.au/forums/topic/441108-gauges/page/3/#findComment-7513159
Share on other sites

1.

Not to the ignition. To the illuminate wire for the radio is easiest.

2.doesn't sound normal but I'm not sure. Did you have to wire up to a constant 12v and ignition?

3.don't know.

4.over 100, how high is really up to you. Perhaps go for a thrash and figure out the usual max, then ad 5 to that.

Thanks heaps for this Ben. I had all positives connected directly to ignition so a bit of a mess.

I've run a new 12V line off the fuse box with a 5A fuse and illumination from the cigarette lighter so it's all up to scratch now. The dials now rest at 6 o'clock as expected when the car is not running, and illumination is in sync with the rest of the dash.

Had a look through the manual and looks like there's no brightness setting for these, must be a just tired bulb in the boost gauge.

Thanks GTSBoy too for the temp alert recommendations.

  • Like 1
Link to comment
https://www.sau.com.au/forums/topic/441108-gauges/page/3/#findComment-7513941
Share on other sites

The stock location would have to be the best choice.

I put a sandwich plate on my RB20. So when I dropped the 25Neo into the car, I just left the gauge sensor on the sandwich plate and ignored the Neo's factory sensor location. But if you want to avoid a sandwich plate, then where the factory put their sensor would have to be the smartest choice.

The idea was just to get the gauge going in a simple fashion.

Then see if a cooler is needed, I have a feeling oil temp won't be the first thing to get into the "danger will robinson" category on the track. My water temp didn't see above 70 doing a drift day, so who knows what oil temp is, or not.

I went to check, and found my standard oil/water/heat/exchanger is a N/A one, which has a welch plug instead of a bung for a sensor.

fPC0u1-photo-24.jpg

fffffuuu

So now I can choose T piece (inaccurate, cheap), sandwich plate (expensive, accurate), or replace the heat exchanger with the correct unit. (cheap, messy, accurate) Waaah.

Link to comment
https://www.sau.com.au/forums/topic/441108-gauges/page/3/#findComment-7513952
Share on other sites

Re: Water temp, it really is 65. ECU and gauge which are independent of one another, both say the same thing. I suspect I got given the Nismo thermostat, which is 65C (despite asking for the 82C neo thermostat) ... twice... and replacing it twice.

In any case I've asked Tuners and engine builders whether tuning it/running it at 65C is going to cause issues and I've been told its fine as long as the engine is tuned with that in mind, in other words, not running enrichment at that point, which it isn't. Concerned about engine life by running it too cold, was told this isn't a problem.

...dunno if right

In any case this is why I was after oil temp. 100% certain it's not sitting at 70C after ample use of the loud pedal.

Going back to sandwich plates, is there a downside to using the $30 china special sandwich plate over the $300 Greddy/HPI/Other Brand name item? Are they prone to leaking and such?

I see it as adding an additional item which could break, or more accurately mysteriously do something unknown which is pretty standard fare for anything I touch, ever.

Link to comment
https://www.sau.com.au/forums/topic/441108-gauges/page/3/#findComment-7514847
Share on other sites

My cheap sandwich plate has been fine. The only time I had a problem with it was when (re?)fitted it, I did it all up from above without checking it from below. Managed to displace the rubber gasket, possibly from just doing it up too much or twisting it around during the doing up process. Filled engine with oil and ran it and managed to squirt a few litres onto the floor under the hoist before realising. Wasn't happy, but no damage done except to the oil budget, the schedule (had to soak up lovely fresh oil from the dirty floor) and having a small panic about what had happened to the gasket. Was not damaged.

Could not tell you if the $300 ones are immune to this. I'd guess that they're not.

Link to comment
https://www.sau.com.au/forums/topic/441108-gauges/page/3/#findComment-7514860
Share on other sites

The idea was just to get the gauge going in a simple fashion.

Then see if a cooler is needed, I have a feeling oil temp won't be the first thing to get into the "danger will robinson" category on the track. My water temp didn't see above 70 doing a drift day, so who knows what oil temp is, or not.

I went to check, and found my standard oil/water/heat/exchanger is a N/A one, which has a welch plug instead of a bung for a sensor.

fPC0u1-photo-24.jpg

fffffuuu

So now I can choose T piece (inaccurate, cheap), sandwich plate (expensive, accurate), or replace the heat exchanger with the correct unit. (cheap, messy, accurate) Waaah.

Why don't you pull the welsh plug out and tap a thread in there. The casting would be the same it's just the N/A housings wouldn't have been tapped.

Edited by D_Stirls
Link to comment
https://www.sau.com.au/forums/topic/441108-gauges/page/3/#findComment-7514874
Share on other sites

  • 4 months later...

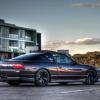
Slow progress is slow. I finally got the gauges in, still need to do sensors and wiring. My car originally came with the pop-up screen so thanks to Charles89 for the gauge pod, it came up well!!

16800349258_3aa19cf9c5.jpg

Ok I got distracted and bought two more Defi gauges, oops.

Any suggestions on where to mount them?

A Greddy (style) A-Pillar dual gauge pod might be an option but I'm not sure if it's a bit too much circus for my taste...

Link to comment
https://www.sau.com.au/forums/topic/441108-gauges/page/3/#findComment-7601406
Share on other sites

Create an account or sign in to comment

You need to be a member in order to leave a comment

Create an account

Sign up for a new account in our community. It's easy!

Register a new account

Sign in

Already have an account? Sign in here.

Sign In Now


  • Similar Content

  • Latest Posts

    • From there, it is really just test and assemble. Plug the adapter cables from the unit into the back of the screen, then the other side to the car harness. Don't forget all the other plugs too! Run the cables behind the unit and screw it back into place (4 screws) and you should now have 3 cables to run from the top screen to the android unit. I ran them along the DS of the other AV units in the gap between their backets and the console, and used some corrugated tubing on the sharp edges of the bracket so the wires were safe. Plug the centre console and lower screen in temporarily and turn the car to ACC, the AV should fire up as normal. Hold the back button for 3 sec and Android should appear on the top screen. You need to set the input to Aux for audio (more on that later). I put the unit under the AC duct in the centre console, with the wifi antenna on top of the AC duct near the shifter, the bluetooth antenna on the AC duct under the centre console The GPS unit on top of the DS to AC duct; they all seem to work OK there are are out of the way. Neat cable routing is a pain. For the drive recorder I mounted it near the rear view mirror and run the cable in the headlining, across the a pillar and then down the inside of the a pillar seal to the DS lower dash. From there it goes across and to one USB input for the unit. The second USB input is attached to the ECUtec OBD dongle and the 3rd goes to the USB bulkhead connected I added in the centre console. This is how the centre console looks "tidied" up Note I didn't install the provided speaker, didn't use the 2.5mm IPod in line or the piggyback loom for the Ipod or change any DIP switches; they seem to only be required if you need to use the Ipod input rather than the AUX input. That's it, install done, I'll follow up with a separate post on how the unit works, but in summary it retains all factory functions and inputs (so I still use my phone to the car for calls), reverse still works like factory etc.
    • Place the new daughterboard in the case and mount it using the 3 small black rivets provided, and reconnect the 3 factory ribbon cables to the new board Then, use the 3 piggyback cables from the daughterboard into the factory board on top (there are stand offs in the case to keep them apart. and remember to reconnect the antenna and rear cover fan wires. 1 screw to hold the motherboard in place. Before closing the case, make a hole in the sticker covering a hole in the case and run the cable for the android unit into the plug there. The video forgot this step, so did I, so will you probably. Then redo the 4 screws on back, 2 each top and bottom, 3 each side and put the 2 brackets back on.....all ready to go and not that tricky really.      
    • Onto the android unit. You need to remove the top screen because there is a daughterboard to put inside the case. Each side vent pops out from clips; start at the bottom and carefully remove upwards (use a trim remover tool to avoid breaking anything). Then the lower screen and controls come out, 4 screws, a couple of clips (including 3 flimsy ones at the top) and 3 plugs on the rear. Then the upper screen, 4 screws and a bunch of plugs and she is out. From there, remove the mounting brackets (2 screws each), 4 screws on the rear, 2 screws top and bottom and 3 screws holding in the small plates on each side. When you remove the back cover (tight fit), watch out for the power cable for the fan, I removed it so I could put the back aside. The mainboard is held in by 1 screw in the middle, 1 aerial at the top and 3 ribbon cables. If you've ever done any laptop stuff the ribbon cables are OK to work with, just pop up the retainer and they slide out. If you are not familiar just grab a 12 year old from an iphone factory, they will know how it works The case should now look like this:
    • Switching the console was tricky. First there were 6 screws to remove, and also the little adapter loom and its screws had to come out. Also don't forget to remove the 2 screws holding the central locking receiver. Then there are 4 clips on either side....these were very tight in this case and needed careful persuading with a long flat screw driver....some force required but not enough to break them...this was probably the fiddliest part of the whole job. In my case I needed both the wiring loom and the central locking receiver module to swap across to the new one. That was it for the console, so "assembly is the reverse of disassembly"
    • But first....while I was there, I also swapped across the centre console box for the other style where the AV inputs don't intrude into the (very limited !) space.  Part# was 96926-4GA0A, 284H3-4GA0B, 284H3-4GA0A. (I've already swapped the top 12v socket for a USB bulkhead in this pic, it fit the hole without modification:) Comparison of the 2: Basically to do the console you need to remove the DS and PS side console trim (they slide up and back, held in by clips only) Then remove the back half of the console top trim with the cupholders, pops up, all clips again but be careful at the front as it is pretty flimsy. Then slide the shifter boot down, remove the spring clip, loose it forever somewhere in the car the pull the shift knob off. Remove the tiny plastic piece on DS near "P" and use something thin and long (most screwdrivers won't fit) to push down the interlock and put the shifter down in D for space. There is one screw at the front, then the shifter surround and ashtray lift up. There are 3 or 4 plugs underneath and it is off. Next is the rear cover of the centre console; you need to open the console lid, pop off the trim covering the lid hinge and undo the 2rd screw from the driver's side (the rest all need to come out later so you can do them all now and remove the lid) Then the rear cover unclips (6 clips), start at the top with a trim tool pulling backwards. Once it is off there are 2 screws facing rearwards to remove (need a short phillips for these) and you are done with the rear of the console. There are 4 plugs at the A/V box to unclip Then there are 2 screws at the front of the console, and 2 clips (pull up and back) and the console will come out.
×
×
  • Create New...