Jump to content
SAU Community

Recommended Posts

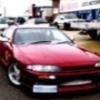
hey all just getting my skyline on the road should be very soon

1993 r33 gtst

needs some panel work

just the normal mods

intercooler

3.5'' cat back

lower springs

19'' wheels

queen street custom paint

GTR front bar and wing

front bar in pic not fully on

Photo-0185.jpg

  • 5 weeks later...

hmm, im under construction.

R33 '95 GTST mspec

- xforce 3" turbo back

- greddy fmic

- power fc

- apexi pfc boost cont. kit

- k&n pod

- 19" shadow chrome rims

- HICAS lockbar

- strut braces

- z32 afm

Got a 400R kit, but its not on, atm its just got a GTR front and no skirts (special thanks to previous owner for the incomplete bodykit, awesome)

Got about $3k set aside for body, and will up the clutch/suspension/brakes/injectors/fuel pump/turbo upgraded in due time, probably in that order.

buy a 10k car, spend 10k on it.

hazah for bankrupt!

Edited by Sonuku

Well i have posted my ride in here before but the pic was sh*t. I now have a few better pics and few thing have been done.

you might have seen me cruzing around, as i also ways go for little drives all around the place.

Here are some pics:

post-39528-1219408752_thumb.jpg

post-39528-1219408760_thumb.jpg

post-39528-1219408769_thumb.jpg

  • 4 weeks later...

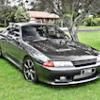
My new toy

R32 GTS-t M-spec

18 inch rims

intercooler

grey velour interior

full 3" zorst

short shift kit

momo steering wheel

tein coiovers

front bar trimmed to suit intercooler

slotted rotors

4 pot calipers (cuz it's an m-spec)

bleed valve (taken off at the moment for rego)

clearish indicators

at the moment she needs a bit of work...running pretty rich and there is a weird problem that autotech is going to look at on tuesday.

plus need new tyres

reverse switch is broken. going to be replaced this week.

had to get the cannon re aligned a bit because was rubbing on the fuel tank protecter and burnt a hole...lucky.

hopefully it doesn't cost me too much money but hey ive wanted once since i was like 14 so ill probly pour all my money into it :) haha if u see me...give me a wave :P

Mycar004-2.jpg

woooooo

MY BEAST.

MODS= bits here and there.

ive seen you a few times in woden. you may or may not have seen ZCR (silver32) and i (white chaser) a few times in woden aswell.

nice looking car, the eye lids definatly make it look pretty unique

  • 3 weeks later...

1993 Nissan Skyline R33 GTS-T

Heres the list of mods my car has:

Full GTR Body-kit including spoiler

18" starcorp racing rims.

3" Turbo Back Exhaust.

Apexi Blow Off Valve.

Front Mount Intercooler.

Heavy duty clutch.

Forged and polished pistons.

Turbo rebuilt by turbologics.

Engine block crank & head work.

flywheel machining.

PLENTY more planned!!

changing rims soon hopefully and the 18"s will be u for about $500 if anyones interested

post-56408-1223948615_thumb.jpg

  • 2 weeks later...

I just bought a skyline last friday just gone ... only just signed up to this forum aswell ...

So here she is ... I have allways wanted a skyline ... was tossing up getting a R31 a few years back and gave up on that plan ... now a sweet R32 came up at a price I couldn't refuse so I bought it ...

Here she is ...

1992 HR32 GTS

RB20DE

Automatic .... (In future will be swapped out for a complete engine gearbox upgrade) but for the time being the auto is smooth as hell ...

Has a few mods done to it allready ...

Lowered suspention which is still as all hell

17" SSR wheels

2.5" catback exhaust with canon

Aftermarket rear swaybar

Front bushes have been replaced with nolathane bushes

Custom stereo install ...

Remote central locking , Alarm , immobiliser , remote start

Have some nice red/black Autotechnica racing seats to go into it in future there not the monza style ones ... there the new 08 model seats ...

here is a sideshot of it ...

skylinesideto5.jpg

w845.png

  • 2 weeks later...

Finally got some pics uploaded of my new skyline.

1992 R32 GTST type M. - 155rwkw - stock boost.

Black

Manual

130,000kms

ARC side mount Intercooler (good for 200rwkw +)

K&N Panel filter

Iridium platnum spark plugs

R33 turbo (std boost 10psi) std turbo also supplied.

HKS split dump pipe

HKS front pipe

Catco cat converter high flow

Trust PE11 power extreme cat back exhaust

Cam gears fitted and tuned for mid-range

Computer re-map by Dr-Drift

Oil cooler and filter relocater kit with modifyed inner wheel arch to allow more air flow

GTR Front brake upgrade

DBA 4000 Wiper slot rotors all round (near new)

New and upgraded suspension bush's fitted (Caster/front camber/pineapples)

Bilsteins shocks fitted front and rear almost new (Height adjustable)

Whiteline adjustable sway bars front and rear

Hi cas lock bar

Strut braces front and rear

Walbro fuel pump up-grade

GTR front seats (std ones thrown in)

turbo timer

3 point car alarm

Tinted windows

CD player with remote

PA190022.jpg

PA190020.jpg

Edited by livo

Create an account or sign in to comment

You need to be a member in order to leave a comment

Create an account

Sign up for a new account in our community. It's easy!

Register a new account

Sign in

Already have an account? Sign in here.

Sign In Now


  • Similar Content

  • Latest Posts

    • Did this end up working? Did you take some pictures?
    • And finally, the front lower mount. It was doubly weird. Firstly, the lower mount is held in with a bracket that has 3 bolts (it also acts as the steering lock stop), and then a nut on the shock lower mount itself. So, remove the 3x 14mm head bolts , then the 17mm nut that holds the shock in. From there, you can't actually remove the shock from the lower mount bolt (took me a while to work that out....) Sadly I don't have a pic of the other side, but the swaybar mounts to the same bolt that holds the shock in. You need to push that swaybar mount/bolt back so the shock can be pulled out past the lower control arm.  In this pic you can see the bolt partly pushed back, but it had to go further than that to release the shock. Once the shock is out, putting the new one in is "reverse of disassembly". Put the top of the shock through at least one hole and put a nut on loosely to hold it in place. Put the lower end in place and push the swaybar mount / shock bolt back in place, then loosely attach the other 2 top nuts. Bolt the bracket back in place with the 14mm head bolts and finally put the nut onto the lower bolt. Done....you have new suspension on your v37!
    • And now to the front.  No pics of the 3 nuts holding the front struts on, they are easy to spot. Undo 2 and leave the closest one on loosely. Underneath we have to deal with the wiring again, but this time its worse because the plug is behind the guard liner. You'll have to decide how much of the guard liner to remove, I undid the lower liner's top, inside and lower clips, but didn't pull it full off the guard. Same issue undoing the plug as at the rear, you need to firmly push the release clip from below while equally firmly gripping the plug body and pulling it out of  the socket. I used my fancy electrical disconnect pliers to get in there There is also one clip for the wiring, unlike at the rear I could not get behind it so just had to lever it up and out.....not in great condition to re-use in future.
    • Onto the rear lower shock mount. It's worth starting with a decent degrease to remove 10+ years of road grime, and perhaps also spray a penetrating oil on the shock lower nut. Don't forget to include the shock wiring and plug in the clean.... Deal with the wiring first; you need to release 2 clips where the wiring goes into the bracket (use long nose pliers behind the bracket to compress the clip so you can reuse it), and the rubber mount slides out, then release the plug.  I found it very hard to unplug, from underneath you can compress the tab with a screwdriver or similar, and gently but firmly pull the plug out of the socket (regular pliers may help but don't put too much pressure on the plastic. The lower mount is straightforward, 17mm nut and you can pull the shock out. As I wasn't putting a standard shock back in, I gave the car side wiring socket a generous gob of dialectric grease to keep crap out in the future. Putting the new shock in is straightforward, feed it into at least 1 of the bolt holes at the top and reach around to put a nut on it to hold it up. Then put on the other 2 top nuts loosely and put the shock onto the lower mounting bolt (you may need to lift the hub a little if the new shock is shorter). Tighten the lower nut and 3 upper nuts and you are done. In my case the BC Racing shocks came assembled for the fronts, but the rears needed to re-use the factory strut tops. For that you need spring compressors to take the pressure off the top nut (they are compressed enough when the spring can move between the top and bottom spring seats. Then a 17mm ring spanner to undo the nut while using an 8mm open spanner to stop the shaft turning (or, if you are really lucky you might get it off with a rattle gun).
    • You will now be able to lift the parcel shelf trim enough to get to the shock cover bolts; if you need to full remove the parcel shelf trim for some reason you also remove the escutcheons around the rear seat release and you will have to unplug the high stop light wiring from the boot. Next up is removal of the bracket; 6 nuts and a bolt Good news, you've finally got to the strut top! Remove the dust cover and the 3 shock mount nuts (perhaps leave 1 on lightly for now....) Same on the other side, but easier now you've done it all before
×
×
  • Create New...