Jump to content
SAU Community

Recommended Posts

Hey everyone,

I've always wanted to start a thread and constantly update it over the years with new mods etc, then look back at the progress and see how far it's come. So here it is!

DSC02127.thumb.jpg.d230511bcfe8a7fad466267c209c71e8.jpg

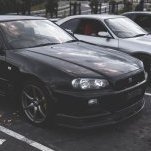
This is my 2001 Skyline R34 GTR. It was a grade 4B at the auctions and was exported on the 2nd of March 2018. I later purchased it from a local dealer here in Sydney on the 21st of December 2018 as a nice little Christmas present to myself. 


20181217_171244.thumb.jpg.b74c8d2e87bb7d01480a8e3d3f2a1bea.jpg

(Picking it up from the dealer)


20181217_171300.thumb.jpg.e143dc99c3bcd7f68b705ebdcf086b58.jpg


20181221_175939.thumb.jpg.4ccba7596af2ff7d141dda32d87363cc.jpg

(Bringing her home)


20181221_175958.thumb.jpg.4f8dee4d3ec55898296578ec2fedea20.jpg

As you could imagine I was ecstatic about finally owning a car I have only dreamed about. Although I did pay a premium price for it, it was worth every penny to me (and that's all that really matters).

Theres not much to say about it really. It is a base model and had absolutely no modifications done to it, but that will slowly change over time as you guys will see in this thread! That same weekend I bought a new Kenwood head unit and Alpine speakers to replace the factory speakers and crappy aftermarket head unit that was already in the car. At the time I didn't think of taking any photos of the install but I don't think that is too interesting anyways haha.

After about two months of owning the car, it was time to find a good exhaust system so I could listen to that RB26 in all of it's glory! I found someone selling some near new HKS front pipes, high-flow cat and Tomei Expreme Ti cat-back which I jumped on straight away and got myself a bargain!

Then around mid-June 2019 I got myself a brand new NISMO Intercooler off a member on this forum, installed it and colour matched the front lip to the rest of the car.

DSC06546.thumb.jpg.b21e7be1920d79731975ca08dbd4ebb8.jpg

Fast forward to last weekend where I replaced the factory clutch and duel-mass flywheel for a NISMO twin plate and boy does that clutch feel so good. I'm not going to be chasing 1000hp like most GTR's in Sydney, but this clutch install should be overkill for the power level I want out of it.


20200718_095149.thumb.jpg.b1e0a906d29d5a7b67aeecd9f4820eb5.jpg

(Pulling the clutch out at my work. Definitely not something I wanted to do on my garage floor and my boss was kind enough to let me come in on the weekend and use a hoist so I could replace it)


20200726_144056.thumb.jpg.440d327ba50a0a6635ddeba89ec1dcf3.jpg

(Stock clutch ready to be replaced)


20200718_100501.thumb.jpg.9a98444ba0b91e20c95129aa6fd84b66.jpg

(Definitely needs a good clean up in there)


20200726_144042.thumb.jpg.18932667883a7dfb2386c36dea1a0739.jpg

(New clutch, rear main seal and spigot bearing installed)


20200718_110812.thumb.jpg.9b85280490dc79da24e7dc1d6017d9ef.jpg

(Bell housing cleaned up nicely with new release bearing)

Really impressed with how easy it is to use the NISMO twin plate. Feels just like the stock one with a bit more bite. Anyways, that's a quick catch up of what life has been like for the past year and a half of ownership. More exciting things to come! I hope you guys enjoy the journey with me. Until next time ✌️

  • Like 9
Link to comment
https://www.sau.com.au/forums/topic/480835-my-bnr34-build-journal/
Share on other sites

23 hours ago, oski said:

Hey everyone,

I've always wanted to start a thread and constantly update it over the years with new mods etc, then look back at the progress and see how far it's come. So here it is!

DSC02127.thumb.jpg.d230511bcfe8a7fad466267c209c71e8.jpg

This is my 2001 Skyline R34 GTR. It was a grade 4B at the auctions and was exported on the 2nd of March 2018. I later purchased it from a local dealer here in Sydney on the 21st of December 2018 as a nice little Christmas present to myself. 


20181217_171244.thumb.jpg.b74c8d2e87bb7d01480a8e3d3f2a1bea.jpg

(Picking it up from the dealer)


20181217_171300.thumb.jpg.e143dc99c3bcd7f68b705ebdcf086b58.jpg


20181221_175939.thumb.jpg.4ccba7596af2ff7d141dda32d87363cc.jpg

(Bringing her home)


20181221_175958.thumb.jpg.4f8dee4d3ec55898296578ec2fedea20.jpg

As you could imagine I was ecstatic about finally owning a car I have only dreamed about. Although I did pay a premium price for it, it was worth every penny to me (and that's all that really matters).

Theres not much to say about it really. It is a base model and had absolutely no modifications done to it, but that will slowly change over time as you guys will see in this thread! That same weekend I bought a new Kenwood head unit and Alpine speakers to replace the factory speakers and crappy aftermarket head unit that was already in the car. At the time I didn't think of taking any photos of the install but I don't think that is too interesting anyways haha.

After about two months of owning the car, it was time to find a good exhaust system so I could listen to that RB26 in all of it's glory! I found someone selling some near new HKS front pipes, high-flow cat and Tomei Expreme Ti cat-back which I jumped on straight away and got myself a bargain!

Then around mid-June 2019 I got myself a brand new NISMO Intercooler off a member on this forum, installed it and colour matched the front lip to the rest of the car.

DSC06546.thumb.jpg.b21e7be1920d79731975ca08dbd4ebb8.jpg

Fast forward to last weekend where I replaced the factory clutch and duel-mass flywheel for a NISMO twin plate and boy does that clutch feel so good. I'm not going to be chasing 1000hp like most GTR's in Sydney, but this clutch install should be overkill for the power level I want out of it.


20200718_095149.thumb.jpg.b1e0a906d29d5a7b67aeecd9f4820eb5.jpg

(Pulling the clutch out at my work. Definitely not something I wanted to do on my garage floor and my boss was kind enough to let me come in on the weekend and use a hoist so I could replace it)


20200726_144056.thumb.jpg.440d327ba50a0a6635ddeba89ec1dcf3.jpg

(Stock clutch ready to be replaced)


20200718_100501.thumb.jpg.9a98444ba0b91e20c95129aa6fd84b66.jpg

(Definitely needs a good clean up in there)


20200726_144042.thumb.jpg.18932667883a7dfb2386c36dea1a0739.jpg

(New clutch, rear main seal and spigot bearing installed)


20200718_110812.thumb.jpg.9b85280490dc79da24e7dc1d6017d9ef.jpg

(Bell housing cleaned up nicely with new release bearing)

Really impressed with how easy it is to use the NISMO twin plate. Feels just like the stock one with a bit more bite. Anyways, that's a quick catch up of what life has been like for the past year and a half of ownership. More exciting things to come! I hope you guys enjoy the journey with me. Until next time ✌️


Great looking car mate! Very tasteful mods so far.

Hopefully I can be a proud owner of one of these one day.. currently building my 32 gtr.

  • Like 1
  • 3 months later...

Quick little update,

I screwed up the paint on my car... 🙃 don't worry, there's a happy ending to this!


So turtle wax have come out with a black polish that is ceramic infused and I decided to give it a go. However, before giving the car a quick polish I gave it a wash and went over it with a clay bar (and clay lube!) only to find it left horrendous marks on the paint after drying.

20201018_114355.thumb.jpg.7bf4cec03dd7110b2389f75df49be324.jpg 20201018_170054.thumb.jpg.c697c1b3f16f4b290bc37a69188b6252.jpg20201018_170137.thumb.jpg.b3b2625dc8e6a85faad05b1f3a1c54dd.jpg


What was supposed to be a day of me treating the car to a nice clean inside and out, along with a light polish to make her pop again quickly turned into my worst nightmare. I went over it with the turtle wax polish but the scratches were too deep and needed a heavier cut to get them out. I neither had the tools or the skill for the job so it was time to send it to someone who actually knows what they're doing...and here is the result!


20201101_180630.thumb.jpg.9ef3e77e3983416ab483538a3011647b.jpg20201101_180842.thumb.jpg.20b44388cffed563e858f911f99c76e2.jpg20201101_180849.thumb.jpg.7dd1faff33e2adc1b9ec2cdb9640bfb4.jpg


Stage 2 paint correction with ceramic coating and boy is this thing glossy!! Not a single swirl mark left behind and unbelievably smooth to the touch. Plus the added protection should make cleaning this a breeze. I'll get some more photos of it in the sun but I am so happy with the result! More news coming in the next couple of weeks 🤫🤔


Edited by oski
  • Like 1
  • 5 months later...
On 01/11/2020 at 10:35 PM, oski said:

More news coming in the next couple of weeks 🤫🤔


I lied. It's been almost 6 months 😅

I finally got a new set of wheels for the ol' girl! 2020 Nismo LMGT4 in omori black 19x10.5 +15. I ordered these wheels back in August 2020 and didn't receive them until the end of January 2021! Although I may have lost my patience towards the end of that it definitely was worth the wait.

IMG_0212.thumb.jpg.6b97ad989c87f2c30eca6e0fcaf250e7.jpgIMG_0217.thumb.jpg.a09b67a762c107e59b27738ca4835f03.jpg

I wrapped them in some Michelin Pilot Sport 4s 275/30/19 and I think they completely transformed the car! Decided to go take some photos of the car out in the city lights and damn she looks good 😍 

DSC09978-Edit-2.thumb.JPG.9524c93f8226a904beafc4a62bc3c8d2.JPGDSC09963-Edit-2.thumb.JPG.58f30a85a2bc73c76f021f8d1e8099c9.JPGDSC09986-Edit-2.thumb.JPG.d95523afb0ceecad0ffe0ceee9b2f006.JPGDSC09988-Edit-2.thumb.JPG.f7bc008480df9290c965d0ff8ac60ac3.JPG

Shameless plug; if you like what you see follow me on instagram @ oski.gtr or my photography page @ ockn.photo

Edited by oski
  • Like 2

Create an account or sign in to comment

You need to be a member in order to leave a comment

Create an account

Sign up for a new account in our community. It's easy!

Register a new account

Sign in

Already have an account? Sign in here.

Sign In Now


  • Similar Content

  • Latest Posts

    • Hi, is the HKS  Tower Bar still available ? negotiable ? 🤔
    • From there, it is really just test and assemble. Plug the adapter cables from the unit into the back of the screen, then the other side to the car harness. Don't forget all the other plugs too! Run the cables behind the unit and screw it back into place (4 screws) and you should now have 3 cables to run from the top screen to the android unit. I ran them along the DS of the other AV units in the gap between their backets and the console, and used some corrugated tubing on the sharp edges of the bracket so the wires were safe. Plug the centre console and lower screen in temporarily and turn the car to ACC, the AV should fire up as normal. Hold the back button for 3 sec and Android should appear on the top screen. You need to set the input to Aux for audio (more on that later). I put the unit under the AC duct in the centre console, with the wifi antenna on top of the AC duct near the shifter, the bluetooth antenna on the AC duct under the centre console The GPS unit on top of the DS to AC duct; they all seem to work OK there are are out of the way. Neat cable routing is a pain. For the drive recorder I mounted it near the rear view mirror and run the cable in the headlining, across the a pillar and then down the inside of the a pillar seal to the DS lower dash. From there it goes across and to one USB input for the unit. The second USB input is attached to the ECUtec OBD dongle and the 3rd goes to the USB bulkhead connected I added in the centre console. This is how the centre console looks "tidied" up Note I didn't install the provided speaker, didn't use the 2.5mm IPod in line or the piggyback loom for the Ipod or change any DIP switches; they seem to only be required if you need to use the Ipod input rather than the AUX input. That's it, install done, I'll follow up with a separate post on how the unit works, but in summary it retains all factory functions and inputs (so I still use my phone to the car for calls), reverse still works like factory etc.
    • Place the new daughterboard in the case and mount it using the 3 small black rivets provided, and reconnect the 3 factory ribbon cables to the new board Then, use the 3 piggyback cables from the daughterboard into the factory board on top (there are stand offs in the case to keep them apart. and remember to reconnect the antenna and rear cover fan wires. 1 screw to hold the motherboard in place. Before closing the case, make a hole in the sticker covering a hole in the case and run the cable for the android unit into the plug there. The video forgot this step, so did I, so will you probably. Then redo the 4 screws on back, 2 each top and bottom, 3 each side and put the 2 brackets back on.....all ready to go and not that tricky really.      
    • Onto the android unit. You need to remove the top screen because there is a daughterboard to put inside the case. Each side vent pops out from clips; start at the bottom and carefully remove upwards (use a trim remover tool to avoid breaking anything). Then the lower screen and controls come out, 4 screws, a couple of clips (including 3 flimsy ones at the top) and 3 plugs on the rear. Then the upper screen, 4 screws and a bunch of plugs and she is out. From there, remove the mounting brackets (2 screws each), 4 screws on the rear, 2 screws top and bottom and 3 screws holding in the small plates on each side. When you remove the back cover (tight fit), watch out for the power cable for the fan, I removed it so I could put the back aside. The mainboard is held in by 1 screw in the middle, 1 aerial at the top and 3 ribbon cables. If you've ever done any laptop stuff the ribbon cables are OK to work with, just pop up the retainer and they slide out. If you are not familiar just grab a 12 year old from an iphone factory, they will know how it works The case should now look like this:
    • Switching the console was tricky. First there were 6 screws to remove, and also the little adapter loom and its screws had to come out. Also don't forget to remove the 2 screws holding the central locking receiver. Then there are 4 clips on either side....these were very tight in this case and needed careful persuading with a long flat screw driver....some force required but not enough to break them...this was probably the fiddliest part of the whole job. In my case I needed both the wiring loom and the central locking receiver module to swap across to the new one. That was it for the console, so "assembly is the reverse of disassembly"
×
×
  • Create New...