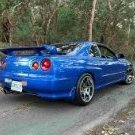
Skyracer [SE] Posted September 2, 2004 Share Posted September 2, 2004 Here are some pictures of my "car stereo" or what it can be called. The car has a power outlet so I can just plug it into 220V. Head unit: Pioneer P6500DVD Front speakers: Rockford Fosgate P162S Back speakers: Rockford Fosgate T162C Boot speakers: Rockford Fosgate T162C Boot subs (x2): Rockford Fosgate P312D2 Amp coupé: Rockford Fosgate P4004 Amp subs: Rockford Fosgate P6002 Power build up (dont know the english word): Rockford Fosgate CPCD10-03 DVD montors: Built in motorized in head unit, 13" in boot, 7" WS in sun visor I can promise you, this sounds good! Regards Håkan www.skyline.se Link to comment https://www.sau.com.au/forums/topic/50186-r33-show-car/ Share on other sites More sharing options...
Skyracer [SE] Posted September 2, 2004 Author Share Posted September 2, 2004 Here is a movie from the Swedish Skyline Meet last week where you can see my car popping some music from the trunk. http://www.skyline.se/filmer/bosse/skyline...ortbilen.se.wmv Regards Håkan www.skyline.se Link to comment https://www.sau.com.au/forums/topic/50186-r33-show-car/#findComment-998117 Share on other sites More sharing options...
P1E Posted September 2, 2004 Share Posted September 2, 2004 Nice. What's it worth all up? I'm keen to do something similar with my boot. Not show car styles, but just to reclaim some space as I currently have 2 x 12 inch Pioneer subs in a box that takes up 90% of my boot. Where do you even start with something like this? How hard is it to relocate the battery? What's the black Punch screen thing made of? I would want to keep the spare tyre too, which throws a spanner in the works. Good work though, it looks good. Link to comment https://www.sau.com.au/forums/topic/50186-r33-show-car/#findComment-998301 Share on other sites More sharing options...
astroboi Posted September 2, 2004 Share Posted September 2, 2004 would love some DIY instructions on how to do something like that for yourself i too have 2 12inch pioneer subs and they take up 90% of my boot as well so i am looking to do something like this one and it sure looks good... that's not fibreglass isit? just carpetted over? Link to comment https://www.sau.com.au/forums/topic/50186-r33-show-car/#findComment-998421 Share on other sites More sharing options...
P1E Posted September 3, 2004 Share Posted September 3, 2004 Looks like fibreglass to me. Link to comment https://www.sau.com.au/forums/topic/50186-r33-show-car/#findComment-999594 Share on other sites More sharing options...
Skyracer [SE] Posted September 26, 2004 Author Share Posted September 26, 2004 It does not cost that much since im sponsored by BRL in Sweden. I started by phoning them, and say "Of course you want to be first in Sweden with a Skyline-stereo-car" The relocation of the battery is not hard, just move it. Of course some wire relocation is necessary. I have 2 Punch amps in the trunk (one for the subs and one for the system inside the car), one is straight ahead and 1 is in the right side wall. They actually look like that in the bottom, yes it is the bottom of the amp that is showing. It will look better now that we have recieved better lights to light up the amps, battery and so on. There is no spare tyre, I only have "Spare tyre in can". However Im thinking of building something for the spare tyre, nos-tube, xbox instead of the back seat. It's fibreglass and then with carpet over it. I will see if we will paint or something on top of the carpet during this winter... And now, here are the building pics: http://www.skyline.se/skyracer/webgallerie...build/index.htm Regards Håkan www.skyline.se/skyracer Link to comment https://www.sau.com.au/forums/topic/50186-r33-show-car/#findComment-1026591 Share on other sites More sharing options...
martydaman Posted September 26, 2004 Share Posted September 26, 2004 looking good... keep us posted with your progress Link to comment https://www.sau.com.au/forums/topic/50186-r33-show-car/#findComment-1026617 Share on other sites More sharing options...
Guest RedLineGTR Posted September 26, 2004 Share Posted September 26, 2004 awesome Link to comment https://www.sau.com.au/forums/topic/50186-r33-show-car/#findComment-1026633 Share on other sites More sharing options...
Skyracer [SE] Posted October 11, 2004 Author Share Posted October 11, 2004 Step 2: Regards Håkan Link to comment https://www.sau.com.au/forums/topic/50186-r33-show-car/#findComment-1046289 Share on other sites More sharing options...
martydaman Posted October 12, 2004 Share Posted October 12, 2004 very nice... what else are you planning to do? i dont see what else can be done. Link to comment https://www.sau.com.au/forums/topic/50186-r33-show-car/#findComment-1046715 Share on other sites More sharing options...
Skyracer [SE] Posted October 14, 2004 Author Share Posted October 14, 2004 This is the whole trunk right now. More? Yes ofcourse, how about a 13" monitor and a speaker kit in the inside of the trunk door? Hopefully next week... Regards Håkan Link to comment https://www.sau.com.au/forums/topic/50186-r33-show-car/#findComment-1050610 Share on other sites More sharing options...
Fhrx Posted October 14, 2004 Share Posted October 14, 2004 Looking the good now hey! Well done. Link to comment https://www.sau.com.au/forums/topic/50186-r33-show-car/#findComment-1051101 Share on other sites More sharing options...
drifta Posted October 15, 2004 Share Posted October 15, 2004 very very nice Link to comment https://www.sau.com.au/forums/topic/50186-r33-show-car/#findComment-1052581 Share on other sites More sharing options...
chaos Posted October 17, 2004 Share Posted October 17, 2004 love the video, subs sounds awesome Link to comment https://www.sau.com.au/forums/topic/50186-r33-show-car/#findComment-1054263 Share on other sites More sharing options...
Skyracer [SE] Posted October 29, 2004 Author Share Posted October 29, 2004 Inside of the car. DVD player with monitor in centre. 6.5" midrange in original door hole. Double Rockford (yes it comes standard with double speakers) high range on door. Regards Håkan Link to comment https://www.sau.com.au/forums/topic/50186-r33-show-car/#findComment-1071801 Share on other sites More sharing options...
Skyracer [SE] Posted October 29, 2004 Author Share Posted October 29, 2004 A 13" inch monitor and Rockford speakers added! Regards Håkan Link to comment https://www.sau.com.au/forums/topic/50186-r33-show-car/#findComment-1071802 Share on other sites More sharing options...
Guest RedLineGTR Posted October 29, 2004 Share Posted October 29, 2004 looks great...very nice install Link to comment https://www.sau.com.au/forums/topic/50186-r33-show-car/#findComment-1071835 Share on other sites More sharing options...
someonestolecc Posted October 29, 2004 Share Posted October 29, 2004 *drool* thats crazy nice! Link to comment https://www.sau.com.au/forums/topic/50186-r33-show-car/#findComment-1072032 Share on other sites More sharing options...
martydaman Posted October 29, 2004 Share Posted October 29, 2004 very sweet... looking better everytime Link to comment https://www.sau.com.au/forums/topic/50186-r33-show-car/#findComment-1072037 Share on other sites More sharing options...
uk_skyman Posted November 19, 2004 Share Posted November 19, 2004 The install looks realy great... but How do you change the bulbs? have you got pull out pannels etc?? Thanks Dean Link to comment https://www.sau.com.au/forums/topic/50186-r33-show-car/#findComment-1093360 Share on other sites More sharing options...

![Skyracer [SE]](http://saufiles.s3.ap-southeast-2.amazonaws.com/profile/photo-thumb-13133.jpg)


Recommended Posts
Create an account or sign in to comment
You need to be a member in order to leave a comment
Create an account
Sign up for a new account in our community. It's easy!
Register a new accountSign in
Already have an account? Sign in here.
Sign In Now