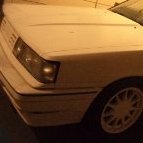
lorddavros Posted August 6, 2005 Share Posted August 6, 2005 here i have an old 79 skyline and i have no idea what model it is or any details about it. does anyone know what its specs are if its a good car and what ppl think of the model thanks Link to comment https://www.sau.com.au/forums/topic/83064-old-skyline/ Share on other sites More sharing options...
SteveL Posted August 6, 2005 Share Posted August 6, 2005 here i have an old 79 skyline and i have no idea what model it is or any details about it. does anyone know what its specs are if its a good car and what ppl think of the modelthanks C210 Skyline. Had one exactly like it many years ago. Quite good cars compared with what was available from Ford/Holden at the time. Possibly a little cramped inside, but well fitted out. IMHO the model was let down badly by the engine (carb'd....L24S), which was underpowered and performance suffered particularly as an auto. Manuals were a bit better. All-in-all good, solid cars, but benefit greatly from a power upgrade. Steering is another weak area being recirc ball with many links in the system. Link to comment https://www.sau.com.au/forums/topic/83064-old-skyline/#findComment-1503734 Share on other sites More sharing options...
lorddavros Posted August 6, 2005 Author Share Posted August 6, 2005 thanks for the info steve. being a newbi in the world of nissans what type of engine swaps/upgrades are avaliable. do they take kindly to being turbocharged.???? or can the current enging be brought back to life with some mode... it was just rebuilt b4 i got it ... done approx 10,000kms.. so they said Link to comment https://www.sau.com.au/forums/topic/83064-old-skyline/#findComment-1503740 Share on other sites More sharing options...
SteveL Posted August 6, 2005 Share Posted August 6, 2005 thanks for the info steve.being a newbi in the world of nissans what type of engine swaps/upgrades are avaliable. do they take kindly to being turbocharged.???? or can the current enging be brought back to life with some mode... it was just rebuilt b4 i got it ... done approx 10,000kms.. so they said When I had mine turbocharging was unheard of. I fitted a modified L28 engine with 240Z carb's and it went very well after that . After I got tired of carbs I fitted it with a hybrid EFI system using cheap (at the time) D-jet system parts....but that's a fair bit of work. It's possible to fit aftermarket cams to the stock L24 and get some improvement, but in the end the L24S is severely restricted by it's intake ports, valve sizes and relatively low CR. I suppose turbo-charging is an option, but personally I wouldn't bother as it's possible to drop in an RB20DET relatively cheaply - probably cheaper than modifying an L24 to do the job properly. I think it's been discussed before, so suggest doing a search in the first instance. Another option is L28 turbo, but finding the parts is an issue. Link to comment https://www.sau.com.au/forums/topic/83064-old-skyline/#findComment-1503764 Share on other sites More sharing options...
lorddavros Posted August 6, 2005 Author Share Posted August 6, 2005 excellent thanks for that .. mabey i will have to persue somthing like the rb20 dont suppose you know what the model of the car is called.. i cant find any searches based on the year alone. Link to comment https://www.sau.com.au/forums/topic/83064-old-skyline/#findComment-1503798 Share on other sites More sharing options...
SteveL Posted August 6, 2005 Share Posted August 6, 2005 dont suppose you know what the model of the car is called.. i cant find any searches based on the year alone. The model is 'C210' in Nissan speak. Link to comment https://www.sau.com.au/forums/topic/83064-old-skyline/#findComment-1503816 Share on other sites More sharing options...
V8skylineMAN Posted August 7, 2005 Share Posted August 7, 2005 /wakes up......oh look another C210...theyre popping up everywhere lately....i just bought another coupe. currently i have 77 coupe (KMGC210), 79 coupe(KMGC210) and a 81 Sedan(MGC210)..... Welcome to the forums....there is a wealth of info here, and many people willing to help.... Link to comment https://www.sau.com.au/forums/topic/83064-old-skyline/#findComment-1505310 Share on other sites More sharing options...
lorddavros Posted August 7, 2005 Author Share Posted August 7, 2005 hey there thanks for the welcome.. any idea how easy it is to put a rb20 into the old c210's.. or any other ideas you might have for a power up.. as i dont really fancy driving a 1.2 tonne car with only 97kw of power also does anyone have any idea whre i could get a turb set up for one??? or a rb20 Link to comment https://www.sau.com.au/forums/topic/83064-old-skyline/#findComment-1505447 Share on other sites More sharing options...
V8skylineMAN Posted August 7, 2005 Share Posted August 7, 2005 as far as i know the gearbox xmember will accept the rb20 box, and you only have to slot the drivers side engine mount 10-15 mm......but my memory sux so i may be wrong. I am currently fitting an RB30 to my second coupe. so ill let you know how that goes Link to comment https://www.sau.com.au/forums/topic/83064-old-skyline/#findComment-1506551 Share on other sites More sharing options...
racsov500 Posted August 16, 2005 Share Posted August 16, 2005 Good to know it went to a good home That one you have was on ebay, does it go well? what a bargain Link to comment https://www.sau.com.au/forums/topic/83064-old-skyline/#findComment-1525114 Share on other sites More sharing options...
lorddavros Posted August 17, 2005 Author Share Posted August 17, 2005 hahaha yeah it is.... lol not bad at all... not sure weather to get an ex sys for it yet.. dont want the police defecting me n stuff..... neone know of any sa cruises going on soon? Link to comment https://www.sau.com.au/forums/topic/83064-old-skyline/#findComment-1527842 Share on other sites More sharing options...


Recommended Posts
Create an account or sign in to comment
You need to be a member in order to leave a comment
Create an account
Sign up for a new account in our community. It's easy!
Register a new accountSign in
Already have an account? Sign in here.
Sign In Now