Jump to content
SAU Community

Recommended Posts

Noticed we go off topic about it in pretty much every thread so thought I'd post this up.

Currently I have no idea how my line is going, haha, to lazy to check and enjoying the cheap mileage in the mazda. But the clutch FINALLY arrived last tuesday and that was the only thing left to get in before it all goes together. So shouldn't be far (I hope).

Link to comment
https://www.sau.com.au/forums/topic/91189-whats-going-on-with-everyones-cars/
Share on other sites

Noticed we go off topic about it in pretty much every thread so thought I'd post this up.

Currently I have no idea how my line is going, haha, to lazy to check and enjoying the cheap mileage in the mazda. But the clutch FINALLY arrived last tuesday and that was the only thing left to get in before it all goes together. So shouldn't be far (I hope).

Well my car is still the POS it was yesterday, and the day before that and the day before that.

Still haven't had time or place to fit the FMIC or the oil cooler and as they are not on i have not put the Power FC back in nor have i had it tuned :P

Now with the new job offer and my change in plans (looking buying a Q) i think it maybe time to sell the car and buy a van and pimp that so i got something to put the new toy in when i can afford it :)

When you coming down to use the kart TIMMAY :)

Cheers B

The poor old redtop RB20DET in my R31 coupe cracked the shits...

Cylinder 1 - 130psi

Cylinder 2 - 130psi

Cylinder 3 - 130psi

Cylinder 4 - 130psi

Cylinder 5 - 130psi

Cylinder 6 - 0psi

Plus turbo is stuffed. So it hasn't moved in nearly 2 months. Anyone got a cheap RB20DET? doesn't matter, haven't got any money anyway, lol.

just got my FMIC on after making the piping, which is very time consuming and frustrating to get right! just gotta tidy up some clamps etc and throw the front bar back on.

will be nice to try it out in 13 days time.....

cheers

Looks good Bart, bet it will make a bit of a difference :D

I got to pull my finger out and get mine on, i had a crack the other day but its a pain in the arse doing it by yaself so i didn't continue on with it :)

I KNOW IM A LAZY MOFO :)

Im still working out my delima with my low/high beam lights as im not paying $200 for globes :(

Cheers B

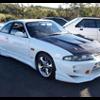
PS: i wased my car and it looks all pretty like TIMMAY :lol:

post-17838-1129874941.jpg

post-17838-1129875064.jpg

Edited by grandmasterb
if i looked that hot id probably wank in the mirror

what your trying to say blondy, u dont like my car and you dont think its sexy :lol:

GOT to loose the spoiler i think and maybe drop it an inch or so but other other than that its ok considering :P

Head lights modified and i can finally see at night and i didn't buy the $200 globes like i was supposed to :rolleyes:

Cheers B

  • 4 weeks later...

Ok fella's its been pretty quiet on the home front with this thread.

Im sure there has been some progress made with everyone, i know TIMMAY is spending up big still :D

COME on fella's post up and tell us how its going.

Paul you got the car running yet?

Tim how far away are ya with yours?

Bart i know you got your licence back so no doubt your too busy hooning around everywhere again :lol:

You get the front bar back on yet?

My car is coming along slowly, but im not in any rush. WIll update more when i get the next part finished.

Cheers B

OK, I figured I should add my bit as it is way to quite in the Tassie section!

Well, I got my car... R32 GTS-t

It came with an exhaust, pod filter (had to replace it as it had eaten itself), tomie boost gauge, tomie steering wheel, 17" Impul rims, alpine headunit and 12 stacker, racing harness, strut brace and turbo timer.

Front_Angle_Small.jpg

Rear_Bush_Small.jpg

Richmond%20003.jpg

So far I have removed the spoiler...

Spoiler%20Removed%20002.jpg

Spoiler%20Removed%20003.jpg

Spoiler%20Removed%20004.jpg

Installed a boost controller...

Skyline%20Boost%20001.jpg

Purchased some side skirts... still have to paint them, have some rear pods on the way.

Skyline%20Skirts%20001.jpg

Skyline%20Skirts%20002.jpg

Fitted a front mount intercooler...

Intercooler%20001.jpg

Intercooler%20002.jpg

Intercooler%20003.jpg

Intercooler%20004.jpg

Have purchased an aluminimum D1 Piping kit, still waiting for it to arrive.

I have also purchased an alarm system, lowered springs, stock suspension (with low k's) and am about to give it a full service including timing belt, brake pads/machining rotors, plugs, oil, coolant flush, gearbox oil, brake fluid and I think I will get the timing checked (after the belt).

Plans for the near future include tint, further stereo upgrades (just put in a TV, stacker and sub) I just got 2 12" subs and am looking at a boot build up next week as I have a week off... I probably get a T04 Turbo and high mount manifold and run around 17-20psi (until it goes pop :angry: )

I will stop going on now but thanks for reading!

I love having a turbo again and love the Skyline!

Todd

well with no other internal mods you can probably expect it to go pop pretty quick :(

Looks the goods though mate. You are getting the side skirts painted silver though yeah?

Ha Ha, yeah... I will paint them silver, and the pods at the same time. Also will have to do the mirrors, the front lip and some interior highlights!

Don't expect it to last long running that much boost, but will give me an excuse to rebuild with forged internals! :D

Should look heaps better dumped and with the skirts!

Todd

My new boost controller arrived yesterday (Blitz Dual SBC Spec-R), and I installed it last night. I had a quick play round with the settings last night, and it's pretty close to what I want, just need to fine tune the gain.

And I ordered this stereo surround last night, as the previous owner of my car, cut the cigger ligher and ash tray out.

trust1994-img600x450-1130463011dsc04351.jpg

Edited by sav man

Yeah well my latest update is I have been had by member "#33". Purchased some non existant springs for $120 and now his mobile is disconnected and won't reply to my messages. Also, just saw he is in the know bad traders list! :( so don't like my chances and have to go and talk to the cops! Anyone been through this? Guess I talk to the police and my bank?

Todd

have been through this, lost $1500, wasn't a happy camper. Just talk to the cops. I got nowhere with them and will never buy off a forum again. Buy everything off nengun now.

Damn shame, sorry to hear... it's sad to think some people think this is worth doing!!

Looks like I am a lucky one and after pushing a little :) I will be refunded (touch wood). Will let you know how things go, and will make sure I can trust the person before handing over any cash!

Todd

Create an account or sign in to comment

You need to be a member in order to leave a comment

Create an account

Sign up for a new account in our community. It's easy!

Register a new account

Sign in

Already have an account? Sign in here.

Sign In Now


  • Similar Content

  • Latest Posts

    • Did this end up working? Did you take some pictures?
    • And finally, the front lower mount. It was doubly weird. Firstly, the lower mount is held in with a bracket that has 3 bolts (it also acts as the steering lock stop), and then a nut on the shock lower mount itself. So, remove the 3x 14mm head bolts , then the 17mm nut that holds the shock in. From there, you can't actually remove the shock from the lower mount bolt (took me a while to work that out....) Sadly I don't have a pic of the other side, but the swaybar mounts to the same bolt that holds the shock in. You need to push that swaybar mount/bolt back so the shock can be pulled out past the lower control arm.  In this pic you can see the bolt partly pushed back, but it had to go further than that to release the shock. Once the shock is out, putting the new one in is "reverse of disassembly". Put the top of the shock through at least one hole and put a nut on loosely to hold it in place. Put the lower end in place and push the swaybar mount / shock bolt back in place, then loosely attach the other 2 top nuts. Bolt the bracket back in place with the 14mm head bolts and finally put the nut onto the lower bolt. Done....you have new suspension on your v37!
    • And now to the front.  No pics of the 3 nuts holding the front struts on, they are easy to spot. Undo 2 and leave the closest one on loosely. Underneath we have to deal with the wiring again, but this time its worse because the plug is behind the guard liner. You'll have to decide how much of the guard liner to remove, I undid the lower liner's top, inside and lower clips, but didn't pull it full off the guard. Same issue undoing the plug as at the rear, you need to firmly push the release clip from below while equally firmly gripping the plug body and pulling it out of  the socket. I used my fancy electrical disconnect pliers to get in there There is also one clip for the wiring, unlike at the rear I could not get behind it so just had to lever it up and out.....not in great condition to re-use in future.
    • Onto the rear lower shock mount. It's worth starting with a decent degrease to remove 10+ years of road grime, and perhaps also spray a penetrating oil on the shock lower nut. Don't forget to include the shock wiring and plug in the clean.... Deal with the wiring first; you need to release 2 clips where the wiring goes into the bracket (use long nose pliers behind the bracket to compress the clip so you can reuse it), and the rubber mount slides out, then release the plug.  I found it very hard to unplug, from underneath you can compress the tab with a screwdriver or similar, and gently but firmly pull the plug out of the socket (regular pliers may help but don't put too much pressure on the plastic. The lower mount is straightforward, 17mm nut and you can pull the shock out. As I wasn't putting a standard shock back in, I gave the car side wiring socket a generous gob of dialectric grease to keep crap out in the future. Putting the new shock in is straightforward, feed it into at least 1 of the bolt holes at the top and reach around to put a nut on it to hold it up. Then put on the other 2 top nuts loosely and put the shock onto the lower mounting bolt (you may need to lift the hub a little if the new shock is shorter). Tighten the lower nut and 3 upper nuts and you are done. In my case the BC Racing shocks came assembled for the fronts, but the rears needed to re-use the factory strut tops. For that you need spring compressors to take the pressure off the top nut (they are compressed enough when the spring can move between the top and bottom spring seats. Then a 17mm ring spanner to undo the nut while using an 8mm open spanner to stop the shaft turning (or, if you are really lucky you might get it off with a rattle gun).
    • You will now be able to lift the parcel shelf trim enough to get to the shock cover bolts; if you need to full remove the parcel shelf trim for some reason you also remove the escutcheons around the rear seat release and you will have to unplug the high stop light wiring from the boot. Next up is removal of the bracket; 6 nuts and a bolt Good news, you've finally got to the strut top! Remove the dust cover and the 3 shock mount nuts (perhaps leave 1 on lightly for now....) Same on the other side, but easier now you've done it all before
×
×
  • Create New...