Jump to content
SAU Community

Recommended Posts

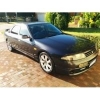
I don't if it's just me being a bit naive about the cost of things these days but I feel like I got well and truly ripped for my 100,00km service, i.e timing belt etc, on my S2 RS4.

So how much would you expect to pay for a major service?

In the first instance I will keep the cost and name of mechanic close to my chest but if he has done me over the sh*t will fly.

Link to comment
https://www.sau.com.au/forums/topic/233227-100000-km-service/
Share on other sites

Well dont forget that the timing belt should be done around that time too- so that

can add greatly to the over all cost- perhaps you should list what WAS done then we can all

have a look then pass judgement-

I don't if it's just me being a bit naive about the cost of things these days but I feel like I got well and truly ripped for my 100,00km service, i.e timing belt etc, on my S2 RS4.

So how much would you expect to pay for a major service?

In the first instance I will keep the cost and name of mechanic close to my chest but if he has done me over the sh*t will fly.

timing belt would be about $150 for aftermarket, if OEM almost double. - labour would be 2.0 hours at say $180

Lube service would be approx $250 depending on oils used (assuming engine and transfer and diffs)

At 100k should be coolant and waterpump. If waterpump OEM is $155, coolant is $65, labour on top of timing belt would be another hour so $90.

tune, assuming just a check tune not a dyno, should not be anymore than $100.

so total would be around $1,000.

depends what sparkies he put in? if he put iridium plugs in they are like $30 each so there is a $180 plus half hour to fit.

Air filter - assuming standard panel is (last time I checked) $79 and say 15 minutes to fit.

Fuel filter was $34 and say half hour to fit.

Yeah dood, that seems abit excessive by about $500 odd, did you get an itemised account?

you wont be able to sit down for a month mate, you have been well and truly ass raped if you paid anywhere next to 2k, my bill came to $600ish all oils timing belt water pump labour etc that was about a year ago.

when i got my cooler put on we both came to an idea do half the 100k service now and half later save on cost's ...oil - front diff, rear diff, auto trans oil , engine oil, oil filter, basicall all the fluids that looked old and coulnt wait .. but for that labour was only $240 parts was $148 .. in 6km more im getting timing belt and sparks done and change air filter and maybe fuel filter .. this is at a well reconized workshop also

umm .. I wouldnt agree with 1/2 hr to fit - they can be a b1tch to do as you gotta get SO much stuff out of the way before you do it. And if they were not familiar with an RB25DET it might take em twice that long .

HALF AN HOUR to fit a fuel filter! WTF!! thats a massive ripoff

Did they itemise the bill? if so maybe you could scan in and just blur out the workshop name.

2k - whoa baby! thats good motivation to learn to do it yourlself hey?

depends what sparkies he put in? if he put iridium plugs in they are like $30 each so there is a $180 plus half hour to fit.

Air filter - assuming standard panel is (last time I checked) $79 and say 15 minutes to fit.

Fuel filter was $34 and say half hour to fit.

Yeah dood, that seems abit excessive by about $500 odd, did you get an itemised account?

timing belts terrify me too - but apparently if you get the thing set up ok and obey the rules - ie keep an eye on where the pulleys are pointing etc- then your ok

oh well - after the 100thou service you should be able to DIY it and reclaim the 2k

Hell yeah, as of yesterday I have got myself a weekender in my mates workshop... I usually do my own services but when it came to timing belt etc I just cbf. Looks like I learnt a lesson the hard way.

Just thought I'd say that I got a quote from a reputable workshop in Adelaide who do a lot of work on imports and they said ~$1,250 (I can't remember the exact price, but it was around there).

This for a series 2 RS-Four V (auto), and they said everything got changed - plugs, fluids (diffs, auto, brake fluid) air cleaner, fuel filter, spark plugs, timing belt, idler & tensioner pulleys & water pump... I must say, considering the cost of components to do it yourself anyway, I'm still thinking about it... I know I can do it 'cause I've had it far enough apart before, but I just don't know if I can justify the time. Plus I could get them to do a couple of extra things like replace the exhaust manifold gasket and studs, checkout the manifold for cracks for hopefully not too much extra while they're there...

timing belts terrify me too - but apparently if you get the thing set up ok and obey the rules - ie keep an eye on where the pulleys are pointing etc- then your ok

oh well - after the 100thou service you should be able to DIY it and reclaim the 2k

I dont get this myself, I mean, if you are confident enough to remove the spark plugs you have all the skills required to change a timing belt, and it doesn't take that long really.

The ONLY golden rule to stress about is making sure the crank/cams aren't rotated if the timing belt is off, other than that, it is really simple to do.

Best way to learn is by doing.

Mine was almost $2500... :P but I had a cracked exhaust manifold (with 4 broken studs) and leaking main seal etc.. <sigh> But it was a new car afterwards. Had the usual work done with water pump, thermostat, plugs, timing belt (racing one) plus had engine mounts done, all acc. belts, vacuum hoses etc etc etc..

Just thought I'd say that I got a quote from a reputable workshop in Adelaide who do a lot of work on imports and they said ~$1,250 (I can't remember the exact price, but it was around there).

This for a series 2 RS-Four V (auto), and they said everything got changed - plugs, fluids (diffs, auto, brake fluid) air cleaner, fuel filter, spark plugs, timing belt, idler & tensioner pulleys & water pump... I must say, considering the cost of components to do it yourself anyway, I'm still thinking about it... I know I can do it 'cause I've had it far enough apart before, but I just don't know if I can justify the time. Plus I could get them to do a couple of extra things like replace the exhaust manifold gasket and studs, checkout the manifold for cracks for hopefully not too much extra while they're there...

I have to get mine done soon too, is this Boostworx?

Create an account or sign in to comment

You need to be a member in order to leave a comment

Create an account

Sign up for a new account in our community. It's easy!

Register a new account

Sign in

Already have an account? Sign in here.

Sign In Now


  • Similar Content

  • Latest Posts

    • Did this end up working? Did you take some pictures?
    • And finally, the front lower mount. It was doubly weird. Firstly, the lower mount is held in with a bracket that has 3 bolts (it also acts as the steering lock stop), and then a nut on the shock lower mount itself. So, remove the 3x 14mm head bolts , then the 17mm nut that holds the shock in. From there, you can't actually remove the shock from the lower mount bolt (took me a while to work that out....) Sadly I don't have a pic of the other side, but the swaybar mounts to the same bolt that holds the shock in. You need to push that swaybar mount/bolt back so the shock can be pulled out past the lower control arm.  In this pic you can see the bolt partly pushed back, but it had to go further than that to release the shock. Once the shock is out, putting the new one in is "reverse of disassembly". Put the top of the shock through at least one hole and put a nut on loosely to hold it in place. Put the lower end in place and push the swaybar mount / shock bolt back in place, then loosely attach the other 2 top nuts. Bolt the bracket back in place with the 14mm head bolts and finally put the nut onto the lower bolt. Done....you have new suspension on your v37!
    • And now to the front.  No pics of the 3 nuts holding the front struts on, they are easy to spot. Undo 2 and leave the closest one on loosely. Underneath we have to deal with the wiring again, but this time its worse because the plug is behind the guard liner. You'll have to decide how much of the guard liner to remove, I undid the lower liner's top, inside and lower clips, but didn't pull it full off the guard. Same issue undoing the plug as at the rear, you need to firmly push the release clip from below while equally firmly gripping the plug body and pulling it out of  the socket. I used my fancy electrical disconnect pliers to get in there There is also one clip for the wiring, unlike at the rear I could not get behind it so just had to lever it up and out.....not in great condition to re-use in future.
    • Onto the rear lower shock mount. It's worth starting with a decent degrease to remove 10+ years of road grime, and perhaps also spray a penetrating oil on the shock lower nut. Don't forget to include the shock wiring and plug in the clean.... Deal with the wiring first; you need to release 2 clips where the wiring goes into the bracket (use long nose pliers behind the bracket to compress the clip so you can reuse it), and the rubber mount slides out, then release the plug.  I found it very hard to unplug, from underneath you can compress the tab with a screwdriver or similar, and gently but firmly pull the plug out of the socket (regular pliers may help but don't put too much pressure on the plastic. The lower mount is straightforward, 17mm nut and you can pull the shock out. As I wasn't putting a standard shock back in, I gave the car side wiring socket a generous gob of dialectric grease to keep crap out in the future. Putting the new shock in is straightforward, feed it into at least 1 of the bolt holes at the top and reach around to put a nut on it to hold it up. Then put on the other 2 top nuts loosely and put the shock onto the lower mounting bolt (you may need to lift the hub a little if the new shock is shorter). Tighten the lower nut and 3 upper nuts and you are done. In my case the BC Racing shocks came assembled for the fronts, but the rears needed to re-use the factory strut tops. For that you need spring compressors to take the pressure off the top nut (they are compressed enough when the spring can move between the top and bottom spring seats. Then a 17mm ring spanner to undo the nut while using an 8mm open spanner to stop the shaft turning (or, if you are really lucky you might get it off with a rattle gun).
    • You will now be able to lift the parcel shelf trim enough to get to the shock cover bolts; if you need to full remove the parcel shelf trim for some reason you also remove the escutcheons around the rear seat release and you will have to unplug the high stop light wiring from the boot. Next up is removal of the bracket; 6 nuts and a bolt Good news, you've finally got to the strut top! Remove the dust cover and the 3 shock mount nuts (perhaps leave 1 on lightly for now....) Same on the other side, but easier now you've done it all before
×
×
  • Create New...