Jump to content
SAU Community

Recommended Posts

Hey everyone,

Well ITs been a LONG time since I decided I was serious about wanting an import. I couldn't do anything until I sold my first car (Subaru Liberty) so I sold that, which was about 3 months ago. I was looking at mainly R32's, R33's, S13's (although not preferable) and 180SX's, with the odd glance at Stagea's or a Toyota of some description. After MANY arguements with Dad about Turbo's he finally agreed to letting me own a 4cyl Turbo, and I found one.

Its a 1998 (according to ID Plate, 1995 according to rego???) 180SX. Its done 111,xxx km's and the only mods are the clear tail lights, 3inch cat back exhaust and coilovers. The guy gave me the stock tail lights incase I wanted to change them, but might leave it for now.

Overall its in good condition, there is a few chips that have been covered on the roof and a few small scratches, but only noticable if you're really looking. The drivers seat is slightly pushed in/squashed from getting in and out but the inteerior is in great condition also. It runs well and the gears are nice, but I wouldn't know much as it is my first.

I picked it up saturday morning and not driven manual for a good couple of weeks (been driving my sisters car around the block every now and then) I managed to stall it leaving the guys house :ermm:

But now I'm doing a lot better and a lot smoother.

Anyway I didn't tell ANY of my mates and since my two best mates were coming back from QLD that night, I ddecided to go pick them up in it, what a surprise haha!

So I've been driving it around all weekend, stupid idea was a bay run today. Insane traffic banked up. Getting used to it slowly.

Now with the year mix ups, I just got a mate to Nissan FAST it using the VIN, and it said it was made in 95/07. Why would the ID plate say 98 but the VIN from the same plate say its a 95

(which is what it is rego'd as). Very confusing, is there anything I can check to determine the year? Did they even make non type X models in 98? My original theory was they sold all the Type X bits and replaced them with standard parts, but thats obviously not right. Anyone know why it'd have 98 stamped in?

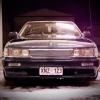
But anyway, it drives, so here's a few quick snaps from my phone over the weekend:

l_0dab85e0fd7b444a98a1c119569e29ed.jpg

l_86a19205e8744c439250ee4273f640a7.jpg

l_1d8c10e90be34222aab037f70236141f.jpg

l_c566aebe703749ae831f37b9bfef688e.jpg

l_7128cdd560194793b69e014cf28e6548.jpg

l_a5b5e0039d9d4b3ba3969e7ac8c39e95.jpg

l_83df839d324f406d95c9ff862f5d53af.jpg

I will post better pics when I take them (probably next weekend).

Thanks for looking! Tom.

Link to comment
https://www.sau.com.au/forums/topic/239905-my-new-car/
Share on other sites

  • Replies 51
  • Created
  • Last Reply

Top Posters In This Topic

Nice buy. I would personally be looking to replace them tail lights with a set of Type X rear tail lights :) what engine is it - CA or SR?

+1

get black drifteks on that and it will look king ,

let me know if you want to see what im talkin about ;)

Link to comment
https://www.sau.com.au/forums/topic/239905-my-new-car/#findComment-4190377
Share on other sites

Wow quick replys.

Its a Blacktop SR20DET, Manual.

Pete, taken straight from the ad on carpoint: 'SR20 Black Top Motor, 3 Inch Exhaust System from the CAT Back, Coil Over Suspension, LED Tail Lights (Have original Tail Lights), Car Alarm / Immobiliser, Keyless Entry, CD / Mini Disk Player, Serviced & in good condition, RAA Checked & able to view report,

Complied December 2007'

So 98 can't be compliance date.

I won't be doing any mods for a while, or atleast until I build my bank account back up! I'll probably get a new head unit and the side window visors forst, then think about a Type X wing and tail lights and maybe a rear window spoiler. Rims, well I was thinking bronze/gold XD9's? But thats a long way off yet.

Interior pics will come later. Here's the one from carpoint:

4308188.jpg

Engine:

4209066.jpg

And Mitch care to share your pics?

Link to comment
https://www.sau.com.au/forums/topic/239905-my-new-car/#findComment-4190405
Share on other sites

Yeah, XD9's aren't that expensive though mate. Just abit over $3,000 with tires. 18x8.5 and 18x9.5 with 35 offset would sit nice on that. Bit of dish etc. You wouldn't really need a kit on it, would look tough (and different) with the stock one on. That's all you would really need to do exterior wise. Keep it clean and keep it simple.

Link to comment
https://www.sau.com.au/forums/topic/239905-my-new-car/#findComment-4190420
Share on other sites

yeah i like white 180's pretty much all 180's cept for champagne gold :)

if you want tinted windows and a better alarm ring Ric from Auto Perfection let him know Steve from Skylines Australia told you to go there

Don't get drift-teks, everyone has them. Wait for the AUS$ to strengthen and get some good Jap rims under yourself.

+1

Link to comment
https://www.sau.com.au/forums/topic/239905-my-new-car/#findComment-4190421
Share on other sites

Thanks Steve, its actually got a Cyclops alarm, so its alright, will keep the tint in mind.

Unfortunately I gotta wait a while before I can spend any on it, as I did have to pay cash so my bank account is very low. Unlike most people my age, I have to pay for it myself.

Link to comment
https://www.sau.com.au/forums/topic/239905-my-new-car/#findComment-4190431
Share on other sites

Thanks Steve, its actually got a Cyclops alarm, so its alright, will keep the tint in mind.

Unfortunately I gotta wait a while before I can spend any on it, as I did have to pay cash so my bank account is very low. Unlike most people my age, I have to pay for it myself.

Paid cash for mine when I imported it, was my first car and import, pay for all my mods cash too. You learn something new everyday about them. You've been on here long enough to know anyone here will help you when and if you need it. Just don't get yourself a girlfriend, work more, spendless and you'll have all the mods done before you know it.

How much you paying for insurance?

Link to comment
https://www.sau.com.au/forums/topic/239905-my-new-car/#findComment-4190437
Share on other sites

Well since I'm a 17 year old male driving a turbo, comprehensive was something insane like $3k a year and I don't wanna know the excess.

So third party property, fire and theft is about $530 or something with an excess of about $1700 for an accident, and $1150 for fire and theft.

Link to comment
https://www.sau.com.au/forums/topic/239905-my-new-car/#findComment-4190442
Share on other sites

Create an account or sign in to comment

You need to be a member in order to leave a comment

Create an account

Sign up for a new account in our community. It's easy!

Register a new account

Sign in

Already have an account? Sign in here.

Sign In Now


  • Similar Content

  • Latest Posts

    • From there, it is really just test and assemble. Plug the adapter cables from the unit into the back of the screen, then the other side to the car harness. Don't forget all the other plugs too! Run the cables behind the unit and screw it back into place (4 screws) and you should now have 3 cables to run from the top screen to the android unit. I ran them along the DS of the other AV units in the gap between their backets and the console, and used some corrugated tubing on the sharp edges of the bracket so the wires were safe. Plug the centre console and lower screen in temporarily and turn the car to ACC, the AV should fire up as normal. Hold the back button for 3 sec and Android should appear on the top screen. You need to set the input to Aux for audio (more on that later). I put the unit under the AC duct in the centre console, with the wifi antenna on top of the AC duct near the shifter, the bluetooth antenna on the AC duct under the centre console The GPS unit on top of the DS to AC duct; they all seem to work OK there are are out of the way. Neat cable routing is a pain. For the drive recorder I mounted it near the rear view mirror and run the cable in the headlining, across the a pillar and then down the inside of the a pillar seal to the DS lower dash. From there it goes across and to one USB input for the unit. The second USB input is attached to the ECUtec OBD dongle and the 3rd goes to the USB bulkhead connected I added in the centre console. This is how the centre console looks "tidied" up Note I didn't install the provided speaker, didn't use the 2.5mm IPod in line or the piggyback loom for the Ipod or change any DIP switches; they seem to only be required if you need to use the Ipod input rather than the AUX input. That's it, install done, I'll follow up with a separate post on how the unit works, but in summary it retains all factory functions and inputs (so I still use my phone to the car for calls), reverse still works like factory etc.
    • Place the new daughterboard in the case and mount it using the 3 small black rivets provided, and reconnect the 3 factory ribbon cables to the new board Then, use the 3 piggyback cables from the daughterboard into the factory board on top (there are stand offs in the case to keep them apart. and remember to reconnect the antenna and rear cover fan wires. 1 screw to hold the motherboard in place. Before closing the case, make a hole in the sticker covering a hole in the case and run the cable for the android unit into the plug there. The video forgot this step, so did I, so will you probably. Then redo the 4 screws on back, 2 each top and bottom, 3 each side and put the 2 brackets back on.....all ready to go and not that tricky really.      
    • Onto the android unit. You need to remove the top screen because there is a daughterboard to put inside the case. Each side vent pops out from clips; start at the bottom and carefully remove upwards (use a trim remover tool to avoid breaking anything). Then the lower screen and controls come out, 4 screws, a couple of clips (including 3 flimsy ones at the top) and 3 plugs on the rear. Then the upper screen, 4 screws and a bunch of plugs and she is out. From there, remove the mounting brackets (2 screws each), 4 screws on the rear, 2 screws top and bottom and 3 screws holding in the small plates on each side. When you remove the back cover (tight fit), watch out for the power cable for the fan, I removed it so I could put the back aside. The mainboard is held in by 1 screw in the middle, 1 aerial at the top and 3 ribbon cables. If you've ever done any laptop stuff the ribbon cables are OK to work with, just pop up the retainer and they slide out. If you are not familiar just grab a 12 year old from an iphone factory, they will know how it works The case should now look like this:
    • Switching the console was tricky. First there were 6 screws to remove, and also the little adapter loom and its screws had to come out. Also don't forget to remove the 2 screws holding the central locking receiver. Then there are 4 clips on either side....these were very tight in this case and needed careful persuading with a long flat screw driver....some force required but not enough to break them...this was probably the fiddliest part of the whole job. In my case I needed both the wiring loom and the central locking receiver module to swap across to the new one. That was it for the console, so "assembly is the reverse of disassembly"
    • But first....while I was there, I also swapped across the centre console box for the other style where the AV inputs don't intrude into the (very limited !) space.  Part# was 96926-4GA0A, 284H3-4GA0B, 284H3-4GA0A. (I've already swapped the top 12v socket for a USB bulkhead in this pic, it fit the hole without modification:) Comparison of the 2: Basically to do the console you need to remove the DS and PS side console trim (they slide up and back, held in by clips only) Then remove the back half of the console top trim with the cupholders, pops up, all clips again but be careful at the front as it is pretty flimsy. Then slide the shifter boot down, remove the spring clip, loose it forever somewhere in the car the pull the shift knob off. Remove the tiny plastic piece on DS near "P" and use something thin and long (most screwdrivers won't fit) to push down the interlock and put the shifter down in D for space. There is one screw at the front, then the shifter surround and ashtray lift up. There are 3 or 4 plugs underneath and it is off. Next is the rear cover of the centre console; you need to open the console lid, pop off the trim covering the lid hinge and undo the 2rd screw from the driver's side (the rest all need to come out later so you can do them all now and remove the lid) Then the rear cover unclips (6 clips), start at the top with a trim tool pulling backwards. Once it is off there are 2 screws facing rearwards to remove (need a short phillips for these) and you are done with the rear of the console. There are 4 plugs at the A/V box to unclip Then there are 2 screws at the front of the console, and 2 clips (pull up and back) and the console will come out.
×
×
  • Create New...