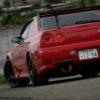
R-SPEC Posted November 2, 2008 Share Posted November 2, 2008 (edited) got pretty bored so i got rid of the neo engine cover looked ok, but still bored. coilpack cover was dirty so took that off and gave it a clean. still bored. found a can of black spray paint in teh garage so i gave it a respray. looked much cleaner (excuse the shit phone quality pics) , although i was still bored... was looking through a box full of junk, found a black metal "skyline" badge. a bit of paint stripper + polish later the badge came up lookin nice and shiney. hmmm what to do now? put 2 and 2 together, took the badge and mounted it on the coilpack cover anyone wanna guess what i got this badge off? just thought i'd share thanks Edited November 2, 2008 by R-SPEC Link to comment https://www.sau.com.au/forums/topic/243013-got-bored-yesterday/ Share on other sites More sharing options...
Basti Posted November 2, 2008 Share Posted November 2, 2008 an r31? Link to comment https://www.sau.com.au/forums/topic/243013-got-bored-yesterday/#findComment-4236229 Share on other sites More sharing options...
RusH_ Posted November 2, 2008 Share Posted November 2, 2008 heh nice work, i was thinkin bout doin the same thing to my coil pack cover, but dont know what color i want to go... Link to comment https://www.sau.com.au/forums/topic/243013-got-bored-yesterday/#findComment-4236447 Share on other sites More sharing options...
babyskyline Posted November 2, 2008 Share Posted November 2, 2008 Not bad for a bored days work Link to comment https://www.sau.com.au/forums/topic/243013-got-bored-yesterday/#findComment-4236518 Share on other sites More sharing options...
(OO)SKYLINE(OO) Posted November 3, 2008 Share Posted November 3, 2008 Hey R-SPEC! What polish did you use? I really don't know what to buy and auto barn sold me mag and alloy wheel polish and is only good on bare metal not paint metal. Link to comment https://www.sau.com.au/forums/topic/243013-got-bored-yesterday/#findComment-4236806 Share on other sites More sharing options...
Nero_Tigre Posted November 4, 2008 Share Posted November 4, 2008 got pretty bored so i got rid of the neo engine cover looked ok, but still bored. coilpack cover was dirty so took that off and gave it a clean. still bored. found a can of black spray paint in teh garage so i gave it a respray. looked much cleaner (excuse the shit phone quality pics) , although i was still bored... was looking through a box full of junk, found a black metal "skyline" badge. a bit of paint stripper + polish later the badge came up lookin nice and shiney. hmmm what to do now? put 2 and 2 together, took the badge and mounted it on the coilpack cover anyone wanna guess what i got this badge off? just thought i'd share thanks I rkn you got the badge off the floor mats, am i right? Link to comment https://www.sau.com.au/forums/topic/243013-got-bored-yesterday/#findComment-4241063 Share on other sites More sharing options...
Nero_Tigre Posted November 4, 2008 Share Posted November 4, 2008 Btw it looks pretty cool lol. I think i might copy you Link to comment https://www.sau.com.au/forums/topic/243013-got-bored-yesterday/#findComment-4241067 Share on other sites More sharing options...
sotck4door Posted November 4, 2008 Share Posted November 4, 2008 how long did it took you to take the pipe off??? Link to comment https://www.sau.com.au/forums/topic/243013-got-bored-yesterday/#findComment-4241314 Share on other sites More sharing options...
R-SPEC Posted November 5, 2008 Author Share Posted November 5, 2008 Hey R-SPEC!What polish did you use? I really don't know what to buy and auto barn sold me mag and alloy wheel polish and is only good on bare metal not paint metal. i think it was actually some oven cleaner. cant remember exactly I rkn you got the badge off the floor mats, am i right? correct how long did it took you to take the pipe off??? a couple minutes Link to comment https://www.sau.com.au/forums/topic/243013-got-bored-yesterday/#findComment-4243311 Share on other sites More sharing options...
Craved Posted November 5, 2008 Share Posted November 5, 2008 i think it was actually some oven cleaner. cant remember exactly oven cleaner will kill/strip paint and remove annodising ... Link to comment https://www.sau.com.au/forums/topic/243013-got-bored-yesterday/#findComment-4243423 Share on other sites More sharing options...
(OO)SKYLINE(OO) Posted November 5, 2008 Share Posted November 5, 2008 oven cleaner will kill/strip paint and remove annodising ... So what do you recommend to make the rocker covers / painted metals all nice and shiny? Besides wiping it down with engine oil. Link to comment https://www.sau.com.au/forums/topic/243013-got-bored-yesterday/#findComment-4243438 Share on other sites More sharing options...
Craved Posted November 5, 2008 Share Posted November 5, 2008 paint = paint wax/polish same as outside the car polish alloy - metal polish - autosol/meguirs metal polish/etc as for making old alloy cover into polished - look at the polishing thread in the fabrication section. Link to comment https://www.sau.com.au/forums/topic/243013-got-bored-yesterday/#findComment-4243808 Share on other sites More sharing options...
(OO)SKYLINE(OO) Posted November 6, 2008 Share Posted November 6, 2008 paint = paint wax/polish same as outside the carpolish alloy - metal polish - autosol/meguirs metal polish/etc as for making old alloy cover into polished - look at the polishing thread in the fabrication section. Yeah cool, I got Auto Glym car polish, I give that a go on my rocker / cam covers I got Mothers alloy/mag polish but only works on bare metal stuff as you know. Thanks man! Link to comment https://www.sau.com.au/forums/topic/243013-got-bored-yesterday/#findComment-4244342 Share on other sites More sharing options...
Craved Posted November 6, 2008 Share Posted November 6, 2008 Yeah cool, I got Auto Glym car polish, I give that a go on my rocker / cam coversI got Mothers alloy/mag polish but only works on bare metal stuff as you know. Thanks man! if your covers are std r32 GTR black - no polish will make them look nice - the stuff is matt finish and not smooth. Link to comment https://www.sau.com.au/forums/topic/243013-got-bored-yesterday/#findComment-4245078 Share on other sites More sharing options...
(OO)SKYLINE(OO) Posted November 6, 2008 Share Posted November 6, 2008 if your covers are std r32 GTR black - no polish will make them look nice - the stuff is matt finish and not smooth. So can you suggest anything else or would I have to take the covers off, sand them down and repaint them? Link to comment https://www.sau.com.au/forums/topic/243013-got-bored-yesterday/#findComment-4245132 Share on other sites More sharing options...
Craved Posted November 6, 2008 Share Posted November 6, 2008 So can you suggest anything else or would I have to take the covers off, sand them down and repaint them? that silicon spray stuff might work for you to make them look fresher ( its like using armorall) but can attract and allow dust to stick to it. up to you and what you want to achieve with the covers, above is cheapest by all means. Link to comment https://www.sau.com.au/forums/topic/243013-got-bored-yesterday/#findComment-4245257 Share on other sites More sharing options...
(OO)SKYLINE(OO) Posted November 6, 2008 Share Posted November 6, 2008 that silicon spray stuff might work for you to make them look fresher ( its like using armorall) but can attract and allow dust to stick to it.up to you and what you want to achieve with the covers, above is cheapest by all means. Yeah a friend told me about that silicon spray / armorall stuff too and thats pretty much what Iam after but auto barn sold me Mother Mag / Alloy polish and it can not be used on painted surfices. Just a more fresher look. Here is an example of what Iam after. This pic is from the Zele International website from Japan and I think they spend a lot of time in cleaning their engine bays. R32 GTR R33 GTR As you can see it looks fresh as! Link to comment https://www.sau.com.au/forums/topic/243013-got-bored-yesterday/#findComment-4245322 Share on other sites More sharing options...
NZM.031 Posted November 6, 2008 Share Posted November 6, 2008 thats been resprayed with a glossier black than the standard paint... if you want it done properly track down some spare covers and timing cover and get them done in a spray booth with proper automotive paint... it bakes on so there will be no flaking and wont chip and scratch as easily, has a much nicer finish and can be polished just like your car. im spray can guy myself, ive never had any problems, and usually results in a good enough job for the amount of time people see under the bonnet... a)because im cheap, b) because i get bored and like to change colours and c)im cheap Link to comment https://www.sau.com.au/forums/topic/243013-got-bored-yesterday/#findComment-4246054 Share on other sites More sharing options...
(OO)SKYLINE(OO) Posted November 6, 2008 Share Posted November 6, 2008 thats been resprayed with a glossier black than the standard paint... if you want it done properly track down some spare covers and timing cover and get them done in a spray booth with proper automotive paint... it bakes on so there will be no flaking and wont chip and scratch as easily, has a much nicer finish and can be polished just like your car. im spray can guy myself, ive never had any problems, and usually results in a good enough job for the amount of time people see under the bonnet... a)because im cheap, b) because i get bored and like to change colours and c)im cheap Yeah right, thanks! I probley see what I can find at any import wrecker place for the cam and timing covers. Cool and thanks again! Link to comment https://www.sau.com.au/forums/topic/243013-got-bored-yesterday/#findComment-4246377 Share on other sites More sharing options...


Recommended Posts
Create an account or sign in to comment
You need to be a member in order to leave a comment
Create an account
Sign up for a new account in our community. It's easy!
Register a new accountSign in
Already have an account? Sign in here.
Sign In Now