

Announcements
-
Similar Content
-
-
Latest Posts
-
 There's restrictor pills in the stock boost control hoses. That's how they set the amount that was bled off and hence the "high" boost setting. The usual mod in the day was to remove it and send the "high" boost setting up to about 14 psi.
 -
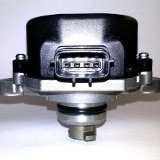
 Thanks Duncan, that's the best info I've read. Furthermore after learning about the PCM programming side controlling the factory boost solenoid, the purpose of the solenoid is to "bleed" boost when pin 25 is earthed, thus allowing spring pressure in the wastegate actuator to overcome diaphragm boost pressure, thus closing or reducing the position of the wastegate flap creating more boost as the turbo is able to spin faster. It's pretty cool to see a designated Pill to do exactly this, would have liked to have seen it with a tiny filter over the end for those moments in vacuum. The constant bleed pill has now been removed completely from the system and solenoid boost control has been restored once again. Case closed 😂
 -
-
 Manual boost controllers (where a little of the boost was bled off) were quite common back in the day, because they were cheap and easy. Generally they had a manual adjustment screw rather than being fixed like yours. Down side is they always bleed boost, not just when you want them to so an electronic boost controller that uses a solenoid will have less lag.
 -
 Hello , im new here and i have A31 home build RB25det neo stock eng / turbo aem ems 2 blue connector aem 3.5 map aem cas disk aem wideband connected to ecu 355 lph pump 550 nismo yellow injectors side feed aftermarket regulator and won’t start with base aem tuner basic tune eventually flipped cas 180 degree so it triggers on correct stroke not in exhaust cycle Now it won’t start Wideband reads 10 and 11 at lowest fuel setting and will share calibrations soon for aem tuner i think something is wrong in aem tuner please if you have any information, am very grateful
-


Recommended Posts
Create an account or sign in to comment
You need to be a member in order to leave a comment
Create an account
Sign up for a new account in our community. It's easy!
Register a new accountSign in
Already have an account? Sign in here.
Sign In Now