Jump to content
SAU Community

Recommended Posts

Well boys and girls, I decided to finally get off my but and slowly start my dream audio visual install into my Series 1 260RS

I've just finished sound deadening all four passenger doors on my Stagea. Whoa, what a job!

I spent a total of 15 hours sound deadening and 8.5 sheets of Dynamat Extreme (bought the bulk pack for $300)

I used the factory FRONT Stagea speaker spacer/mounts for both the front and the REAR. Thanks to a fellow stag owner who was wrecking one out my way! They are a solid plastic item, and with attention to detail and slight modification, they make a mighty fine solid mount. I used sikaflex as a gasket between the mounts and the door.

I applied the dynamat to the WHOLE outer skin, as well as the inner skin. I even put some sikaflex around the door handle mounts and lubricated the actuator rods and slides with some G501 plastic grease. That is where most of the 15 hours went!

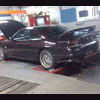
I'll upload the only pics I have of one door, as I got too carried away (and hungry) to remember to take progress pics!

At the moment I only have cheap JBL 6.5" splits that are running off the headunit, so they are hooked up to the factory speaker wire for the time being. When my new speakers arrive, I'll need to run some 14 guage speaker wire through the door jams and into the footwell area. From what I have read in another thread, it seems it will be a difficult task. From what I can see whilst sound deadening, the stagea doesn't have plugs between the door and the chassis, its just a hard wired loom? I could be wrong tho. I'll also look at getting some Dynaxorb pads for the outter skins behind the speakers.

For those that are interested, when im done, I'll have two sets of high-end 6.5" component splits with tweeters mounted in the A pillars and in the C pillars. Crossovers will be mounted in the boot with several amps and other gear.

I'd like to thank my beautiful girlfriend Jess for helping me and being ever so patient for the whole weekend. I think she fell asleep in the back seat at one stage :S

Wait till I tell her I need to do the whole boot, quarter panels and tailgate!!!

Nigel

Link to comment
https://www.sau.com.au/forums/topic/269418-the-start-of-my-mega-audio-install/
Share on other sites

door looms aren't hard wired, they have a big-ass multi pin plug that's secured with a 10mm bolt, accessed from the outside of the door pilllar behind the rubber boot. iirc

D.

Indeed they do, you can just drill a small hole through a empty spot in the plug and run the wire through it. Bit of a fiddly job yeah but not that hard.

Interestingly my S2 had sound deadning from the factory on the inner door skin behind the door trim, proper tar stuff. Nothing inside the door though.

Edited by msports180
Looking good. How have you found the Code Alarm system? I'm erring towards a Viper. Is Code alarm < viper for cost?

Code alarm is the bee's knees.

Remote start, turbo timer, window closer kit, shock, tilt, 2 stage microwave. cost me $1800 installed, but would probably be a bit more depending where you go.

Im currently making up a circuit that works off the axillary output to open my garage door.

ha ha i know what you are going through with the install, i recently pulled out massive system i had in my S1 after months months of time buliding, wiring ect ect decidied to go for a few more HP rather then DB.

I can post up some pics of what i had if you want, you can use for ideas if you like what you see, if you happy for them to be posted in your thread.

Holy sh!tballs that's some serious prep. Basically stripped the interior back to a shell, nice work.

Can't wait to see the progress

:D

Yeh mate, the photos don't show it, but the only thing in the car is the dash and the steering wheel. All trim is removed at the moment.

I'm currently installing Dynamat to the floor. Next is the cargo area, then the roof, and finally the tailgate.

When doing a big install such as this one, a few hundred dollars spent on Dynamat is a great investment. Not only does it keep the good sounds inside the car, and the bad sounds out, but its also a great thermal insulator!

When I sat down and started planning my stereo, there were three main targets.

These were:

Build a quality system without taking shortcuts -Workmanship

Build a system to suit the music I listen to - Well designed

Build a System that leaves room for my bikes - Practical

I wanted to do all the work myself, minus the fibreglassing. I have a mate who is a wizard with the stuff, so best leave it to the pro.

So far the planned list, without giving too much away is:

Speakers:

4 x 6.5" 100wrms splits , Alpine or PPI,

2 x Tweeters in A-Pillars

2 x Tweeters in rear doors or D-Pillars

2 x 12" 1000wrms subs, Alpine or other

Audio Visual:

1 x Single DIN 7" LCD DVD headunit, Alpine 106EV

1 x Alpine GPS Navigation unit

2 x 7" Headrest monitors with DVD players

1 x Sony PS2 in the glovebox

2 x Wireless PS2 controllers in rear armrest

Amps:

1 x 4x100w 4ch, Alpine PDX or other

1 x 1000wrms monoblock, Alpine PDX or other

Misc:

1 x Fused distribution block

2 x Capacitors

2 Guage Power Cable

38 Metres of Stinger speaker cable so far

I'm up to 3 MEGA-BULK boxes of Dynamat 6.6sqM each box... (possible promo car?)

BITSUS Customs:

8.5V Power supply with switched 8Amp relay for PS2

Custom Earthing setup

Fibreglass sub boxes either side of the boot

Retrimmed roof liner

Custom interior lights

A few blue neons

A bit of plexiglass here and there

many many more gadgets no doubt...

Edited by BIT SUS

extra battery? lol i have two 600W RMS Dual coil subs and a 1000W Amp when the bass is full you can see the front lights and dash lights dim to the beat. i dont know what battery you have in yours but mine came with a pissy little girly one that isnt fit for a motorbike let alone a monster size wagon with full electrics.

That is hardcore! Wish I had the dosh to do a system like that, but I'm happy with my low budget number..... for the moment.

Where are you going to put the subs? Considering one of your parametere's was; space for bikes.

Dunno if you saw my budget sub box making thread, but my setup seems to be prety space efficient.

:P

Create an account or sign in to comment

You need to be a member in order to leave a comment

Create an account

Sign up for a new account in our community. It's easy!

Register a new account

Sign in

Already have an account? Sign in here.

Sign In Now


  • Similar Content

  • Latest Posts

    • I would just put EBC back on the "I would not use their stuff" pile and move on.
    • Can I suggest you try EBC directly again and link them to as many competitor catalogues as you can to show their listing is incorrect, eg https://dba.com.au/product/front-4000-series-hd-brake-rotor-dba42304/ If you have access to an R33 GTST VIN and your VIN, you could also use a Nissan Parts lookup like Amayama to show them the part number is different between 33 GTST and 34 GTT which may get their attention
    • So i got reply from EBC and they just this site where you can clearly see those 296mm fronts on R34 GTT. I send them photos and "quotes" that 296mm are not for 34 GTT and they are too small. But it will be very hard to return them cuz nobody here knows 100% and they just copy those EBC catalogue :-D https://ebcbrakesdirect.com/automotive/nissan/skyline-r34
    • Hi, is the HKS  Tower Bar still available ? negotiable ? 🤔
    • From there, it is really just test and assemble. Plug the adapter cables from the unit into the back of the screen, then the other side to the car harness. Don't forget all the other plugs too! Run the cables behind the unit and screw it back into place (4 screws) and you should now have 3 cables to run from the top screen to the android unit. I ran them along the DS of the other AV units in the gap between their backets and the console, and used some corrugated tubing on the sharp edges of the bracket so the wires were safe. Plug the centre console and lower screen in temporarily and turn the car to ACC, the AV should fire up as normal. Hold the back button for 3 sec and Android should appear on the top screen. You need to set the input to Aux for audio (more on that later). I put the unit under the AC duct in the centre console, with the wifi antenna on top of the AC duct near the shifter, the bluetooth antenna on the AC duct under the centre console The GPS unit on top of the DS to AC duct; they all seem to work OK there are are out of the way. Neat cable routing is a pain. For the drive recorder I mounted it near the rear view mirror and run the cable in the headlining, across the a pillar and then down the inside of the a pillar seal to the DS lower dash. From there it goes across and to one USB input for the unit. The second USB input is attached to the ECUtec OBD dongle and the 3rd goes to the USB bulkhead connected I added in the centre console. This is how the centre console looks "tidied" up Note I didn't install the provided speaker, didn't use the 2.5mm IPod in line or the piggyback loom for the Ipod or change any DIP switches; they seem to only be required if you need to use the Ipod input rather than the AUX input. That's it, install done, I'll follow up with a separate post on how the unit works, but in summary it retains all factory functions and inputs (so I still use my phone to the car for calls), reverse still works like factory etc.
×
×
  • Create New...