Jump to content
SAU Community

Recommended Posts

  • Replies 245
  • Created
  • Last Reply

Top Posters In This Topic

LOL

So.....how do you find time to work on all these vehicles??

I mean...what if I was to ask you to build me a motor, when you going to find the time?? LOL

Mate i'd love a steer but i'd be too scared!

Will be good to catch up on friday mate!

and still cant wait to see the new project/keep following it, sounds awesome!

I dunno where the time comes from. I work all day and then end up stuffing around with other stuff when I get home.

I don't really build any engines anymore, I sublet all the machining to the one person I trust and I only do the final assembly after its been checked and pre-assembled. Duncan's are a love job, and its easy cause the sealer lives over the hill from me.

Its actually not that scary to drive. The biggest thing is maintaining corner speed and the acceleration when you mash the throttle can be daunting at first. We have worn the transfer case out so its currently a RWD POS. Its alot harder to drive atm but besides the wheel spin its okay.

Friday after the track day your welcome to drop past home and have alook at it, should be totally gutted and stripped down by then.

Yea I'm out of the S13 as well,,,he's sending me pics,,,but just the seat cut outs turn me off,,,Oh well I'll keep looking,,,no way am I building from scratch.

I don't have your access to plasma cutters and the like at the moment young Brad,,,but it will happen.

I'm after another Sporty but after the Capri it has to be a Nissan with Nissan power.

At least now the Sports Sedan guy's have a half desent web site to interact.

Neil.

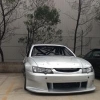
The photos are not great Neil.

chassis/engine mounting/position/diff etc etc its all pretty much "home grown"

Duncan and I were talking about it again today.

Take a close look when you get photos at the wishbone design. We'll discus it off air!

Plus its Chromolly tube frame. Everyone knows how much of a head f**k chromolly chassis are when they age and start cracking.

Id rather the engine mounted so you dont have to cut the seat which was my comment previously about mounting the engine the right way. He'll also send you a inventory which clearly says ASTRON turbo not RB25.

Mate you can also mount the engine off to one side of the chassis and angle the tailshaft...

I also looked at the s13 some of the designing was below standard , he had to change to the astron because the rb in the end wouldn't physically fit.

Thats exactly what I plan to do with this car. Ill mount the engine as low as possible with the dry sump pan and angle the tail shaft as little as possible to make it work the way it should.

I mentioned earlier that to fit an RB into that chassis it would need to be cut up and it wasn't worth it.

Glad someone looks along the same lines i do and seen the flaws as well before saying its a bargain with an RB fitted.

It looks like they have built the chassis and tried to make an engine fit instead of building the chassis to suit the engine.

Yea I'm out of the S13 as well,,,he's sending me pics,,,but just the seat cut outs turn me off,,,Oh well I'll keep looking,,,no way am I building from scratch.

I don't have your access to plasma cutters and the like at the moment young Brad,,,but it will happen.

I'm after another Sporty but after the Capri it has to be a Nissan with Nissan power.

At least now the Sports Sedan guy's have a half desent web site to interact.

Neil.

Neil what sort of sports sedan are you after?

Im building 2 sports sedans at the moment, one car has the engine completely off to one side of the car the other has the engine mooved over 100mm

btw its profi from the sports sedan forum...

Edited by Riverside Racing Parts

From my measurements I should get away with moving the inline 6 across about 200-240mm so I shouldnt have any problems. The inlet manifold of the RB is the killer but something interesting has been designed for that.

Not sure how far back to go yet, Was contemplating leaving the front two cylinders in the engine bay which is well behind the front axle.

I did think it was you Liam.

We started building ours and had to pull the engines forward, they were going to end up too rear heavy.

one of our cars has an sr and the front of the engine is level with the firewall/base of windscreen...

if you want some pics pm me your email address..

Edited by Riverside Racing Parts

That was my thought with the weight issue. Sounds like Im on the right track leaving two cylinders poking out the front then.

Obviously it will be weighted before final mounting.

The idea of just pulling the engine forward is so good! None of this worrying about front drive shaft angles and rubbish I've had before.

Neil what sort of sports sedan are you after?

My wish list is:-

Aussie spec Gazelle coupe

R33 GTS-T,,,no you lot I am not cutting up the wifey's car!!!.

S13/S14

OR

Really left field a

Morris Marina coupe with RB30 power,,,when I was a kid my dad took me to Warrick Farm and one of these was running a V8 chev,,,I fell in love with it. I have a pic somewhere taken with my instermatic poloriod camera. Shit I'm an old bastard.

Oh while waiting for the train home I'll never forget my 1st view of this spunk in a mini-skirt,,,my dad said I shouldn't look but he was and so was every other bloody male,,,great day indeed.

Neil.

Create an account or sign in to comment

You need to be a member in order to leave a comment

Create an account

Sign up for a new account in our community. It's easy!

Register a new account

Sign in

Already have an account? Sign in here.

Sign In Now


  • Similar Content

  • Latest Posts

    • From there, it is really just test and assemble. Plug the adapter cables from the unit into the back of the screen, then the other side to the car harness. Don't forget all the other plugs too! Run the cables behind the unit and screw it back into place (4 screws) and you should now have 3 cables to run from the top screen to the android unit. I ran them along the DS of the other AV units in the gap between their backets and the console, and used some corrugated tubing on the sharp edges of the bracket so the wires were safe. Plug the centre console and lower screen in temporarily and turn the car to ACC, the AV should fire up as normal. Hold the back button for 3 sec and Android should appear on the top screen. You need to set the input to Aux for audio (more on that later). I put the unit under the AC duct in the centre console, with the wifi antenna on top of the AC duct near the shifter, the bluetooth antenna on the AC duct under the centre console The GPS unit on top of the DS to AC duct; they all seem to work OK there are are out of the way. Neat cable routing is a pain. For the drive recorder I mounted it near the rear view mirror and run the cable in the headlining, across the a pillar and then down the inside of the a pillar seal to the DS lower dash. From there it goes across and to one USB input for the unit. The second USB input is attached to the ECUtec OBD dongle and the 3rd goes to the USB bulkhead connected I added in the centre console. This is how the centre console looks "tidied" up Note I didn't install the provided speaker, didn't use the 2.5mm IPod in line or the piggyback loom for the Ipod or change any DIP switches; they seem to only be required if you need to use the Ipod input rather than the AUX input. That's it, install done, I'll follow up with a separate post on how the unit works, but in summary it retains all factory functions and inputs (so I still use my phone to the car for calls), reverse still works like factory etc.
    • Place the new daughterboard in the case and mount it using the 3 small black rivets provided, and reconnect the 3 factory ribbon cables to the new board Then, use the 3 piggyback cables from the daughterboard into the factory board on top (there are stand offs in the case to keep them apart. and remember to reconnect the antenna and rear cover fan wires. 1 screw to hold the motherboard in place. Before closing the case, make a hole in the sticker covering a hole in the case and run the cable for the android unit into the plug there. The video forgot this step, so did I, so will you probably. Then redo the 4 screws on back, 2 each top and bottom, 3 each side and put the 2 brackets back on.....all ready to go and not that tricky really.      
    • Onto the android unit. You need to remove the top screen because there is a daughterboard to put inside the case. Each side vent pops out from clips; start at the bottom and carefully remove upwards (use a trim remover tool to avoid breaking anything). Then the lower screen and controls come out, 4 screws, a couple of clips (including 3 flimsy ones at the top) and 3 plugs on the rear. Then the upper screen, 4 screws and a bunch of plugs and she is out. From there, remove the mounting brackets (2 screws each), 4 screws on the rear, 2 screws top and bottom and 3 screws holding in the small plates on each side. When you remove the back cover (tight fit), watch out for the power cable for the fan, I removed it so I could put the back aside. The mainboard is held in by 1 screw in the middle, 1 aerial at the top and 3 ribbon cables. If you've ever done any laptop stuff the ribbon cables are OK to work with, just pop up the retainer and they slide out. If you are not familiar just grab a 12 year old from an iphone factory, they will know how it works The case should now look like this:
    • Switching the console was tricky. First there were 6 screws to remove, and also the little adapter loom and its screws had to come out. Also don't forget to remove the 2 screws holding the central locking receiver. Then there are 4 clips on either side....these were very tight in this case and needed careful persuading with a long flat screw driver....some force required but not enough to break them...this was probably the fiddliest part of the whole job. In my case I needed both the wiring loom and the central locking receiver module to swap across to the new one. That was it for the console, so "assembly is the reverse of disassembly"
    • But first....while I was there, I also swapped across the centre console box for the other style where the AV inputs don't intrude into the (very limited !) space.  Part# was 96926-4GA0A, 284H3-4GA0B, 284H3-4GA0A. (I've already swapped the top 12v socket for a USB bulkhead in this pic, it fit the hole without modification:) Comparison of the 2: Basically to do the console you need to remove the DS and PS side console trim (they slide up and back, held in by clips only) Then remove the back half of the console top trim with the cupholders, pops up, all clips again but be careful at the front as it is pretty flimsy. Then slide the shifter boot down, remove the spring clip, loose it forever somewhere in the car the pull the shift knob off. Remove the tiny plastic piece on DS near "P" and use something thin and long (most screwdrivers won't fit) to push down the interlock and put the shifter down in D for space. There is one screw at the front, then the shifter surround and ashtray lift up. There are 3 or 4 plugs underneath and it is off. Next is the rear cover of the centre console; you need to open the console lid, pop off the trim covering the lid hinge and undo the 2rd screw from the driver's side (the rest all need to come out later so you can do them all now and remove the lid) Then the rear cover unclips (6 clips), start at the top with a trim tool pulling backwards. Once it is off there are 2 screws facing rearwards to remove (need a short phillips for these) and you are done with the rear of the console. There are 4 plugs at the A/V box to unclip Then there are 2 screws at the front of the console, and 2 clips (pull up and back) and the console will come out.
×
×
  • Create New...