Jump to content
SAU Community

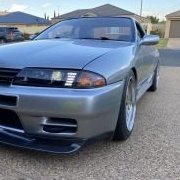
S14 With Neo Rb25 Drift Car.


Recommended Posts

Thanks for the review mate.

.... any advice for someone who is about to set up an s13 to learn to drift in?

I've been reading a lot of info on drift set up's, but not too much info on what a good beginner set up might be. also, a good proportion of the info out there is contrary to most of what I know about suspension (open wheel/circle track style cars).

It has cusco coil-overs, caster arms and rear camber arms.

Cheers

Justin

Link to comment
Share on other sites

all you need is coilovers, a diff that locks both wheels reliably, and a seat that holds you tight. the rest is not needed. save the money and spend it on tyres and seat time.

seat time is what makes you a better driver.. not the sum of the parts listed on the car

Link to comment
Share on other sites

While I agree with Simon, in regards to setup, if I was just starting out, this is what I would do. (I don't mean to hi-jack)

Firstly, keep the car at a reasonable height. Max out the front camber. If you want, you could run s14 lca's for more track and even some eccentric clevis bolts for more front camber and better sai. Run 7-8 degrees of castor and 6 or so mm of toe out to help with turn in. Rack spacers are a quick, cheap and easy way to get more lock. There's no need for knuckles when starting out. A tight or shimmed lsd is a good starter, don't start out with a welded diff. A gtr rear sway bar would be a good addition. Start out with zero toe on the rear and work your way in as you get more comfortable. Same goes for rear camber, and standing the wheels more upright. But most importantly don't forget to have fun. Oh, and keep an eye on those temps.

Hope that helps.

Link to comment
Share on other sites

i have a similar yet different opinion.

for any S or R chassis... if you want to learn to drift all you need is the 3 basics.

-coilovers

-bucket seat to hold you tight

-an LSD that works

power, other susp mods and anything else isnt needed in this early stage... better off saving cash, buy tyres and hit the track. learn the basics and develop skills.. then upgrade accordingly

Link to comment
Share on other sites

more work done today..

312341_533050153410759_713379608_n.jpg

cut out the rear shelf to start building the ducting box

535719_533050136744094_73924963_n.jpg

Cut the lip off the inner wheel well to allow clearance at lock.. will then run a weld over it to strengthen back up

1002891_533050160077425_202570851_n.jpg

New GKtech V3 castor rods! looks the good

529105_533050173410757_414644586_n.jpg

Link to comment
Share on other sites

made up rails for the velo passenger seat i have,.. both my seats are old and due for replacement. but that will come in good time. for now i'll continue to rock them.. so comfty!


1001571_534038536645254_70406225_n.jpg


944590_534038549978586_250727587_n.jpg


1095098_534038563311918_1926534082_n.jpg


1000292_534038626645245_542962850_n.jpg


1005898_534038623311912_182270801_n.jpg


then i welded up the chassis rail after cutting the lip off to give extra clearance.. i then ground it back flush and painted it up.. quite shit to weld since its thin and far from clean material.


I also cut the lip off the firewall above where the head would be to make the engine install an easier process.. welded it up and linished it back.


547173_534038609978580_1333836862_n.jpg


my welding rig.. gets shit done!


543823_534038666645241_1605467946_n.jpg


Link to comment
Share on other sites

car is now at the painters!

i got myself a Kouki wing for it, will look good once painted and fitted i think. Spent yesterday chopping rear guards inner and outer skin. bashing it up and then welding new sheet metal in to fill the gap. was an absolute prick of a job, then used sikaflex panel bond to seal the whole thing all the way around to minimise smoke entering cabin.

1098020_535178793197895_1842399117_n.jpg

21653_535468673168907_556954990_n.jpg

Link to comment
Share on other sites

with the car at the painters not much has been happening at home.. so i broke the 31 out the shed and started working on that. fitted s13 suspension and coils to it, just need to fit manual trans, do cooler piping and shes almost ready for some skids. I'll probably skid it a few times and then sell it off.

944626_10201093696517934_506203904_n.jpg

an arty shot of my motor with my cat on it... haha

1012459_10201104969319747_1715676515_n.j

Some parts from GKtech rocked up also! pretty much got a heap of bushes and so forth for chassis bracing. They sent me a bash plate but unsure if it will fit. will prob require modification since RB and all.

945988_537158302999944_625528109_n.jpg

GKtech also just released these sway bar links which are solid.

20499_536066249775816_13998069_n.jpg

Link to comment
Share on other sites

  • 4 weeks later...

bit of an update... car is all painted and now we've started on all the mechanicals n 3 weeks the car is getting a whole new ecu and loom. Full rewire. Fuel lines. Coolant lines being made. Ducting and shrouding for rad. As well as various mechanical bits and pieces. Garage7 have got this!

I decided to sell the Haltech as we got a fantastic deal on a new Link G4+ extreme, probably one of the best ecu's on the market, big call i know but the list of things that this can do is crazy.

Some pics.

1176312_549146028467838_1580984546_n.jpg

1208624_548839225165185_1797244765_n.jpg

738_546488252066949_539183082_n.jpg

559227_545957685453339_407583185_n.jpg

On top of this i have been driving my missile r31 lately which is basic as hell. weldie with s13 coilovers, SMDrift knuckles, rb30e+t making 165 rwkw. Qualified 4th and finished 4th at Stadium drift round 3.

1174957_159508574245470_1867087717_n.jpg

you can read up on it here

http://www.smdrift.com.au/1/post/2013/09/stadium-drift-rd-3-2013.html

Link to comment
Share on other sites

been super busy, had a heap of time off work so spent last week and a half working on it each day getting a solid 8 hours + done each day. engine loom is all done and its Pro town! Done by Steve at Garage7 who was taught by Declan how to do it, Loom uses nylon sleeve with 3:1 glue lined heat shrink as the bulk of it. not a single bit of elec tape used haha. We also used quality Deutsch plugs (DT series connectors - google it) through out. Today we fired up the loom/ecu combo and made it all live, good to know everything works. a few hours were spent calibrating and configuring it all, so now when it comes time to crank it over it should in theory fire first crank.

Body loom is yet to be done, Decs from Garage7 has designed a laser cut switch panel which is very aviation style and mounted on the roof just behind the front cage tube with all the switches, push start and so forth. the cool thing with the Link g4+ is you can use one button to start and stop the engine. just push it and it primes the pump, cranks the engine until it fires and then keeps it running. push again to kill it. just like a lot of new cars these days!

also spent time mounting the GKtech hydro handbrake, tomorrow i'll make some custom brake lines up for the rear brakes and then all that is left is fuel lines and coolant lines + shrouding of the rear rad. all of which is being laser cut atm.

1234547_550838491631925_1013894301_n.jpg

Link to comment
Share on other sites

Create an account or sign in to comment

You need to be a member in order to leave a comment

Create an account

Sign up for a new account in our community. It's easy!

Register a new account

Sign in

Already have an account? Sign in here.

Sign In Now


×
×
  • Create New...