Jump to content
SAU Community

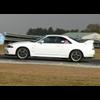
Nathan's R33 Gtr Build


Recommended Posts

This is a build that has taken a while, a lot has been done by me with a lot of learning on the way.

I hope to transform this car into more of a track weapon as time and budget allows.

This will be a bit backwards at first as I am going to post the current results first after the final tune that was done on Tuesday, then I will go through some of the stages of the build up to it's current form. You will see what I have chosen for this build too. Then as time goes on, I will update this thread with modifications and their results.

There isn't as many photos as a lot of other people take as most of the time I am hands on and didn't really want to stop to take progress pics.

I would like to thank:

Paul from Red R racing for all his advice and the great engine that he has put together for me.

Lachlan for Prep'd Motorsport for the use of his workshop and his advice.

Jim and the guys from CRD for the tuning of the car and helping iron out some of the bugs/gremlins with my GTR from the build process.

The result:

306kW at 18psi

Jim could of tuned it to have more power (we had one of the boost settings at 20psi at one stage) but as the airflow meters were maxed out, and we were tuning the car for more response than outright power, Jim focused on the 15psi tune for when I am on the track and turned the top boost down to 18psi to make it safe.

Dyno graph:

post-38812-1277375964_thumb.jpg

The car seems to keep wanting to make power when more boost is wound in. The limitations would be the turbos (Garrett 2860-7's). Power comes on very early (as you can see from the graph) and is very torquey (spelling?). I am very happy with the result :)

Happy reading!

cheers,

Nathan

Link to comment
Share on other sites

I bought this car from Dom at Auto Style in Beverly Hills and didn't know too much about it. It was meant to be

modified and went alright. The only things that I could confirm that it had an aftermarket ecu (Power FC) and

splitfire coils. The Power FC had the boost control kit too.

The car was up for it's 100000km service. My friend did all the work for me and replaced the HKS cam gears with new ones, and all the other typical parts for this service. while the timing belt was off, he found that the harmonic balancer had a crack in it, Luckily it was found before it did any damage to the engine.

I had the car re-tuned by a workshop that is well known. This was due my friend of mine knowing the owner. At the time the managed to get 260KW out of the engine. It didn't have any blow by, but the head was starting to become a little noisy. I then started tinkering with the idea of just re-doing the head and leaving the bottom end, but then I started thinking more about being able to take it to a track. I decided that I wanted to be able to take the car to the track and not have to worry too much out the typical oil control issues that come with an RB26.This meant needed to do the typical oil control mods.

I then started thinking about the turbos and everything that was unknown about the engine. I decided to do it right, do a fair bit myself with the help of some people in the industry that I had access to. This meant that it was engine out time.

I hunted around and spoke to various peple before deciding on a package and the direction that I wanted to head. The aim for it, was to make it appear fairly stock in apperance as I was still going to be driving it on the road and didn't want too much unwanted attention.

Due to the slope of the block, the only place that I could do the work was out of the front nature strip, this was where the surgery was done to remove the motor. I actually laid down plywood on the grass for the engine crane to be able to roll on.

I pulled what I could off the car myself and then had fun with my friend getting the motor out. It didn't want to

come out without a fight. The original place was to take the motor and box out at once, but the bolts for the

tailshaft didn't want to undo off the back of the transfer case. The bolts for the front prop shaft didn't want to

undo off the front diff either, so it came out with the engine.

Prepping engine for removal

post-38812-1277989278_thumb.jpg

Empty engine bay

post-38812-1277989438_thumb.jpg

Engine out of car

post-38812-1277989490_thumb.jpg post-38812-1277989517_thumb.jpgpost-38812-1277989544_thumb.jpg post-38812-1277989576_thumb.jpg

Link to comment
Share on other sites

Engine was stripped down in prep for me to take it to the engine builder. I also cleaned a lot of the built up grease and grime that seems to attach itself to the motor.

post-38812-1277991331_thumb.jpg post-38812-1277991362_thumb.jpg

post-38812-1277991391_thumb.jpg post-38812-1277991417_thumb.jpg

Paul from Red R racing was who I chose in the end, and he came up with this combo for me:

Gasket Set NISSAN RB26 No HeadGasket

Tomei Oil Gallery Oriface NISSAN RB26

ARP VG30RB26 Rod Bolt Kit

STD Head Bolts Genuine

STD Main Bolts Genuine

CBS STD RB26DETT

MBS STD RB26DETT

RB26 Sump Extension and swinging pickup

Nissan N1 Water Pump LATE R32 R33 R34

RR32B Ross R32 GTR Balancer

RB26 Arias piston kit including rings

Cometic 1.2mm head gasket

Nitto high volume oil pump

Nitto crank collar

NPC twin plate clutch kit

Due to the power I was chasing we kept the standard rods and prepped them. I had the piston skirts teflon coated. This was also the first time Paul had used a Nitto oil pump. When I was getting pricing for parts, the Japanese was fairly strong against the Australian dollar and Tomei oil pumps were really expensive. Paul found out about the Nitto ones and told me about what the gearing was made out of. I decided to try one for the price and the high oil pressure it could supply.

The head didn't need to be anything fancy either. Stock valves and springs and cams were retained. New valve guides (some of the old ones were cracked). They needed to come out anyway for the minor port job that was done on the head to clean up the inlet and exhaust ports.My existing cam gears went back on.

As for the clutch choice, I went with the sprung centre version of the NPC clutch. My brother had the solid centre version in his car already, which I liked but wanted something that was going to be gentler on the driveline. I had also heard very good things about them too.

Link to comment
Share on other sites

well sure, if they arent fatigued that is, 15 year old springs could cause problems down the track i would have thought - even if stock cams are being used?

+ even if he is using stock cams, some stronger springs arent that expensive anyway, atleast if he wants to upgrade later on he has the option of just bolting them in

how much are those nitto pumps worth?

The stock springs were tested before going back in. If any were found not to be up to spec then they were replaced spare ones that Paul had. As Jonn said they are fine with the std cams. No need to go over the top. Remember this is not an outright power build. This engine was built to take approx 400kw, but with the turbos I am using it will never get near it.

With the Nitto pumps, prices have changed since I bought it,as they have been improved them even further now with a billet backing plate. Best bet would be to call a Nitto distributor (look at www.nitto.com.au) to find out. Definately cheaper than a JUN or Tomei pump.

Link to comment
Share on other sites

With the engine out and away getting built, decided the engine bay needed a tidy up as it was quite dirty.

post-38812-1278681397_thumb.jpg post-38812-1278681415_thumb.jpg

post-38812-1278681436_thumb.jpg

Tried cleaning it up with lots of elbow grease and de-greaser, but couldn't get it to a finish I was happy with.

post-38812-1278681488_thumb.jpg post-38812-1278681535_thumb.jpg

post-38812-1278681557_thumb.jpg

Ended up removing the gearbox and as much as I could in front of the strut towers and take it to my friends panel shop to get the paint blown in on the front reo, radiator support and the engine bay itself around to the back of the strut towers done. It now looked much tidier.

post-38812-1278681625_thumb.jpg post-38812-1278681646_thumb.jpg

Link to comment
Share on other sites

Kept myself busy while the engine was being rebuilt, by ordering some goodies for the engine and preparing other bits for when it arrived back.

Bought a new NPC twin plate clutch and ARP bolts

post-38812-1278718346_thumb.jpg post-38812-1278718367_thumb.jpg

post-38812-1278718387_thumb.jpg

Ross Metal Jacket harmonic balancer

post-38812-1278718435_thumb.jpg post-38812-1278718455_thumb.jpg

Nismo Thermostat

post-38812-1278718482_thumb.jpg

Blitz SBC i-D Spec-R boost controller

post-38812-1278718526_thumb.jpg

Other things included:

X-Force dumps

Garrett 2860-7 turbos

Just Jap catch can/washer bottle

Just Jap oil filter relocation kit

Mines cam cover baffles

Nismo engine and gearbox mounts

New engine fan

Hicas lock bar and new boots

HKS adjustable actuators

Heater hose kit

Link to comment
Share on other sites

Sounds good, good luck with the build :)

Thanks for that. Engines in and running and fully tuned now. Didn't want to create a build thread until it was up and running.

Link to comment
Share on other sites

Port matched and moved the standard turbo manifolds to the new turbos. This was my first time at doing this and they turned out alright. Sorry about the crap quality photos as they were done on my phone.

before

post-38812-1278719078_thumb.jpg

after

post-38812-1278719094_thumb.jpg

I removed the rear housings of the turbos and sent the along with the dumps and manifolds off to be ceramic coated at Hi Octane. When I replace the front engine pipe I well get this done too. this was done to improve the response of the turbos and the help keep the engine bay temps down.

post-38812-1278719173_thumb.jpg post-38812-1278719192_thumb.jpg

post-38812-1278719210_thumb.jpg post-38812-1278719225_thumb.jpg

post-38812-1278719251_thumb.jpg

As I was after a stock look, painted the intercooler black. (Actually conned my brother into doing it once I had prepped it)

post-38812-1278719428_thumb.jpg post-38812-1278719448_thumb.jpg

Had my intercooler hard pipe kit powder coated black by Chris at Craved Coatings. He was really good to deal with and the finish was excellent. Only wish I had sent my engine covers off to get them coated instead on being painted. I highly recommend him to anyone after powder coating. I believe that he does ceramic coating now too.

post-38812-1278719649_thumb.jpg post-38812-1278719660_thumb.jpg

post-38812-1278719667_thumb.jpg

Link to comment
Share on other sites

Looking good.

Restrospective thread keeps progress of build on track

love it

Thanks mike. Good luck with your build. Taking it to it's first track day next Saturday (SAU NSW Track day), so I get to see how it goes.

Link to comment
Share on other sites

I got the engine back from Paul at Red R Racing, looking nice and fresh. The new sump looked the goods. Paul had been sent by his work to Brisbane for a few months. He was that dedicated to getting the engine completed for me, that he flew back on a couple of weekends to make sure that it was done. How is that for commitment? It turned out that it wasn't really necessary, as my work decided to send me up there shortly after it was finished. That is still an A for effort on his part. He constantly kept me updated of the build process.

post-38812-1278801809_thumb.jpg post-38812-1278801828_thumb.jpg

post-38812-1278801846_thumb.jpg post-38812-1278801862_thumb.jpg

post-38812-1278801974_thumb.jpg

Link to comment
Share on other sites

Now the fun and exciting part started. :blink:

I took my motor, engine stand and parts to my mate's workshop at Prep'd motorsport. He gave me an area to setup and work in. This part was a drawn out process as I changed every gasket, seal and hose that I could, while the engine was out. It took me a while to get together as I could only get a few days off work here and there to work on it.

With a bit of advice from Lachlan and a lot of consulting of the Skyline manual, I managed to get the jigsaw puzzle of external components bolted back to the motor back together.

I learnt a lot doing this, especially which order to put the components back on. There was a number of times I had to remove components to bolt other things on. It looked the part though. :P

post-38812-1278802561_thumb.jpg post-38812-1278802581_thumb.jpg

post-38812-1278802604_thumb.jpg post-38812-1278802634_thumb.jpg

post-38812-1278802658_thumb.jpg post-38812-1278802699_thumb.jpg

Link to comment
Share on other sites

I don't have many photos for this post but you will understand why after reading this post. Bolted the gearbox up, then Myself, Lachlan and his apprentice slid the motor and box into the car. All the rest of the external components were bolted on and the harnesses connected up. Filled the car up with fluids.

post-38812-1278804045_thumb.jpg

Went to crank the motor over to get oil pressure but it wouldn't even turn. A lot of time was spent trying to work out why. We couldn't even turn the motor over by hand from the crankshaft bolt. It was like the motor was seized. Narrowed it down and then looked through the window on the bell housing to see that the OS Giken pull to push converter was catching on the back of the clutch housing.

Luckily I wasn't there when Lachlan tried to fix it. I believe the apprentice learned how to pull a GTR gearbox in and out really quickly.

It didn't matter what was tried. It was still catching. After a bit of research and help on these forums, I learnt how to convert it over to a push type conversion. I went and bought the parts necessary get this done and Lachlan made it work.

Info on the Gearbox pull to push conversion

http://forums.nicoclub.com/rb-push-pull-cl...on-t288581.html

Link to comment
Share on other sites

When the clutch issues had been sorted, checked everything twice. Cranked the motor with the crank angle sensor disconnected until I had oil pressure and could see oil in the Head. Connected the CAS back up and after a few cranks that engine came to life. Ran into a few minor issues though;

One thing I had over looked was to do with the dump pipes. When I had put X-Force ones on, I had to remove the separator as the Garrett turbos already have one. One of the bolts actually penetrates through the back of the dump pipes. These had to come off and the holes were fixed, then re-fitted.

Had the 4WD, A-LSD and check engine lights come on and stay on. I knew it was related to the Attesa system. Changed the front speed sensors with new ones from Nissan and then tried bleeding the whole system. Still wasn't able to get them cleared. After a lot of playing around and research, I had given up. I was at CRD with Paul when he was tuning his car and spoke to Jim. I mentioned that I wanted him to do the run in tune on my engine and about the Attesa error codes too. He said to book in a time with him and he could look at the errors as he had made up a special harness that allows him to hook a stock ecu in with the Power FC, so he can run a consult scan to decipher the error codes.

Link to comment
Share on other sites

Dropped the Car off to CRD for them to fix the Attesa error codes, and to do a run in tune on the engine. Also had Jim do part of the run in on the Dyno. I dropped it off on a Thursday morning and by that night Jim had called me saying that the errors had been fixed. He had started on the tune and would continue to break in the engine on the Dyno for me.

Car made around 220Kw. I was quite happy with this and had fun taking the car for drives to break the engine in. :banana:

Link to comment
Share on other sites

Create an account or sign in to comment

You need to be a member in order to leave a comment

Create an account

Sign up for a new account in our community. It's easy!

Register a new account

Sign in

Already have an account? Sign in here.

Sign In Now
 Share


  • Similar Content

  • Latest Posts

    • Embrace the freedom of casual encounters on the best dating app in town! Verified Maidens Superlative Сasual Dating
    • Slimline sub on the rear parcel shelf is doable. Pioneer TS-WX140DA is only 70mm high.   
    • People like Johnny Dose Bro might be laughing at my post because I accidentally added 100mm to my numbers. 350-355 is indeed the lower limit. 450 is off-road Skyline spec.
    • What is the "compromise" that you think will happen? Are you thinking that something will get damaged? The only things you have to be concerned about with spherical jointed suspension arms are; Arguments with the constabulary wrt their legality (they are likely to be illegal for road use without an engineering certificatation, and that may not be possible to obtain). A lot more NVH transmitted through to the passengers (which is hardly a concern for those with a preference for good handling, anyway). Greatly increased inspection and maintenance requirements (see above points, both).   It is extremely necessary to ask what car you are talking about. Your discussion on strut tops, for example, would be completely wrong for an R chassis, but be correct for an S chassis. R32s have specific problems that R33/4 do not have. Etc. I have hardened rubber bushes on upper rear control arms and traction rods. Adjustable length so as to be able to set both camber and bump steer. You cannot contemplate doing just the control arms and not the traction arms. And whatever bushing you have in one you should have in the other so that they have similar characteristics. Otherwise you can get increased oddness of behaviour as one bushing flexes and the other doesn't, changing the alignment between them. I have stock lower rear arms with urethane bushes. I may make changes here, these are are driven by the R32's geometry problems, so I won't discuss them here unless it proves necessary. I have spherical joints in the front caster rods. I have experienced absolutely no negatives and only positives from doing so. They are massively better than any other option. I have sphericals in the FUCAs, but this is driven largely by the (again) R32 specific problems with the motion of those arms. I just have to deal with the increased maintenance required. Given how much better the front end behaves with the sphericals in there.....I'd probably be tempted to go away from my preference (which is not to have sphericals on a road car, for 2 of the 3 reasons in the bulleted list above), just to gain those improvements. And so my preference for not using sphericals (in general) on a road car should be obvious. I use them judiciously, though, as required to solve particular problems.
    • Easiest way to know is to break out the multimeter and measure it when cold, then measure all the resistances again once it gets hot enough to misfire. Both the original ignitor and the J Replace version. Factory service manual will have the spec for the terminal measurements.
×
×
  • Create New...