Jump to content
SAU Community

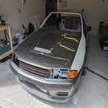
R32 Gts4 - Restoration/rebuild


Recommended Posts

yep its going to take me a bit to do. figure if I do all the panel removal it will work out a bit cheaper when it gets painted and goes back together.

shop is directly behind ballymore. gets annoying when they change the parking signs.

Link to comment
Share on other sites

Thought i'd add this list here for you to have as reference. This is list of parts i had prices on from Lander Nissan in Blacktown, Sydney when i built last GTR so pricing is around 5 years old now but has all part numbers and gives you a guide

Lander Prices.rtf

Link to comment
Share on other sites

thanks for that!!

I have the forward guard that I cut loose a couple of days ago on the way from osaka with a couple of other pieces $275 AUD for those keeping track. ( I really dont wish to keep track of what I'm spending on this car..)

The bad news though is that one of the braces that is in the very back of the engine bay is no longer available.

this is the one where the cowl panel meets the top frame in the corner. so I will have to be extra careful when I remove it.

should have most of the metal removal done by the end of next week. (too much going on at the shopr for me to work on it.) and funds permitting I'll have the other guard panel on the way shortly after.

anyone thats following this and tearing a GTR DOWN I need a few of the white plastic rings that sit in the various holes that the wiring/cooler pipes run through..

Link to comment
Share on other sites

got a bonus! its been fiddled with by MINES. now I just have to work out what has been done to the engine so it runs properly.

Chris,

Whats the best way to find out about Mines. My 33 has a Mines ECU and I wouldn't mind finding out what the motors supposed to be runn'

Cheers

Leith

Link to comment
Share on other sites

in my case I ask the people that stripped the car what was on it. the only external thing that I probably dont have is exhaust. t I know where that went (and its in brissy) so all I have to do is get measurements off it. I do have hte chassis number of the car as well. that can be a starting point IF I can get a mate of mine in osaka to contact MINES.

Link to comment
Share on other sites

Thought i'd add this list here for you to have as reference. This is list of parts i had prices on from Lander Nissan in Blacktown, Sydney when i built last GTR so pricing is around 5 years old now but has all part numbers and gives you a guide

prices have not moved that much on this stuff. I'm paying slightly less on some of those (bearing in mind I'm sourcing ex osaka and not via a dealer.)

good to see I'm not the only one that did a hoodledge frt panel. I'm doing both of mine.

anyone know what font the chassis number is stamped in??

my car is done on the old green plate system so the chassis number is used for the car parts side of things and not rego. I need to replace that panel.

Link to comment
Share on other sites

180907_1881141311501_1330376598_32202595_2115371_n.jpg

the resulting pile of sheet metal after I hit it with a spotweld cutter. if you are following they left guard is there as well.

I took a air saw to that first and removed the majority of it to make accessing the headlight area a bit easier.

I only made one mistake on the left side and that was in an area that it will not be seen.

182027_1881141191498_1330376598_32202594_6355455_n.jpg

drivers side area where the steel guard WAS. the lower riight and top left are overlap spots.

lower right has 3 overlapped pieces the top left has 2 overlapped peices.

top left was easy to get out. the lower right - a bitch!

still have to do the tidyup on this as well.

182285_1881141431504_1330376598_32202596_4362147_n.jpg

passenger side. no more rough rusted airsaw holes and missing bolts here. panel gone and awaiting removal of the spotweld remnants.

180039_1881141511506_1330376598_32202597_8286104_n.jpg

Front on showing removed areas. I have a feeling that the left side headlight mount has been replaced at some point as well. spot welds on that side were loose.

for those watching- yes those are red GTST guards on it again. tossing up between GTR and GTST front guards. GTR doesnt look in proportion with the rear end of this car.

Cowl panel comes out next onceI work out where all the welds are, note the sealant widths and thickeness and work out what font the chassis number is stamped in..

Link to comment
Share on other sites

post-2209-0-17726000-1298029641_thumb.jpg

Replacement corner brace. this piece sits between the drivers strut tower and the cowl panel.

the right side (this one) is available. the left side ISN'T. I'm going to be very careful pulling the left one off.

post-2209-0-76536900-1298029644_thumb.jpg

replacement battery tray and lower inner guard panel (this is the right side one.)

they call it hood ledge lower in the parts book. this one is still available as a new part.

the left one is 3-4 days behind this one.

post-2209-0-98438700-1298029647_thumb.jpg

close up for those collecting part numbers.

Link to comment
Share on other sites

post-2209-0-58032000-1298096977_thumb.jpg

Started removing the right side brace. nissan DID NOT want this thing to come loose. keep watching the spot welds and how many I cut loose.

post-2209-0-20724200-1298096981_thumb.jpg

another angle on the start of removing the brace

post-2209-0-20552000-1298096985_thumb.jpg

underside of brace. note left side and corners.

post-2209-0-79098300-1298096973_thumb.jpg

this is the reason it came off. the other side is fine but due to this one major area this entire panel goes in the bin and a new one gets fitted.

Link to comment
Share on other sites

post-2209-0-32955300-1298278022_thumb.jpg

more new bits.

LEFT to RIGHT

GTR BRAKE DUCT

SCREWS (2 bags 20 of) these hold the ducts in place

SCREWS - these hold the lower spoiler in place

NUT 20 of (these are screw clips) these hold the screws that hold the duct on

HEADLIGHT SEAL - RT . left is no longer available. I am going to copy the right side one as I *THINK* it is the same.

if someone has a left one handy I would like to compare them/copy it.

mine were destroyed beyond help so I can't copy mine.

Link to comment
Share on other sites

Create an account or sign in to comment

You need to be a member in order to leave a comment

Create an account

Sign up for a new account in our community. It's easy!

Register a new account

Sign in

Already have an account? Sign in here.

Sign In Now


×
×
  • Create New...