Jump to content
SAU Community

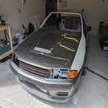
R32 Gts4 - Restoration/rebuild


Recommended Posts

Chris, I can't make out from the pictures but have you sourced those silly ass screws with the housing around them that when screwed down they expand to seal down? They are used along the kick panel that says "skyline" that is only visible when the door is open. If so whats the price tag? Oh and is the brake duct only for 1 side? Cheers

Link to comment
Share on other sites

Chris, I can't make out from the pictures but have you sourced those silly ass screws with the housing around them that when screwed down they expand to seal down? They are used along the kick panel that says "skyline" that is only visible when the door is open. If so whats the price tag? Oh and is the brake duct only for 1 side? Cheers

I havent sourced them yet. that said that are a local part as the navara uses them. I'll dig up the part number for them later (its in my book and I have to find it!) . the brake ducts - yep that price is per side.

Link to comment
Share on other sites

found something 'interesting' yesterday whilst rebuilding a door harness , the later door boots off a Z11 cube or K12 micra actually fit the R32 door/body holes. doesnt look too out of place either.

Link to comment
Share on other sites

181565_1905267874650_1330376598_32248309_5129900_n.jpg

new left inner steel guard. no more rough cut one.

185765_1905235033829_1330376598_32248281_3076150_n.jpg

close up of new left side inner steel guard - showing part number

180749_1905235153832_1330376598_32248282_4400230_n.jpg

shot taken through the front screen area with me standing up. shows the test fitting of both inner steel guards. they fit perfectly.

184689_1905235273835_1330376598_32248283_1344656_n.jpg

right side brace after a quick tidyup with a grinder to remove the spot weld points. the underside has bee painted with copper weld paint.

185813_1905235633844_1330376598_32248286_3252176_n.jpg

right side area where the new panel tucks behind two other pieces of steel. this is inside the wheel well and will need to be resealed.

this wasn't that hard to separate and remove the old piece of metal . putting the new one back in place will be interesting to watch.

183825_1905235393838_1330376598_32248284_8306140_n.jpg

test fitting - right side panel

185925_1905234873825_1330376598_32248280_5004830_n.jpg

passenger side (left) showing how the panel tucks behind two other pieces of steel.

180645_1905235553842_1330376598_32248285_2314042_n.jpg

test fitting left side guard

180980_1905268234659_1330376598_32248311_253501_n.jpg

something I found when mucking around with door boots. this one is off a Z11 Cubre from door. fits perfectly.

whilst its not the 'correct' item it does make the placing of wires a LOT easier.

Link to comment
Share on other sites

not at the moment. quiet season fro the shop so I'm personally watching funds myself. when I have a bit more spare cash I'll start working on it again.

I did manage to separate the sump from the engine block last week but thats about it. at some point I'm going to talk to a diff shop and get the actual condtion of the front diff sorted out.

stuff that is next to buy:

GTR intercooler brackets and plumbing. I have found these bits locally in brisbane and asked the shop in question to hold them for as long as he can.

I may get under it with a rag and thinners through the week and do a bit more cleaning.

Link to comment
Share on other sites

  • 2 weeks later...

found $20 :)

thanks go for FATZ for the fuel filter bracket and associated bits.

I have started storing things on the car now. it makes it a bit easier to see what I am missing as far as small brackets go.

I have a redundant set of GTR front indicators and GTR guards with NEW inner liners that are up for grabs - shoot me a PM if youare interested. I'm keeping the GTST guards .

it doesn't look in proportion front to rear with the GTR stuff on it.

the funds from these go to new GTST inner liners and new front GTST indicators.

Link to comment
Share on other sites

the ties were the first thing I bought from wurth. they do a couple of nissan variants and I use them in my daily duties. I have a source for the slide on bolt type as well though they are a mazda item.

the proper trim clips will be a nissan only thing. whilst wurth do copies the OEM ones are actually cheaper.

Link to comment
Share on other sites

another image :)

189276_1949872869747_1330376598_32324454_3374711_n.jpg

this was a before shot of a crack in the rear lower drivers side door jam.

that crack has now been ground and and shows me where a very quick cut/shut was done on the car.

for those that are looking at these cars for a daily or project take note of this. if you see anything like this take a 17mm socket to the seatbelt mount and pull that trim off. you will probably find a sectioned c pillar like I did when I started this project.

the up side of this crack is that I have to buy a new rear side for the car and that fixes several rust spots along the way.

the inner rear guards , paenl behind the fuel filler (where the filler neck comes through.) and the lower inside wheel arch.

this also means that instead of using PART of the new sill panel I get to use all of it.

Link to comment
Share on other sites

anyone know how the rear of this car goes together?

from what I can see the rear sides go on first the roof goes on last.

actually - does anyone have a panel shop book for a R32 chassis. that would help me immensely in pulling this car apart correctly.

Link to comment
Share on other sites

ok roof is HALF off. I started cutting spot welds about 45 min ago. B->C pillar points - loose, top rear window area - cut and loose. will do the front tomorrow at some point after I close the shop.

decided to redo teh body side of things first before I start on other aspects of the car.

bear in mind I am doing most of this panel removal myself with a bit of occasional verbal guidance from a mate of mine who is a panel beater.

his words today were - you are doing this quite well - done it before ? I replied - no first time I have done this and it is a slow/patient thing.

he agrees!!

I'll put up piccies later :)

Link to comment
Share on other sites

200791_1962956356826_1330376598_32343881_6058719_n.jpg

this is the forward lower part of the right rear guard. when I bought this car it was full of crap. that is the result of crap build up and a good hit with a wire brush.

the inner guard is getting done so all of this will go.

200266_1962957036843_1330376598_32343884_7337735_n.jpg

pile of crap that I prised out of the rear right guard. the big chunk is kah glass.

197002_1962956596832_1330376598_32343883_2432199_n.jpg

rear lower right guard. that pile of crap was filling all of this. the hole goes through into the rear area - the rear panel (with hole) is fine

199999_1962956436828_1330376598_32343882_5943133_n.jpg

top inside of the wheel arch. that will go once the rear guard panel comes off

189637_1962956156821_1330376598_32343880_5201093_n.jpg

start of the roof removal - the spot weld tool I bought makes light work of this. I have a new roof on the way for it and the only reason I started at the top was it was teh last penel to go on. I have to do a rear quarter on this car and taking the roof off is the neatest way I can see of doing it short of cutting up a perfectly good $700+ panel. the grind mark to the right middle of this image is where the vehicle was cut/shut roughly. that panel will come out once the rear side comes off.

the faint gold line on the C pillar is the factory brass seam. those are on all 4 corners of the roof and are fairly easy to find once you find the first one. I can use brass rods so once this goes back together that is how I will put it back together.

Link to comment
Share on other sites

Create an account or sign in to comment

You need to be a member in order to leave a comment

Create an account

Sign up for a new account in our community. It's easy!

Register a new account

Sign in

Already have an account? Sign in here.

Sign In Now


×
×
  • Create New...