Jump to content
SAU Community

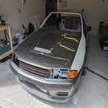
R32 Gts4 - Restoration/rebuild


Recommended Posts

yep. part of the reason when I get to that point the seats/panels go on a truck to MLB (or if its around Oct I'll take them myself.) if anyone can find what I'm looking for this fellow can.

Link to comment
Share on other sites

227464_2038747331553_1330376598_32451058_4837213_n.jpg

start of rear guard removal. most of it was hit with an angle grinder to get it off.

229284_2038747651561_1330376598_32451060_5458637_n.jpg

rear guard section. that took the fuel filler mount with it when it came off. that mount is not part of the guard - it is an extra piece.

224179_2038747571559_1330376598_32451059_4772572_n.jpg

rear wheel arch -inside. the rear area lower is almost non existent. panel shop is aware of it and has already worked out how to fix it.

the other side is fine.

still need to remove the sealant around the fuel tank hole

229214_2038747931568_1330376598_32451061_6317836_n.jpg

inside view of the lower rear guard - all of this crap is what caused the thing to rust in the bottom corner.

if you have crap like this in your's - clean it out!

225114_2038748171574_1330376598_32451062_4098950_n.jpg

this has been cleaned with thinners and ground clean. there is a ventilation duct that sits in the void. the small hole in the top left was a screw.a bit of brass will fill that. the lower white seam will need to be resealed.

223039_2038748291577_1330376598_32451063_5601666_n.jpg

more guard removal - the weld mark is where the cut n shut was done. the people that did it certainly liked the stick welder.

226469_2038748611585_1330376598_32451064_562004_n.jpg

close up of bog used on that side. there is 3-4mm there. that is all gone now.

222634_2038748731588_1330376598_32451065_2509206_n.jpg

removal of the ORIGINAL panel (top area) that was welded over. once the new ones land it will be done with brass to hide the seam.

230704_2038748931593_1330376598_32451066_693673_n.jpg

original panel gone. note lower area. this was the result of two things: a misplaced sunroof drain and incorrect jacking. I am going to make a hole in the new sills so that the sunroof drains out to the ground and not into the new sills.

222779_2038749131598_1330376598_32451067_3397662_n.jpg

close up of the top area showing where the factory roof/guard seam is. cable ties are holding the build plate for the car. I do not have a safe place to put it at this point.

216099_2038749251601_1330376598_32451068_7710210_n.jpg

closeup of lower area showing rust from sunroof drain and incorrect jacking. that sill had been replaced once already.

225789_2038749531608_1330376598_32451069_3391878_n.jpg

another photo of the crush and where I cut it loose

217194_2038749691612_1330376598_32451070_1421798_n.jpg

the above section of panel removed. note rust on bottom.

215944_2038749891617_1330376598_32451071_3418239_n.jpg

panel off showing sill damage and rust because of it.

223084_2038750091622_1330376598_32451073_186611_n.jpg

this was the cracked area that is visible quite a few images back. note the build up of crap behind it. at that point the only part of the guard left is on the B pillar.

227939_2038750251626_1330376598_32451074_4830273_n.jpg

rear area prepped and ready for new panel. the side window area and rear window area have also been done.

224344_2038746811540_1330376598_32451056_4761356_n.jpg

this is how it sits when I'm done with it for a bit. looks bad in the work shop otherwise. great talking point though once I pull the cover off.

Link to comment
Share on other sites

229888_2041046789038_1330376598_32454463_7763041_n.jpg

Ordered a couple more small bits today. Fig 78120,78126.

those are NOT part of the rear guard.

in addition to this FIG 78111E & 78100B are also not part of it. 78111E is no longer available new from nissan. I have mine still and its it perfect condition so I will cut it out of the panel and reuse it. I am going to wait on Fig 78100B and see if it is part of the guard. the diagram says otherwise but seems most things on this car are getting revised as it ages.

part numbers for those playing at home:

78120-04U00 - Base Filler lid

78134-04U00 - corner rear fender RH

78112-04U30 - fender rear RH

the first two are cheap at 30 & $50 each. the rear guard though not cheap. $700+ ! yet to order it.

roof panel is due about the 10th or so of may.

had the panel guy out today for a 45 minute chat about the car and what else I needed to do with it. from my side (removal of things and buying new parts) I'm just about done with it. I can't drop the sills off until I get the car to the panel shop. if I do it before hand the thing will be a pretzel and lose shape.

GT motors is quite impressed at what I am doing and how I am pulling it down a piece at a time. to be honest I'm learning a fair bit as well by doing it.

I know now exactly how the car was put together and where all the seams are on it.

to those that call me a mad man - nope determined is the better word.

wait till you see what I do with the inside of it. :)

Link to comment
Share on other sites

223411_2045533901213_1330376598_32461214_4270869_n.jpg

remnant of rear guard. spoke to the panel shop about removal and was told to be precise and punch through every spot weld on it (I have found 6.) and it will slide out.

230453_2045534101218_1330376598_32461215_1372319_n.jpg

area around rear guard removed. it has been sectioned when the side was done. rear area has to be rebuilt.

225644_2045534181220_1330376598_32461216_6099716_n.jpg

close up of rear area. a lot of crap fell out of that when I ground it off with a grinder

225662_2045534421226_1330376598_32461217_2843807_n.jpg

forward B pillar - stray metal removed and prepped with copper paint. the lower sill scrap can stay there for now. the main area I wanted to clean was the painted section so I could see where the sill was and how it fits into this giant jigsaw puzzle.

as it sits now the outer sill is first, B pillar panel second and inner sill 3rd. the outer is going to be easy to get off. the inner one I'm not sure on until I get started in the outer. car has to go to the panel shop for this part of it. I am doing the removal but not at the risk of it folding like a pretzel if I do it in my workshop and THEN move it.

Link to comment
Share on other sites

208169_1996014743265_1330376598_32387933_5207135_n.jpg

quick note for those tossing GTR tanks in a GTST body. the rubber bung (to the right of this image) IS THE STRAP MOUNTING POINT FOR A GTR !

that makes my patch job a bit easier as I do not have to worry about strength on that point as the mount needs to slide across a hole.

Link to comment
Share on other sites

221652_2047628513577_1330376598_32463955_5296644_n.jpg

fuel strap support removed. that hole was under it (see a few images back) and as such it will be sectioned out and replaced with a bit of steel. the hole I need to use is covered by the steel brace.

218122_2047628593579_1330376598_32463956_3551436_n.jpg

rear shot of removed fuel strap support. that is the other side of the rust spot.

226852_2047628313572_1330376598_32463953_5820400_n.jpg

this was a right royal pain in the ass to get off. one layer of steel over it and one under it. it did NOT help that it was welded in place from the top down. see next image for a MUCH better explanation.

216382_2047628393574_1330376598_32463954_3045178_n.jpg

there's not a lot left in that top corner. I'm in two minds here. ENTIRE rear shelf or a steel plate. body shop can decide there.

the top corner of it was ALL weld not a scrap of steel to punch through and remove. the back end of it was 4 spot welds and it came loose. the top left that mess when I removed it.

Link to comment
Share on other sites

post-2209-1287562515_thumb.jpg

its a new radiator overflow bottle. there is a trap when buying these things: you can buy the bottle/hose, you DO NOT get the yellow cap. that cap costs $10 extra! bottle cost is $170.

I have a brand new cap you could have for $0 but I guess too late now >_<

Link to comment
Share on other sites

231010_2054674529723_1330376598_32475976_5634711_n.jpg

spoke to the panel shop today about the mess in the right rear corner of the window - it was suggested that it would be cheaper (labor wise) to replace the rear shelf than it would be to make a patch for it. I tend to agree myself. this is another panel that stays in place until the car goes to the panel shop. given that it ties the middle of the car together I'm not about to remove it just yet. there are 45 spot welds on it that will take me about and hour or so to get off.

part number is : 79400-04U30 for those keeping track

229373_2054674729728_1330376598_32475977_2105972_n.jpg

for those that want to check - this is what the rear seam around the boot is 'supposed' to look like. if you do not have one there is a VERY good chance that yours has been crashed and you have the problem I am faced with now.

229641_2054675169739_1330376598_32475981_974648_n.jpg

tape measure showing length of 'caulk' seam. this is mainly for my reference so the panel shop has a reference to work from.

228134_2054675049736_1330376598_32475980_5586876_n.jpg

picked this up today. its a GTST item and now I have a full set of reverse lights that are not cracked. the inner mounts are intact as are the steel brackets that hold it to the body. see the next two images for a better description

228557_2054674849731_1330376598_32475978_914868_n.jpg

image showing damaged mounting points and torn plastic tabs

229291_2054674969734_1330376598_32475979_7020727_n.jpg

close up of the steel brackets/plastic tabs. 90% of these things are rusted (right side) or the plastic mounting points have been sheared off. in both cases it makes the panel almost useless.

Link to comment
Share on other sites

225654_2056872224664_1330376598_32478834_6521278_n.jpg

some new bits: the left one is the lower rear right corner brace for the boot. the right one is the fuel filler panel. this is an addition to the rear guard and not part of it.

I also ordered the rear boot panel today as well. it is a LOCALLY kept piece out of MLB.

the rear shelf is next to order and that too is a LOCAL piece. It seems local support for this car is great!!

there are $90 worth of bits there.

227719_2056872464670_1330376598_32478835_381726_n.jpg

closeup showing part number

230174_2056872024659_1330376598_32478833_4139866_n.jpg

close up showing part number

Link to comment
Share on other sites

God almighty she is in rough shape... credit to you mate. Great work!

give me 6 months :)

the interior arrived today for it , the engine arrives on monday from there it's a case of reassembly once a few more panels arrive.

Link to comment
Share on other sites

spent some time tonight unpacking a pallet of stuff. two boxes , carpet,boot trimmings and lots of panel work. all of it out of a 89 GTR that could not have been over 38-40K old. every bit of it was clean as and I have put all of it away and in boxes. dash included.

it was a far cry from where I started and once the body is done/painted it will go in. purchased it off a SAU NSW club member. cheers pete :)

I also started stripping the mirrors down and bagging the bits. if I can get the paint off without destroying them in the process then I will start cleaning them up. I have to find new mirror glass that is FLAT glass. I think that is going to be fun

Link to comment
Share on other sites

in the thick of it Chris....

nice to see regular updates.. i am an avid follow of the tread

you got to see it though. most are not that lucky.

I will say one thing at the end of this build. if anyone door dings it I will probably kill them.

Link to comment
Share on other sites

as am I. I will be doing test fitting on the majority of it. the drivers side should be easy as all of it will simply line up as the factory built it. the passenger side I think will be interesting. I still have a factory fitted guard there and getting it loose without destroying it will be the hard part. I'm not keen on doing that one as well when there is nothing wrong with it.

Link to comment
Share on other sites

Create an account or sign in to comment

You need to be a member in order to leave a comment

Create an account

Sign up for a new account in our community. It's easy!

Register a new account

Sign in

Already have an account? Sign in here.

Sign In Now


  • Similar Content

  • Latest Posts

    • Gtr are still available through the heritage program but don’t have the wiring 
    • I remember test driving this car at Odaiba. All the controls are very light so it's good for commuting. I don't think a 1.2L turbo would make sense in the US though, you would be constantly deep in the boost in highway cruising. 
    • As the Bogan Cruise Ship has nothing wrong with it, and is perfect the way it is, I have decided to fix that issue, nothing major, just a little tidy up and upgrade some parts that don't really need to be upgraded  1. Upgrade the interchiller, basically another fancy pants modern and efficient condenser, a larger reservoir (current one only holds about 500ml) and a better pump (the current pump has a little rattle, so......while I'm in there.....) 2. Move the battery to the boot so I can use that real-estate to fit in a nice big reservoir where the battery currently is As for a new car, I'm holding off buying one for a few reasons: 1. Not enough garage space for another nice car, yes....I consider the Bogan Cruise Ship a nice car that needs a roof over its head, which leads to point 2 2. I'm buying a joint down the south coast next year, hopefully I can find a joint with a nice big double garage that I can get a car lift in, or, it has a massive shed for lots of cars, and a lift (I really really want a car lift) 3. I cannot decide what I want, a new freshness with all the mod cons, or a fairly old thing that I can play with when I'm bored (old as in steel bumper) In other news, there's a light at the end of the tunnel, and it isn't a train coming to run me over  Not that I'm counting 
    • A snake slithering out of a drain in Asahiyama Zoo in Asahikawa, Hokkaido. It wasn't part of an exhibit...
×
×
  • Create New...