Jump to content
SAU Community

Recommended Posts

Hey All,

Well i am very happy to say, thanks to the guys at GT Auto Garage, i have my 32gtr back on the road again after about a 6yr absence. It was an extremely big decision to take the path i have with the build, but i am glad i made the choice.

I originally bought my R back in about 2003 after owning a r32 gtst for about 1yr. When it arrived in the country it had some aftermarket parts already fitted and i enjoyed it like this for about 4months, before carnage :P lol as any gtr owner will understand.

The first problem came about from a spun bearing, piston 5 having no ring lands left at all and the rear turbo non existant. Probably should not have turned up the boost controller so far..... hehe.

After difficulties with 2 workshops a good friend of mind suggested i talk to Alex and the guys at GT Auto Garage for help and advice on setup and future plans. Over a few weeks we came with the current setup choice and am extremely happy with the outcome.

ENGINE & ACCESSORIES

- Step 2 HKS 2.8Lt kit (crank, rods, pistons, head gasket etc)

- Step 2 HKS head. (cnc machined in. & ex. ports, oversized valves all carried out by HKS JPN)

- HKS camshafts 272deg in. 280deg ex.

- HKS cam gears

- HKS fine tune timing belt

- HKS oil pump

- HKS oil cap

- Greddy Sump extension and baffles

- Greddy Oil Cooler and remote mount oil filter

- Greddy Aluminium radiator

- Greddy Radiator Cap

- Greddy Lightweight Pully kit

- N1 water pump

- ATI harmonic balancer

- HKS twin power ignition

- Splitfire Coils packs

- Dual SPAL 10’ thermo fans

- SARD 1000cc injectors

- SARD billet fuel rail

- SARD rising rate fuel regulator

- GT AUTO custom surge tank

- Dual Bosch 044 external pumps

- HKS Fcon V Pro ECU

TURBO, EXHAUST & INTAKE

- Trust T88-34d turbo kit inc manifold & wastegate

- Greddy Drag Intercooler 600x300x150

- Greddy Plenum & oversized throttles(6)

- Trust Airix air filter

- GT Auto custom 4" intake

- HKS racing bov

- GT Auto custom S/S wrapped downpipe

- HKS silent HiPower Exhaust

DRIVELINE

- Stock gearbox (upgrade pending)

- NPC twin plate clutch

- Upgraded diffs. spec unknown

BRAKES & SUSPENSION

- DBA 4000 rotors (full f&r upgrade pending)

- Upgraded pads

- Braided brake lines

- APEXi N1 dampers (coil overs)

- Nismo adj arms

- HKS/Kansai Service tower bars

WHEELS & TYRES

- R34 GTR Wheels – 18x9 +30 powdercoated in satin black

- Bridgestone Potenza RE55 semi slicks 265/35/18

BODYWORK

- Genuine N1 Front bar with “Rocket Dancer” carbon fibre lip

- Fujimura Auto Carbon Bonnet

- Garage Defend Carbon cooling panel

- N1 side skirts

- Standard rear bar

- Top Secret style rear diffuser

- Veilside GT2 carbon fibre wing

- LED Tail lights

INTERIOR

- 7-point bolt in roll cage

- Veilside 340km & 11,000rpm white faced dash & aux meters

- Veilside VSD1 fixed back seats

- Veilside combat steering wheel

- Veilside combat shift knob

- HKS Evc6 boost controller

- Gizzmo dual stage shift light

Thanks for looking. Comments and advice welcome.

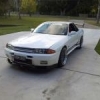
I will take some more pics in the coming days as i don't have very many. These are taken on the weekend i got it back which quite a few months ago now.

Mike.

post-22000-1289199607_thumb.jpg

post-22000-1289199650_thumb.jpg

post-22000-1289199698_thumb.jpg

post-22000-1289199744_thumb.jpg

post-22000-1289199779_thumb.jpg

post-22000-1289199932_thumb.jpg

post-22000-1289199953_thumb.jpg

post-22000-1289199998_thumb.jpg

post-22000-1289200007_thumb.jpg

post-22000-1289200046_thumb.jpg

post-22000-1289200058_thumb.jpg

post-22000-1289200101_thumb.jpg

post-22000-1289200109_thumb.jpg

post-22000-1289200167_thumb.jpg

post-22000-1289200176_thumb.jpg

post-22000-1289200184_thumb.jpg

post-22000-1289200262_thumb.jpg

post-22000-1289200285_thumb.jpg

post-22000-1289200295_thumb.jpg

post-22000-1289200315_thumb.jpg

post-22000-1289200331_thumb.jpg

post-22000-1289200359_thumb.jpg

post-22000-1289200369_thumb.jpg

post-22000-1289200379_thumb.jpg

post-22000-1289200387_thumb.jpg

post-22000-1289200404_thumb.jpg

Link to comment
https://www.sau.com.au/forums/topic/343513-mikes-r32-gtr/
Share on other sites

Yes BLUR, i think i owe you something for the great suggestion. Im soo swamped with work atm its crazy, ive had no chance to get to see the guys and talk about those upgrades. Ive sent some emails back and foward with Holinger to find out what they would suggest.

Im just itching to see how it goes at QR....

Link to comment
https://www.sau.com.au/forums/topic/343513-mikes-r32-gtr/#findComment-5539825
Share on other sites

Yes BLUR, i think i owe you something for the great suggestion. Im soo swamped with work atm its crazy, ive had no chance to get to see the guys and talk about those upgrades. Ive sent some emails back and foward with Holinger to find out what they would suggest.

Im just itching to see how it goes at QR....

Wow you'r Car is amazing, 2.8 KIT :) ... I also have to go to them for Tuning when my R arrives this month, initially i had to go GT Auto as there are the only shop with HKS F-COn, but after reading your build, i will go there with lot more appreciation and knowing there Top notch place

PS - Not a big fan of the rear wing... i am sure you need it though with a monster like this

Link to comment
https://www.sau.com.au/forums/topic/343513-mikes-r32-gtr/#findComment-5539864
Share on other sites

maclarenf1 - id prefer to have something on there than not at all for when i do go to QR...lol

but after seeing a couple of their cars and the workmanship on their FD, the decision to spend a lot of money with them was quite simple. They are maticulous in what they do and the approach to customers if first class.

GTRAAH - i bout the led units about 4yrs ago from jpn. all i did was remove the standard white outer cover and made sure it all fitted correctly, then sicker-flexed and screwed it back into the rear panel making sure it all lined up correctly. this process took q couple of weekends till i was satified. Still thinking of going back to red led's tho...

Link to comment
https://www.sau.com.au/forums/topic/343513-mikes-r32-gtr/#findComment-5540002
Share on other sites

hahaha, well i don't have a carbon grille anymore :unsure:

changing to carbon panel's have been in the back of my head.... but if i go that far the car will no longer be registered and im not sure i like that idea...lol

Edited by dahandfull
Link to comment
https://www.sau.com.au/forums/topic/343513-mikes-r32-gtr/#findComment-5541906
Share on other sites

I am a big fan of that fuel system setup :(

This would be a great package to punt around and QR's back straight would let you get a big head of steam up so definitely bigger brakes there lol

Keen to follow this one

Link to comment
https://www.sau.com.au/forums/topic/343513-mikes-r32-gtr/#findComment-5542846
Share on other sites

thanks Weapon....

im not sure punting around is the correct term there :( ...... its a massive handfull at the moment due to how early it makes its power and more importantly the delivery of the torque. Yes, definately a big set of 6pots is a must before i attack QR...

Thanks for your feedback.

Link to comment
https://www.sau.com.au/forums/topic/343513-mikes-r32-gtr/#findComment-5543064
Share on other sites

BOOST31 - Thanks bud.... Ive tried to keep it pretty unique while looking truely JDM style :D lol

What i like the best about it is we are still using pump fuel & we havn't even cracked 20psi yet to make all this power & torque. I want to run a few more km's before that happens. 25+ and e85...... oh dear!! :)

Link to comment
https://www.sau.com.au/forums/topic/343513-mikes-r32-gtr/#findComment-5551975
Share on other sites

Create an account or sign in to comment

You need to be a member in order to leave a comment

Create an account

Sign up for a new account in our community. It's easy!

Register a new account

Sign in

Already have an account? Sign in here.

Sign In Now


  • Similar Content

  • Latest Posts

    • No, your formula is arse backwards. Mine is totally different to yours, and is the one I said was bang on at 50 and 150. I'll put your data into Excel (actually it already is, chart it and fit a linear fit to it, aiming to make it evenly wrong across the whole span. But not now. Other things to do first.
    • God damnit. The only option I actually have in the software is the one that is screenshotted. I am glad that I at least got it right... for those two points. Would it actually change anything if I chose/used 80C and 120C as the two points instead? My brain wants to imagine the formula put into HPtuners would be the same equation, otherwise none of this makes sense to me, unless: 1) The formula you put into VCM Scanner/HPTuners is always linear 2) The two points/input pairs are only arbitrary to choose (as the documentation implies) IF the actual scaling of the sensor is linear. then 3) If the scaling is not linear, the two points you choose matter a great deal, because the formula will draw a line between those two points only.
    • Nah, that is hella wrong. If I do a simple linear between 150°C (0.407v) and 50°C (2.98v) I get the formula Temperature = -38.8651*voltage + 165.8181 It is perfectly correct at 50 and 150, but it is as much as 20° out in the region of 110°C, because the actual data is significantly non-linear there. It is no more than 4° out down at the lowest temperatures, but is is seriously shit almost everywhere. I cannot believe that the instruction is to do a 2 point linear fit. I would say the method I used previously would have to be better.
    • When I said "wiring diagram", I meant the car's wiring diagram. You need to understand how and when 12V appears on certain wires/terminals, when 0V is allowed to appear on certain wires/terminals (which is the difference between supply side switching, and earth side switching), for the way that the car is supposed to work without the immobiliser. Then you start looking for those voltages in the appropriate places at the appropriate times (ie, relay terminals, ECU terminals, fuel pump terminals, at different ignition switch positions, and at times such as "immediately after switching to ON" and "say, 5-10s after switching to ON". You will find that you are not getting what you need when and where you need it, and because you understand what you need and when, from working through the wiring diagram, you can then likely work out why you're not getting it. And that will lead you to the mess that has been made of the associated wires around the immobiliser. But seriously, there is no way that we will be able to find or lead you to the fault from here. You will have to do it at the car, because it will be something f**ked up, and there are a near infinite number of ways for it to be f**ked up. The wiring diagram will give you wire colours and pin numbers and so you can do continuity testing and voltage/time probing and start to work out what is right and what is wrong. I can only close my eyes and imagine a rat's nest of wiring under the dash. You can actually see and touch it.
×
×
  • Create New...