Jump to content
SAU Community

Recommended Posts

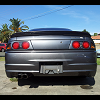
So some mong decided to Reverse into my front bar wrecking it and my brand new numberplates that i just had reprinted a month prior.

201202092053351200x9001330526785.png

201202092054001200x9001330526785.png

201202092054161200x9001330526785.png

201202092054321200x9001330526785.png

So Insurance sorted it out :)

201202241653301200x9001330526785.png

Brand New BN Sports front bar :D

  • Replies 84
  • Created
  • Last Reply

Top Posters In This Topic

So time came to install reconditioned diff as the old one seemed to be a bit of a 1 wheel wally anyway.

Sandblasted crap off backing plate.

201202251804271200x9001330527162.png

Gave it a good polish.

201202251903421200x9001330527162.png

Sprayed with Stoneguard underbody paint.

201202251951331200x9001330527162.png

201202251952081200x9001330527162.png

Polished off the Axle and Drive shaft contacts and any overspray on the backing plate then Filled up with Castrol LSX90 (Took 1.45L).

201202271808081200x9001330527162.png

Car jacked up with front bar almost touching the ground.

201202272110031200x9001330527311.png

201202272116561200x9001330527311.png

Opened up old diff. Oil was pretty bad with heaps of shit in it.

201202272220231200x9001330527311.png

Rear piece of Drive shaft has reinforcement that doesnt seem to be factory and had 2 stickers on it with "JR" on them.

201202272327421200x9001330527244.png

201202272326591200x9001330527311.png

All done :)

201202280103251200x9001330527244.png

Next up is Headlight restoration hopefully tomorrow then Painting Calipers next week.

201202271808531200x9001330527311.png

Y u no Impul front bar? Also JR stickers are factory. Nfi what it's for but they all have em.

I only had a few choices through insurance but then found a company making copy kits in Brisbane for very cheap. But then at that time it was too late.

But for me, this bar is far better looking than impul bar could ever be. So when i get a full respray in the distant future i will buy an Impul bar and have that trial-fitted and sprayed and then keep it as a spare for when i sell the car.

Front bar is looking tops mate, much nicer than the one that was on there when you first got it.

Cheers man :)

Yeah true that. The style doesn't suit the kit nor does the colour suit the style...

So finally got round to doing my headlights a few days ago :D

44918579881e45965e3f1330877147.jpg

So from This:

201201071709331200x9001325950577.png

201203011316161200x9001330876338.png

To this:

201203011349341200x9001330876338.png

201203011358311200x9001330876338.png

Guess i also might post up my video from the Skyline Sound thread in the Skyline section.

Location is in description ;)

Every time I see this thing I regret buying a coupe.

How much was the headlight restore kit?

Yeah i regretted it, especially seeing as i prefer 4 doors. Was just a silly opportunity that i took up. To me they look too big and long for a 2 door vehicle from the 90s,bit cramped and 4 doors handle better because of more overhang in the rear. i Found the 2 door to be quite snappy with loss of traction compared. Only thing i loved about it was Rims,Exhaust and Sunroof and i kept rims and exhaust aha. Loved the sunroof but because the 2 door roof is lower than 4 door to start with and im 6 foot tall my head was touching the roof with a sunroof setup lol.

Mind you yours looks pretty nice in a stock form with rims and no wing :)

I payed $43 at Autobarn. Just walked in the door and they had them on the front desk, payed and left.

If you look around you might be able to find it cheaper and i think its on ebay for 39. Some places have higher prices like Repco about a year ago wanted $51.

Works a treat every time(Have used on 3 R33s so far ;) ) lasts a long time because of uv protective film you wipe onto it and it doesn't take long to do.

Yeah I'm happy with how mine looks (thanks.gif), could be a bit straighter, oh well.

My next one will have the correct amount of doors. whistling.gif

Yeah I tried the Turtle Restoration Kit (payed about the same as your kit) and I don't think I was aggressive enough with the sanding and it needs doing again. I'll have to remember when they get really bad to try the Invision Kit.

Sounds good bro :)

Yeah definitely this kit bro. Its the bomb!

With the diff re furb did they just reshim it or something else and approx how much to have this done please?

Also, you still have the hicas? Is it on the list to go?

My Mate bought the diff with a halfcut engine last year from a wreckers. Dont think it was shimmed but upon opening it, it had definitely been reconditioned.

Yeah Hicas is still rocking i think.

Not buzzed by it really as im no drifter.

I love how well a skyline can come up after a decent headlight touch up. Makes it look like a hole new car.

Yep :) Everytime!

Third skyline to just stand back and go "wow!"

Cars looking tidier and tidier. Agree on the sunroof comment above, thought about taking sunroof out of parts car for the taxi but I'm 6" as well and it felt pretty cramped with the sunroof.

Yeah prenty of room in a 4 door without aye.

just like a meth addict needs his fix, this car makes me need a 33 4 door

Aha cheers :P

mate,

awesome thread... fantastic car and great persistence!!! top effort. Looks amazing!

Thanks mate, really appreciate it :)

Create an account or sign in to comment

You need to be a member in order to leave a comment

Create an account

Sign up for a new account in our community. It's easy!

Register a new account

Sign in

Already have an account? Sign in here.

Sign In Now


  • Similar Content

  • Latest Posts

    • Hi, is the HKS  Tower Bar still available ? negotiable ? 🤔
    • From there, it is really just test and assemble. Plug the adapter cables from the unit into the back of the screen, then the other side to the car harness. Don't forget all the other plugs too! Run the cables behind the unit and screw it back into place (4 screws) and you should now have 3 cables to run from the top screen to the android unit. I ran them along the DS of the other AV units in the gap between their backets and the console, and used some corrugated tubing on the sharp edges of the bracket so the wires were safe. Plug the centre console and lower screen in temporarily and turn the car to ACC, the AV should fire up as normal. Hold the back button for 3 sec and Android should appear on the top screen. You need to set the input to Aux for audio (more on that later). I put the unit under the AC duct in the centre console, with the wifi antenna on top of the AC duct near the shifter, the bluetooth antenna on the AC duct under the centre console The GPS unit on top of the DS to AC duct; they all seem to work OK there are are out of the way. Neat cable routing is a pain. For the drive recorder I mounted it near the rear view mirror and run the cable in the headlining, across the a pillar and then down the inside of the a pillar seal to the DS lower dash. From there it goes across and to one USB input for the unit. The second USB input is attached to the ECUtec OBD dongle and the 3rd goes to the USB bulkhead connected I added in the centre console. This is how the centre console looks "tidied" up Note I didn't install the provided speaker, didn't use the 2.5mm IPod in line or the piggyback loom for the Ipod or change any DIP switches; they seem to only be required if you need to use the Ipod input rather than the AUX input. That's it, install done, I'll follow up with a separate post on how the unit works, but in summary it retains all factory functions and inputs (so I still use my phone to the car for calls), reverse still works like factory etc.
    • Place the new daughterboard in the case and mount it using the 3 small black rivets provided, and reconnect the 3 factory ribbon cables to the new board Then, use the 3 piggyback cables from the daughterboard into the factory board on top (there are stand offs in the case to keep them apart. and remember to reconnect the antenna and rear cover fan wires. 1 screw to hold the motherboard in place. Before closing the case, make a hole in the sticker covering a hole in the case and run the cable for the android unit into the plug there. The video forgot this step, so did I, so will you probably. Then redo the 4 screws on back, 2 each top and bottom, 3 each side and put the 2 brackets back on.....all ready to go and not that tricky really.      
    • Onto the android unit. You need to remove the top screen because there is a daughterboard to put inside the case. Each side vent pops out from clips; start at the bottom and carefully remove upwards (use a trim remover tool to avoid breaking anything). Then the lower screen and controls come out, 4 screws, a couple of clips (including 3 flimsy ones at the top) and 3 plugs on the rear. Then the upper screen, 4 screws and a bunch of plugs and she is out. From there, remove the mounting brackets (2 screws each), 4 screws on the rear, 2 screws top and bottom and 3 screws holding in the small plates on each side. When you remove the back cover (tight fit), watch out for the power cable for the fan, I removed it so I could put the back aside. The mainboard is held in by 1 screw in the middle, 1 aerial at the top and 3 ribbon cables. If you've ever done any laptop stuff the ribbon cables are OK to work with, just pop up the retainer and they slide out. If you are not familiar just grab a 12 year old from an iphone factory, they will know how it works The case should now look like this:
    • Switching the console was tricky. First there were 6 screws to remove, and also the little adapter loom and its screws had to come out. Also don't forget to remove the 2 screws holding the central locking receiver. Then there are 4 clips on either side....these were very tight in this case and needed careful persuading with a long flat screw driver....some force required but not enough to break them...this was probably the fiddliest part of the whole job. In my case I needed both the wiring loom and the central locking receiver module to swap across to the new one. That was it for the console, so "assembly is the reverse of disassembly"
×
×
  • Create New...