Jump to content
SAU Community

Recommended Posts

Now, I also have some cosmetic updates as well. Neither of these projects are actually completed yet, but I will post photos of where they are up to.

First of all, I decided to respray my front bar. 2 years of being about 30mm off the ground had taken their toll, and I also wanted to modify it a little bit. First up, I cleared around the damaged areas with an angle grinder to give the new fibreglass something to grip to:

30565_10151347788152541_803073552_n.jpg

528400_10151347788272541_1702785532_n.jp

551388_10151347788747541_1825082946_n.jp

562429_10151347788987541_898079031_n.jpg

305876_10151347789147541_63795262_n.jpg

Doing this actually revealed how poor quality these cheap copy front bars actually are. This one is actually so full of bog rather than fibreglass, it really is very poor. Time to make it a bit better!

485632_10151354898767541_843592550_n.jpg

I actually wanted to build a lip up around the inside of the bottom of the bar, simply to give me something to screw into so I can install a front diffuser later on. So first I wet up where I wanted to build the lip:

393044_10151354898997541_1290511130_n.jp

I then layed up 5 layers of 6oz fibreglass cloth.

946689_10151354901532541_292005436_n.jpg

This is it after curing:

405892_10151354900032541_1953804814_n.jp

923007_10151354900232541_171500339_n.jpg

Also patched up the damaged bits in the process

943406_10151354900382541_638472190_n.jpg

601868_10151354900627541_2099483694_n.jp

I then cleaned it all up a bit using a rotary tool

946133_10151354900887541_1910088597_n.jp

935169_10151354901037541_606086588_n.jpg

941834_10151354901227541_1588018021_n.jp

302767_10151356852817541_1529291567_n.jp

600954_10151356853182541_867403822_n.jpg

And then these mounting tabs on top of the bar had actually giving me quite a lot of trouble in the past, being very flimsy they were always snapping off. Enter 4 layers of carbon fibre

946703_10151356853557541_1845705797_n.jp

Like to see ya snap off now ya jerks :glare:

I am now in the process of smoothing it all out more and getting it ready for paint. This is where it was at after the first coat of filler-primer last night:

941569_10151356854247541_1860576328_n.jp

But wait, there's more!

This project was a bit of fun really, but something I have wanted to do for a long time. Standard GT non-xenon headlights, extra condensation:

321676_10151347789372541_123825905_n.jpg

316000_10151356854757541_2045553658_n.jp

Place in oven at 100 degrees for 8 minutes or until crispy and golden!

164935_10151356855332541_2089819668_n.jp

All disassembled:

945058_10151356856012541_1186237108_n.jp

Will give this a good polish while it's off!

931339_10151356856557541_299221621_n.jpg

Now for the main course. I want to take this:

936352_10151356856967541_438574463_n.jpg

And fit it inside the stock reflector, like so:

270895_10151356857497541_2030138816_n.jp

Which will require a bit of this:

943011_10151356858007541_443318176_n.jpg

But first! I need to do this:

601798_10151356858497541_156392476_n.jpg

944567_10151356858842541_1558664707_n.jp

Bit of dremel work gives me this!

931207_10151356859132541_1084247380_n.jp

Rinse and repeat

936291_10151356859922541_1060488310_n.jp

944497_10151356860177541_1133914271_n.jp

That is as far as I have gotten with those. Undecided how I'm going to finish them, but I think I will paint the stock reflector and E46-R shroud satin black. I was going to paint the cut-off shield behind the projector red to give it a very aggressive look, like this (credit for this work goes to EvoXenon)

image-2345.jpg

but I don't think I will do that. I wanted a classier look, not necessarily a more aggressive look. I don't think the red would suit my car very well.

That's almost more aggressive than red! Haha. Does look awesome though. I think I'll just leave them clear for now and see how it all looks put together. If I don't like it I can paint it, but if I paint it and don't like it then I'm pretty screwed.

Shinobi how's are your headlights going? Does the paint cope with the heat ok? Do you get any bits of light coming out from the side reflector next to the projector? I sorta suspect these projectors will leak a bit of light out the sides, trying to figure out how to seal them. Might chat to Steve again.

Edited by Hanaldo

Hmm maybe try a lighter colour like a turquoise or something.

The headlights are all finished and on my car now and work a treat. Light output is so much better!

Yeah the paint is still fine. Just make sure it's high temp that you paint it with. My projectors are mounted a little further back so the shroud can sit flush with the reflector. And cause of that the only light that you see is the light coming out of the projector.

I'll try get EvoXenon in on here so he can share some of his insight

Edited by shinobi_s14

Sprayed them satin black last night, takes the chrome edge off them, makes them look a bit more factory I think. I like them. With any luck I should get them finished today or tomorrow.

Well they are done and ready to go on the car. But I've just finished spraying my front bar and some other bits, so the car is currently covered up. Don't want to risk putting dust in the air by moving anything, so I won't do any more tonight. But everything should be done in the next couple of days!

So, car is finally all finished. Spent today wiring the bi-xenons and then tucking the headlight wiring to neaten things up, 4 HID ballast gets pretty messy! Looks much better now. Also decided to remove the eyelids. Anyway, some photos:

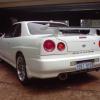
First, another one of the front bar:

270690_10151364319192541_217059185_n.jpg

Another thing I fixed up while I was at it, some of you might remember this damage I picked up at Powercruise last year:

73899_10151045451342541_302461923_n.jpg

Fixed and sprayed:

943323_10151364318762541_134944663_n.jpg

And blended in:

934721_10151364319532541_1603297816_n.jp

Then, here is the final product with my headlights:

21105_10151362846022541_2073803762_n.jpg

942554_10151362846362541_79494676_n.jpg

934975_10151364186512541_785376315_n.jpg

944178_10151364185962541_292225567_n.jpg

936958_10151364054782541_530869902_n.jpg

Also took the car for a drive for the first time since I started. Drives totally fine, can't tell that I've touched the cam timing. Of course I'm not boosting at all, so will need to wait until Tuesday to see how the car goes on the dyno. Only mayyyybe issue is that I drove 46 km's tonight and the car stayed very cool, never reaching normal operating temp. Water temps only just reached 70 degrees by the end of my trip and the oil temps never went over 60 degrees. They are normally both up around 80-85 within 10 minutes of driving. So I'm thinking perhaps my thermostat is stuck open. I'll check that out.

Create an account or sign in to comment

You need to be a member in order to leave a comment

Create an account

Sign up for a new account in our community. It's easy!

Register a new account

Sign in

Already have an account? Sign in here.

Sign In Now


  • Similar Content

  • Latest Posts

    • Thanks for that, I'll check it all out. I can always do the brakes last anyway if its a problem.  The 16's are super cool, if they do fit I'll cruise around with them for a bit.  
    • Well, that's kinda the point. The calipers might interfere with the inside of the barrels 16" rims are only about 14" inside the barrels, which is ~350mm, and 334mm rotors only leave about 8mm outboard for the caliper before you get to 350, And.... that;s not gunna be enough. If the rims have a larger ID than that, you might sneak it in. I'd be putting a measuring stick inside the wheel and eyeballing the extra required for the caliper outboard of the rotor before committing to bolting it all on.
    • OK, so again it has been a bit of a break but it was around researching what had been done since I didn't have access to Neil's records and not everything is obvious without pulling stuff apart. Happily the guy who assembled the engine had kept reasonable records, so we now know the final spec is: Bottom end: Standard block and crank Ross 86.5mm forgies, 9:1 compression Spool forged rods Standard main bolts Oil pump Spool billet gears in standard housing Aeroflow extended and baffled sump Head Freshly rebuilt standard head with new 80lb valve springs Mild porting/port match Head oil feed restrictor VCT disabled Tighe 805C reground cams (255 duration, 8.93 lift)  Adjustable cam gears on inlet/exhaust Standard head bolts, gasket not confirmed but assumed MLS External 555cc Nismo injectors Z32 AFM Bosch 023 Intank fuel pump Garret 2871 (factory housings and manifold) Hypertune FFP plenum with standard throttle   Time to book in a trip to Unigroup
    • I forgot about my shiny new plates!
    • Well, apparently they do fit, however this wont be a problem if not because the car will be stationary while i do the suspension work. I was just going to use the 16's to roll the old girl around if I needed to. I just need to get the E90 back on the road first. Yes! I'm a believer! 🙌 So, I contacted them because the site kinda sucks and I was really confused about what I'd need. They put together a package for me and because I was spraying all the seat surfaces and not doing spot fixes I decided not to send them a headrest to colour match, I just used their colour on file (and it was spot on).  I got some heavy duty cleaner, 1L of colour, a small bottle of dye hardener and a small bottle of the dye top coat. I also got a spray gun as I needed a larger nozzle than the gun I had and it was only $40 extra. From memory the total was ~$450 ish. Its not cheap but the result is awesome. They did add repair bits and pieces to the quote originally and the cost came down significantly when I said I didn't need any repair products. I did it over a weekend. The only issues I had were my own; I forgot to mix the hardener into the dye two coats but I had enough dye for 2 more coats with the hardener. I also just used up all the dye because why not and i rushed the last coat which gave me some runs. Thankfully the runs are under the headrests. The gun pattern wasn't great, very round and would have been better if it was a line. It made it a little tricky to get consistent coverage and I think having done the extra coats probably helped conceal any coverage issues. I contacted them again a few months later so I could get our X5 done (who the f**k thought white leather was a good idea for a family car?!) and they said they had some training to do in Sydney and I could get a reduced rate on the leather fix in the X5 if I let them demo their product on our car. So I agreed. When I took Bec in the E39 to pick it up, I showed them the job I'd done in my car and they were all (students included) really impressed. Note that they said the runs I created could be fixed easily at the time with a brush or an air compressor gun. So, now with the two cars done I can absolutely recommend Colourlock.  I'll take pics of both interiors and create a new thread.
×
×
  • Create New...