Jump to content
SAU Community

Cefiro #3 - Can't Stay Away


konect
 Share

Recommended Posts

Quick update. Bought a few bits and pieces to get this thing closer to driving somewhere.

I managed to get a good haul of parts from a local guy in Melbourne who had to clear out his warehouse. Got 4 doors with windows, boot & bonnet, cluster, glove box, steering column, din pocket - all for a couple of hundred bucks. Very pleased

Little jobs done:

  • Fitted new dash cluster
  • Rewired horn so it actually uses the horn button (was using a little button near the ignition previously but it was a pain to push in a hurry)

Also got some clear indicators thanks to works_510's hot tip. They are a 99% correct fit for the standard Cefiro front bar indicators. Upon fitting I found out some genius has cut the plugs off!! >.<

Only about $45 delivered so I'm super happy with them: http://www.ebay.com.au/itm/170816545537?ssPageName=STRK:MEWNX:IT&_trksid=p3984.m1497.l2649

Other bits....

Rubber grommets to the little hole where the wiper was. Also got a grommet for the space wheel well.

post-18824-0-77380100-1362134755_thumb.jpg

D21 Navara speedo drive to convert my RB25 electronic speedo to the Cefiro's mechanical one. The speedo hasn't worked in the car since I got it so I'm looking forward to actually having a speedo instead of guessing based on the revs! Just hoping that the sending that is in there at the moment is still and RB25 one....

For anyone that needs to connect and RB25 speedo in a Cefiro there is a great guide here: http://www.jdmlegion.com/KnowledgeBase/Engine%20and%20gearbox%20conversions/Making-a-mechanical-speedo-sender-for-the-RB25-gearbox-f0271b89-cd6e-425d-bc0a-ee62f51dfaa7

post-18824-0-60378700-1362134820_thumb.jpg

Edited by konect
Link to comment
Share on other sites

  • 3 weeks later...
  • Replies 47
  • Created
  • Last Reply

Top Posters In This Topic

Top Posters In This Topic

Posted Images

we're getting there, how far are we from club reg or 1st track day ?

i didn't really notice any damage on your doors ,if you got spares i might be after a pair pending price ?

Link to comment
Share on other sites

  • 5 weeks later...

Well well well chaps, bit of an update here...

Dan - Probly a couple of months away from rego and a track day. Nearly ready for rego but I'm going away for 3 weeks which puts it back. Want to get it retuned before I hit the track.

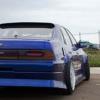
I bought some cheap xxr rims all round with a higher offset and smaller width so they look a bit more reasonable for the street. 9.75in +20 all round but don't have a decent pic as yet so heres a shit one...

post-18824-0-97909800-1366018061_thumb.jpg

Also after doing a heap of searching for silencers that would fit my exhaust I gave up and made my own. In hindsight it actually wasn't that hard and they came out alright. They cut about 5db off the exhaust and remove the deep rumble which the neighbours are enjoying being gone.

post-18824-0-29196500-1366018188_thumb.jpg post-18824-0-89234500-1366018194_thumb.jpg

Finally put my navara speedo sensor to good use and did the conversion mod only to find out that it is the cable that has snapped...the sensor was fine! Ah well, its done now. I read a couple of guides and didn't like their brackets so I made my own. It's 2 pieces of 1.6mm sheet shaped and welded (in hindsight - use 3mm straight off the bat next time). I cut a groove on the side closest to the bolt too so the bracket creates a fork over the sender and then bolts in. This means the sender can't rotate because it is held in place by the 2 sides of the fork.

I have to order a new speedo cable but Nissan wanted $154 for one so I'm waiting on a price back from Jesse and see if Nissan Japan can do any better. If any one has a hook up at Nissan give me a yell. Best price I have from AU is $115 delivered.

Couple of pics for your enjoyment...

Bracket

post-18824-0-72365600-1366018478_thumb.jpg

Slide it on from the back after fitting the sensor. I left a fair bit of metal on the back as there is space and it makes it easier to fit / remove.

post-18824-0-77478300-1366018483_thumb.jpg

All connected up (with the broken cable) and bolted in. Bracket is super tight with no movement. Not bad for an hrs work in the shed.

post-18824-0-34444100-1366018488_thumb.jpg

Hopefully next update will see it off the jack stands and rolling again.

To do in the coming weeks:

  • Raise front coils
  • Wire front indicator wires and fit indicators
  • Replace cat gaskets as both sides are blown (want to fit an Apexi ECV first - having a drainer of a time finding one though!)
  • Fit new speedo cable once it arrives
  • Refit interior dash pieces

I think after all that it will be almost rego time!

Edited by konect
Link to comment
Share on other sites

thats a fair call dont want it to lean out on the track.

for the speedo cable i'm using a vl rb30 cable for 20 bux at the wreckers, broke my other 2 r32 cables on skids so the vl one is a bit more sturdy and is lasting me longer

Link to comment
Share on other sites

thats a fair call dont want it to lean out on the track.

for the speedo cable i'm using a vl rb30 cable for 20 bux at the wreckers, broke my other 2 r32 cables on skids so the vl one is a bit more sturdy and is lasting me longer

Interesting.....

I heard that the VL turbo ones work but I'm not sure about one from the wreckers...might just break again. But for $20 I might give it a go. I could buy 5 of them for 1 new cable haha

Link to comment
Share on other sites

All good. Jesse said a brand new one is $100 delivered so I've ordered one.

Spent some time today removing the cat and as usual had to grind off at least one of the exhaust bolts. Someone had already had a go at removing it in the past and rounded it nicely. Also while I was under the car I noticed a crack in the floor where the trans tunnel meets it and obviously the exhaust has been bashing against it and creasing it in the past. Pulled out the welder and closed it up before it spread any further :)

Also ordered one of these bad boys today - I liked that the lever was a bit more user friendly than the Apexi one and it was ~$30 cheaper delivered.

CircuitSports_EXV-M076-WK_01.jpg

http://www.frsport.com/Circuit-Sports--EXV-M076-WK-3--Exhaust-Control-Valve_p_37639.html

Edited by konect
Link to comment
Share on other sites

  • 1 month later...

Finally had some time to work on the car and fit all the little pieces after getting back from overseas. Took the car of jack stands for the first time in about 2 months and took it for a spin with the new wheels on other goodies.

ECV

ECV arrived from the US just before I left. Put it in when I got back and managed to route the cable perfectly over and around the gearbox, up through the firewall next to the speedo cable then behind the centre console and mounted the little lever on the passenger side (no pics yet though...)

post-18824-0-03697400-1369570412_thumb.jpg post-18824-0-60053100-1369570415_thumb.jpg

Speedo cable

This package arrived while I was away and was a nice little present to have waiting for me. Was pretty easy to remove the old on and put this one in. I haven't tested it with the cluster in yet, but I can see it spinning when I took the car for a drive so I assume it will work!

Ended up being just under $100 delivered from Jesse which I was happy with.

post-18824-0-05646700-1369570505_thumb.jpg

Current state

Finally got to take a pic of the car with the new (temporary) wheels on it. I actually don't mind them, but they need to be spaced out after it gets rego. Front left corner still needs to be raised more. The coil has shit itself from the drive home from QLD when I bought the car so I'll have to get another set in the near future.

post-18824-0-91625800-1369570635_thumb.jpg post-18824-0-64819300-1369570638_thumb.jpg

Also done a heap of little things like wiring front bar indicators, plugging little holes in the floor, cable tying some wiring etc etc.

Things to do before I get it inspected (ETA 2 weeks!)

  • Move boost gauge the A pillar (have a gauge cup waiting at the post office to pickup Monday)
  • Put the cluster and surround back in
  • Tidy the inside
  • Raise the front left a but more
  • Fit indicators to front bar (either the indicators are a bit big, or the slot in the bar is a bit small....)
Link to comment
Share on other sites

Nice work man, I got the Apexi version of the EVC and I love it.

Great for those times when cops are around or you come home late and don't want to wake the neighbors.

Keep up the nice work!

Link to comment
Share on other sites

  • 1 month later...

Some updates. No pics unfortunately.

Upcoming activities:

  • Relocate battery from the back seat to the boot and move the kill switch to free up space for gauges in centre console
  • Fit gauges
  • Put the old exhaust back on, get a dump/front and get a shop to put it all together
  • Do LS2 coil conversion to remove misfire
  • Get it tuned
  • Etc etc etc etc (the list goes on lol)
Link to comment
Share on other sites

  • 1 month later...
  • 2 weeks later...

Finally got around to taking some pics to update this thread! I've been relatively busy with the car and have actually been able to drive it around - feels amazing :closedeyes:

IMAG0477_zpsd7af0099.jpg

I ended up buying a new 100 cell cat and getting a local exhaust shop to weld it up and align the exhaust properly. $80 well spent, saved me the headache of trying to weld under the car. Been driving it around with the mufflers in and it has a reasonably acceptable noise level haha. Had to trim the rear bar for them to fit but is looking good. Can't wait to hit the track with the mufflers out!!

IMG_5710_zps2eb6fe52.jpg

Finished my new gauge installation with its array of switches. I still have to make labels for them but I know what they are so im not too stressed about that.

Made up the bracket from a single piece of aluminium which screws into the stock stereo holes. The gauges have a shit load of wiring to them so I had to draw out a complete wiring diagram to make sure everything works. Here's a run down on what each bit does:

  1. Oil temp
  2. Oil pressure (shown in Bar - car was off at time of photo)
  3. Water temp
  4. Warning buzzer - Each gauge has configurable warning levels switched by an internal relay. All 3 gauges are negatively switched to the buzzer so when the internal relay switches upon hitting the limit it will start the buzzer flashing and beeping (FYI - its really loud)
  5. Switch for buzzer - I added a switch to the buzzer so if something goes wrong and I'm aware of it, it doesn't continually keep beeping at me!
  6. Switch to allow radio, clock, central locking to work when the kill switch is off. When it is on it allows current to pass through a 15amp fuse across the kill switch terminals so if you try and start the car without the kill switch the fuse blows. When it is off it means the car is drawing no power. I have to get used to this as I've blown the fuse twice so far lol
  7. Kill switch

IMG_5708_zpsa1308e89.jpg

After getting sick of hearing every little noise I spent this week making up 2 sheet metal panels to cover the holes where the rear seat and parcel shelf used to be. I've covered all holes and re-routed all the wiring to run through a single hole which I still have to cover with some rubber. It makes a MASSIVE difference to the noise level inside the car and also will allow me to run an external fuel system if the times comes. For all the small holes I tack welded metal covers over them then sikaflexed around them to ensure a complete seal.

I still have to put the other piece of carpet can in but you get the idea....

IMG_5709_zpsf7f82fd9.jpg

Battery has been relocated to the boot. After much deliberation I finally decided to go for the lowest centre of gravity and weld up a platform for it to sit on in the spare wheel well. The clamp is attached to the steel bracket so its not going anywhere. I still need to buy a circuit breaker which also be mounted in the boot to avoid any melt downs if there is a short. Also welded a bolt to the floor to create a good grounded point for the battery.

IMG_5714_zps485e3240.jpg

Things still to be done:

  • LS2 coilpack conversion. I've ordered the coils & pigtails from the US and once I decide where to mount them I'll order the leads too. I've heard great things about these coils making RBs run super smooth and can do the conversion for ~$300 so I thought I might as well do it before getting it tuned.
  • Get it tuned
  • Do a track day!
Link to comment
Share on other sites

Looking good. Have you driven it much with the exhaust valve closed? thinking of doing the same.

Keep waking my 18 month old up when I leave for work!

Yeh I was doing bit of noise testing with it yesterday. The valve can close FULLY (which is just stupid) so where I have it mounted I pull it down about 2/3 of the way.

The best way to explain it is that it takes the 'gurgle' or 'rummble' out of the exhaust. So it is still loud but doesn't have that aggressive tone - hopefully that makes sense. I'll try and take some video of it.

Link to comment
Share on other sites

  • 4 weeks later...

Sooo progress has been made.

Car now has some GM in it with the LS2 coil pack conversion completed. I'd HIGHLY recommend this conversion to anyone. I started the car (very nervously) and waited for the revs to start hunting but they didnt. Stock dwell settings and the car runs much crisper than it did with the splitfires. Doesn't bog down if you don't give it enough revs now either - can't wait to see them at full power with a tune!

IMAG0506_zps918abdf6.jpg

Tune is booked for 30/9 so will be good to see how it runs after that. Then just need some tires and its track time! :)

Link to comment
Share on other sites

  • 1 month later...

Not much to update here...tune got cancelled as I've had a vibration develop somewhere in the driveline. Comes on about 70km/h and shakes the whole car.

Done a few things to find it so far with no luck. I've ordered a Nismo gearbox mount with some new cross member bolts and if this doesn't fix it I have no idea.....

Hopefully have more news soon!

Link to comment
Share on other sites

  • 2 weeks later...

double check that its not the middle rubber mount for the tail shaft that has cracked, as i've been there.

i made up a solid gearbox mount out of 20x50 RHS and a bit of 10mm rubber sheet :P

Link to comment
Share on other sites

Create an account or sign in to comment

You need to be a member in order to leave a comment

Create an account

Sign up for a new account in our community. It's easy!

Register a new account

Sign in

Already have an account? Sign in here.

Sign In Now
 Share


×
×
  • Create New...