Jump to content
SAU Community

Recommended Posts

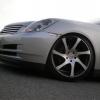
i need to get a better photo but the wheels sit pirfectly and looks sweeeeeet with a spot of camber.

running about 2.5deg camber in the rear now

i have clearence in all direction, a nice ride height and i have taken a few corners and large roundabouts hard and she sticks like a trooper.

a little toe and caster and it feels much more planted at speed which is good. once i get the swaybars in i think i will be happy with the feel of the ride :)

i understand what your saying kiwi, but yeah its still a daily not a race car, i dont think i have done anything overly stupid or dangerous or disprespecfull to other dirvers and so on, if i was to track it or anything i would set it up differently and im happy to have the custom adjustment to do so, some people wont like the look but i love it and im finally happy with the fitment of my car, just annoyed that Varrstoen dont do anything lower than a +12 offset and im forced to use spacers. i would be chuffed it i could have gotten -10, maby for future wheels.

i know the tire wear is increased and i will probably get about 12000km flip them over and another maby 10000km then i need new rears.....and at $100 a pop im not fussed TBH

will get better photos up soon

64413636-2df5-4ab2-90ee-cd96941f2551_zps

Edited by GH05T

Hung over and productive sunday

Picked up a pair of Stagea Impul front seats with rails of a fellow stag owner (dunno if he is on here)

if you are, sorry man was not talkative being quite hungover, but chears.

happy to get these because it allows me to have better seats with a deaper bucket but matching fabric so they blend in nicely like they came with the car.

Firts off it was good having reason to pull the seats out and clean under there....damn filthy.

IMG_3736_zps1873a0ce.jpg

lucky for me the carpets are still in really good condition

IMAG2312_zps6a29ef7d.jpg

ok so this is the comparison, much better looking seat and although it doesn't really show it in photos, they really do hug you allot more.

impul4_zps0d3789f1.jpg

they still need a good clean but so do allot of things, ill let the detailers do that soon enough.

the seating position is also lower, not crazy low but im definatly down a good inch or two

IMG_3730_zps2da7188b.jpg

the fabric is in good condition and they look good in the car. im stoked with them

impul2_zpsb5eb3f9f.jpg

impul1_zps09ff6d84.jpgimpul3_zps217c0e80.jpg

Edited by GH05T
  • Like 1

Nearly grabbed those seats of gumtree when I saw them for my stocky:) good price from memory just one of the bolsters needs a bit of re padding , those seats have a bit of a history been through a few stagea's now, looks good

I removed my leather electric seats (even less support than rs4s seats) and replaced them with the recaros so much better to sit in as you have just found out ;),just got to chuck in the takarta harnesses and fix a slow leak in the passengers side air lumber support , should be some really nice stags out on the next s.a cruise , my mates just quickly done up a rs4s over the last couple of weeks too ,wheels, coilovers, hyper gear turbs, fmic turbo back exhaust, nistune h/d clutch , c/f bonnet, just cams and injectors to go

My recaros (stagea option)

post-76904-0-11813200-1387705593_thumb.jpg

ok so it seams i need to continue my hunt for a decent headlight sealant. the cleaner i use is great but the supposed sealant in it...did nothing

IMAG2316_zpsdfe0y8jl.jpg

also the new light i bought due to the old one getting water inside.....now has f**kign water inside.....f**k

IMAG2315_zps0wexbnxf.jpg

also removed inner guards over the front wheels to fine tweak the suspension. how she now sits and will stay.

IMAG2324_zpsn460kmx4.jpg

IMAG2328_zpspugaytki.jpg

  • 2 weeks later...

haha thanks man, these pics just remind me how much more room i have for poke and lowering.

sooo many things i want to do to the car, it just looks to me like "look at all the stuff im missing" ha

so my list of things to do visually are:

Days rear bar ad-on with black center

days carbon fiber frotn bar center cover

sideskirts of some description

dolphin front grill (still undecided)

dressy wheel nuts

twin chrome exhaust tips

eyelids

fix rust

slimline roofrakcs with thule wind deflector

also i have a colour scheme which i have admired since it blew up on the "scene" which will be the following

wheel nuts

brakes

rotors

engine bits

some subtle stickers

all in turquoise .... i.e...

combine these with some carbon fiber bits with my grey such as front bar inserts, wing maby...will look porn in my eyes

mintcollage_zps40caa34e.jpg

I could be of assistance with the Dayz rear lip. PM me for details if interested.

BTW, Nice rig

Seriously concidering importing on of these

i would get it in white with turquose lettering

IMG_3202.jpg

lettering in this colour instead of black

IMG_3241.jpg

maby even a neachrome center

IMG_3986.jpg

if only it didnt loose my airbag and essentially make it illegal.

would go well with my intended colour scheeme of white grey and turqoise.

what do you think, should do it?

Create an account or sign in to comment

You need to be a member in order to leave a comment

Create an account

Sign up for a new account in our community. It's easy!

Register a new account

Sign in

Already have an account? Sign in here.

Sign In Now


  • Similar Content

  • Latest Posts

    • Good luck on the weekend mate
    • Must have been an absolute nightmare to drive when the power steer was out, the rack ratio/wheel size/caster is all set up for power assistance
    • Welcome to SAU, what are you looking at buying?
    • I checked the injectors again (1 and 2, since they’re easiest to access) to make sure they weren’t clogged. Even though the entire fuel system had been cleaned, I wanted to be certain. Everything looked clean, so I reinstalled and connected everything. When I started the car to confirm everything was okay, it immediately revved up high, so I shut it off straight away. I checked to see if I’d missed a vacuum hose or something, but everything was connected. On the second attempt, the car ran without the high idle, but I noticed a distinct “compressed air” sound coming from the engine bay. Tracing the sound, I pushed injector #6 forward slightly and the noise stopped — it turned out it wasn’t seated properly, despite the fuel rail being bolted down. While holding it in place, the car idled steadily without stalling and ran for over 5 minutes. At this point, I pulled all six injectors out just in case I hadn’t seated them correctly or dirt had gotten onto the O-rings. Unfortunately, I discovered that I had damaged 3 out of 6 injectors (the OEM 270cc ones) during installation. So yes, this was my fault. Since only the pintle caps were damaged, I’ve ordered a Fuel Injector Service Kit from NZEFI to refurbish them. In the meantime, I reinstalled my new injectors – the car now idles fine for over 15 minutes without stalling. I have not attempted to drive it so far. It’s not perfect yet, as it hesitates when the throttle is pressed, but it’s a big improvement. Unplugging the IACV with the new injectors idles at around 800rpm, even with the IACV screw tightened fully. But this is probably due to tune.
    • I wanted to try and preserve the front bumper as long as possible, they're not cheap and are made to order in Japan. Taking inspiration from my previous K11 Micra build where I made an undertray for the Impul bumper, I did the same for this BN Sports bumper but a little slimmed down.  This time round I only made a 'skid plate' (if that's the correct wording/term) for just the bumper surface area, the Micra version covered the gap like an undertray. Starting off with a sheet of mild steel approx. 0.9mm thick 4ft x 2ft in size. I traced around the bumper, cut it out and cleaned the edges. Luckily I was able to get two halves from one piece of metal In the video I installed it as is, but I've since then I've removed it to spray and add a rubber edging trim. The rubber trim is suitable for 1-2mm and it's a really nice tight fit. The bolts had to be loosened due to the plates being too tight against the bumper, the trim wouldn't push on I used some stainless M6 flat headed bolts for a flusher finish (rather than hex heads poking down), I believe this style fastener is used for furniture too incase you struggle to source some. The corner's are a little wider, but this may be an advantage incase I get close to bumping it  The front grill got some attention, finally getting round to repairing it. Upon removal one fixing pulled itself out of the plastic frame, one side is M8 that fixes inside of the frame, where as the other side is M5. Not knowing I could get replacements, I cut down an M8 bolt, threaded it inside the frame along with a decent amount of JB Weld.  The mesh was replaced to match the bumper. One hole on the bonnet/hood had to be drilled out to 8mm to accommodate the new stud, once the glue had set it could be refitted. I think the reason the grill was double meshed was to hide the horn/bonnet latch (which makes sense) but I much prefer it matching the bumper Bumper refitted and it's looking much better IMO The Youtube video can be seen here: https://www.youtube.com/watch?v=bVZP35io9MA
×
×
  • Create New...