Jump to content
SAU Community

Recommended Posts

Picked up another 31 and plan to do a "budget" restoration; as it needs to be tidied up and i have the next few months free. I plan on trying to minimise costs, as it's only going to be used as a daily.

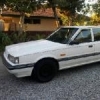
She's a classic white 1989 GX (Auto :glare: ) with around 220,000 kms.

Currently, the first step is to fix her up (I chose to focus on just the front of the car for now). This will include:

  • Rust removal and repair (engine bay and under the guards)
  • Fab up new battery stand
  • 2 replacement fenders
  • Respray the bay (QM1 white)
  • Clean and paint engine
  • Paint rocker cover, fuel rail, intake
  • Pod filter (only due to space) - Cold air intake
  • New gaskets all round (unsure about head gasket yet)
  • New bolt kit for engine bay
  • Paint wheel arches black
  • Paint hubs black
  • Paint calipers blue
  • Fit new rims that have been recently sprayed
  • Fix dodgy/broken wiring and clips

Future plans include:

  • QM1 Polar white paint job
  • Manual conversion
  • New springs and shocks
  • Extractors and exhaust

Will post pictures later on tonight of how she's currently sitting at the moment and what ive done so far.

Even though I've previously owned an R31, I'd say I've got a lot to learn about them still :P

Any help/advice/recommendations will be greatly appreciated. Thanks

Link to comment
https://www.sau.com.au/forums/topic/451086-r33keatons-r31-build/
Share on other sites

Good on ya K dawgie dawg dawg.....all the best with this....I recommend you call it project polar bear !! Hahaa...yeah I am serious !

Haha, Project Polar Bear it is! And thanks, I'm getting stuck into it, there's no turning back now.

Just finished removing the A/C (there was no gas in it) and decided that it will not be going back in the car.

Also removed the alternator, and a few other things which i cant remember right now.

Progress:

post-75365-0-15143700-1416948375_thumb.jpg

post-75365-0-84461100-1416948427_thumb.jpg

post-75365-0-98656600-1416948475_thumb.jpg

Tomorrow's jobs are to remove the water pump + timing cover, exhaust manifold, brake lines + system.

QUESTION FOR ANYONE READING:

When removing all the wiring, i found most of the clips to be quite dodgy, broken, or they broke when i was unclipping them. Some are corroded as well, and i wouldn't really like to hook the car back up with the wiring in its current state. What would be the best (yet cost effective) way to redo the wiring? Could i just drop the wiring off at an autosparky and they'll do it? Is this a costly thing to do? Where can i find something new? or should i just go round to wreckers?

Also, if I'm not putting the A/C back in, do i still need the condenser at the front, the one in front of the radiator? I still want the heater in the car to work.

Any help would be appreciated :D thanks.

Looking forward to watching this build, I have a bit of a soft spot for 31s. If you remove the air on you don't need the condeser as long as the heater hoses are hooked up, the heater will still work. With the loom a auto sparky should be able to replace all plugs if not you should be able to just get a new loom.

Looking forward to watching this build, I have a bit of a soft spot for 31s. If you remove the air on you don't need the condeser as long as the heater hoses are hooked up, the heater will still work. With the loom a auto sparky should be able to replace all plugs if not you should be able to just get a new loom.

Yeh I agree, it's good to mix it up and work on this instead of my 33. Thanks for your reply to my questions also. I plan on maybe just putting some mesh where the condenser was. With the loom, and engine wiring in general, is there a way I can disconnect it easily, so that it could be repaired?

Right now I've got the injector wiring (don't know what it's officially called) hanging out the left side of the engine bay. I've got wiring with concerning headlights, power steering etc , fuse box, hanging out the right side of the engine bay. And starter motor and what not wires (the ones coming from the gearbox tunnel) just hanging down to the ground..

All this wiring is making me confused as electrics are a weakpoint for me :(

For the motor loom if you unplug the ecu and two plugs up behind the dash more, that end should feed through behind the front passenger quater panel into engine bay, and the gearbox ones go to some plug just behind where the battery sits. Hope this helps

Managed to free it, thanks for your help :) I'll probably just redo the tape on it with something that can withstand engine bay heat. Should freshen it up a bit.

The rust was worse than first expected. I will do my best to fix it though. Progress pics soon.

post-75365-0-79646300-1417290232_thumb.jpg

post-75365-0-58142100-1417290202_thumb.jpg

I started removing the air-con inside the car.

post-75365-0-50789900-1417290419_thumb.jpg

The rust peeking through the other side :whistling:

post-75365-0-09145200-1417290467_thumb.jpg

More rust due to poor drainage im guessing.. :unsure:

post-75365-0-62216800-1417290523_thumb.jpg

So the air-con is completely out. What do i still need to keep to be able to run the heater?

Has anyone removed their air-con before and have advice on what they did? I'm unsure of what i need keep/throw away/change.

post-75365-0-14134200-1417290713_thumb.jpg

She's keeping me company atleast!

post-75365-0-14115500-1417290770_thumb.jpg

Took her off the stands and plan to degrease the engine bay and surrounding areas tomorrow.

post-75365-0-49262100-1417290877_thumb.jpg

Cut out the box section of the fender using a multi-tool grinder disk (to keep sparks to a minimum)

post-75365-0-35777700-1417464425_thumb.jpg

post-75365-0-74398700-1417464461_thumb.jpg

Box section removed

post-75365-0-51698300-1417464522_thumb.jpg

All the rust cut out

post-75365-0-98440100-1417464593_thumb.jpg

Will do the exact same for the passenger side.

The battery stand will need to be cut out also. Has seen better days...

This picture was before everything was taken out of the bay.

post-75365-0-10427400-1417465420_thumb.jpg

Finished most of the grinding. Big thanks to my dad for his help :D

Driver's side

post-75365-0-60118800-1418034131_thumb.jpg

post-75365-0-80076700-1418033629_thumb.jpg

Passenger side

post-75365-0-62300700-1418033748_thumb.jpg

Battery stand

post-75365-0-21162300-1418033945_thumb.jpg

Also degreased, wire brushed, sanded, then painted the extractors with high-temp paint. Not sure how long it will last but can only give it a go i guess. Apparently the paint can handle 2000F (just under 1100C) and when completely dry has a matte finish.

post-75365-0-38137700-1418035026_thumb.jpg

Removed the a/c core from its box and will put the interior a/c ducts back together once welding has finished.

Am also considering running dual fans in front of the radiator seeing as there is no condenser in the way, and hence more room.

  • 2 weeks later...
  • 1 month later...

Welding completed, sikaflexed, painted. Box section riveted back on. Will get more pics of box section when i paint the outside.

Cut the battery tray out completely as I decided to move the battery to the boot.

Also removed the air filter brackets and welded them up (pic is before welding).

post-75365-0-19936700-1422296819_thumb.jpg

post-75365-0-74809800-1422297124_thumb.jpg

post-75365-0-82879700-1422296748_thumb.jpg

post-75365-0-97857500-1422297349_thumb.jpg

post-75365-0-51537500-1422297437_thumb.jpg

post-75365-0-61809600-1422297493_thumb.jpg

post-75365-0-74165700-1422297543_thumb.jpg

post-75365-0-69566500-1422297610_thumb.jpg

post-75365-0-82776700-1422297720_thumb.jpg

post-75365-0-15277100-1422297794_thumb.jpg

post-75365-0-45473600-1422297852_thumb.jpg

Create an account or sign in to comment

You need to be a member in order to leave a comment

Create an account

Sign up for a new account in our community. It's easy!

Register a new account

Sign in

Already have an account? Sign in here.

Sign In Now


  • Similar Content

  • Latest Posts

    • @Kapr Haha yeah thats the one. I missed that you had a built up engine, I wouldn't want to run it on there either then. It was good in my situation just to replace the original turbo on a stock engine. @MBS206Yep definitely not a replacement for anything name brand
    • You are selling this? I have never bought something from marketplace...i dont know if i trust that enough. And the price is little bit "too" good...
    • https://www.facebook.com/share/19kSVAc4tc/?mibextid=wwXIfr
    • It would be well worth deciding where you want to go and what you care about. Reliability of everything in a 34 drops MASSIVELY above the 300kw mark. Keeping everything going great at beyond that value will cost ten times the $. Clutches become shit, gearboxes (and engines/bottom ends) become consumable, traction becomes crap. The good news is looking legalish/actually being legal is slighly under the 300kw mark. I would make the assumption you want to ditch the stock plenum too and want to go a front facing unit of some description due to the cross flow. Do the bends on a return flow hurt? Not really. A couple of bends do make a difference but not nearly as much in a forced induction situation. Add 1psi of boost to overcome it. Nobody has ever gone and done a track session monitoring IAT then done a different session on a different intercooler and monitored IAT to see the difference here. All of the benefits here are likely in the "My engine is a forged consumable that I drive once a year because it needs a rebuild every year which takes 9 months of the year to complete" territory. It would be well worth deciding where you want to go and what you care about with this car.
    • By "reverse flow", do you mean "return flow"? Being the IC having a return pipe back behind the bumper reo, or similar? If so... I am currently making ~250 rwkW on a Neo at ~17-18 psi. With a return flow. There's nothing to indicate that it is costing me a lot of power at this level, and I would be surprised if I could not push it harder. True, I have not measured pressure drop across it or IAT changes, but the car does not seem upset about it in any way. I won't be bothering to look into it unless it starts giving trouble or doesn't respond to boost increases when I next put it on the dyno. FWIW, it was tuned with the boost controller off, so achieving ~15-16 psi on the wastegate spring alone, and it is noticeably quicker with the boost controller on and yielding a couple of extra pounds. Hence why I think it is doing OK. So, no, I would not arbitrarily say that return flows are restrictive. Yes, they are certainly restrictive if you're aiming for higher power levels. But I also think that the happy place for a street car is <300 rwkW anyway, so I'm not going to be aiming for power levels that would require me to change the inlet pipework. My car looks very stock, even though everything is different. The turbo and inlet pipes all look stock and run in the stock locations, The airbox looks stock (apart from the inlet being opened up). The turbo looks stock, because it's in the stock location, is the stock housings and can't really be seen anyway. It makes enough power to be good to drive, but won't raise eyebrows if I ever f**k up enough for the cops to lift the bonnet.
×
×
  • Create New...