Jump to content
SAU Community

Recommended Posts

Hey guys,

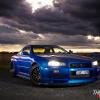
Please bear with me as this is my first ever build thread and I haven't ever owned a Skyline before. I have had a BNR34 as my phone screen for years and it will eventually be in my posession. Anyway onto the build!

I bought the car and it has 170k on it And had been rather neglected over the past couple of years. So first this was removing the horrible body kit it has on it. Most is removed and im going to be going back to a stock bodykit.

Then after thinking for a while i decided that i was going to chase grip before i go to bump the power up. So i ordered a full set of front and rear lower control arms, front castor rods and rear toe arms and fitted it all up.

  • Like 1
Link to comment
https://www.sau.com.au/forums/topic/452046-r34-sports-sedan-build/
Share on other sites

So front end is all done and got a buddy to wheel align it so now were just running a semi street setup so have 1.5deg rear camber and 2deg on the front and managed to get about 11deg of castor on the front so thats really turning in and braking nicely. As for toe i think we just had about 1mm toe on front and back but i cant remember 100% so in february im going to knock some more camber into the front and dial abit of the toe out.

I also had my HEL braided brake lines arrive awhile ago and was waiting for Bendix SRT pads and some DBA rotors but they arrive a week or so ago so managed to fit them while it was up on his hoist and bleeded the system. Also fabbed up a master cylinder stopper. So now the brakes are finnished in my opinion just going to keep going with suspension.

  • Like 1

Will try get some pictures my phone camera is stuffed so have to take them on my missus phone then send them over.

Anyway I have gotten the suspension to a point where my pocket can handle it and i have done as much as i want to do before i really start pushing it on the track. So i dont want to change too much suspension wise and lose my bearings so down the track im going to go Tein Mono flex coilovers and some Whiteline 27mm front and 24mm rear swaybars.

But now i have started working on engine reliability and some performance. When i got the car it had the usual FMIC with pipework over the radiator and it meant i was getting ALOT of heatsoak into the "cool" air charge. So i fabbed up a turn flow system that now runs below the intercooler and then comes back into the engine bay in the stock location so it looks relatively standard but now means theres no more heat soak.

I also picked up a Blitz split dump pipe thats plumbed back and a Blitz 3" down pipe so fitted both of them got myself a 3" 100 cell cat and that connects up to the existing 3" Blitz system that was on the car so thats completed In my opinion.

Last on the list mainly for reliability was oil cooler just for some more Oil volume for while im on the track so got a Aeroflow cooler and all braided line and also did a Filter relocation into where the battery was as the battery is now in the boot.

Will hopefully get some pics soon its mega ugly as it sits as it has a full body kit on it but i have a new front bar that im painting this week to go on

I lie sorry i have this pic. Bits i have been collecting for the car live in the loungeroom and my missus couldnt pass up an opportunity for a funny pic. There are lots more pcs hiding but they will come out to show eventually

post-96314-0-53397900-1419856691_thumb.jpeg

well ive been rather productive recently managed to get abit more work done under the hood so now all the oil filter and relocation setup is completed and i have some pics. Firstly is a plate that i made that sits where the battery is that holds my universal washer bottle, oil catch can(Still to be plumbed) as well as the oil filter

20141115_151319_zpse61bd2ff.jpg

Then it in place and mostly fitted just waiting on fittings for the oil catch can they are in the post tho.

20141122_195458_zps335adb1b.jpg

and the oil cooler all mounted up infront of the AC Condenser and behind the cooler

20141122_195517_zpse0fca07d.jpg

i finally had to take the bumper off as im painting up an original front bar so i was able to get some pics of the turn flow system i made. its not AMAZING but i made it all myself so im pretty happy

20141122_195530_zps1f4455de.jpg

and inside the engine bay

20141122_195542_zpsff8d6c71.jpg

and just one of my driveway. gotta have my other toy so i can listen to music haha

20141122_193036_zpsea4cb156.jpg

  • Like 1

Well today was productive i painted my new front bar tye other day and fitted it today. Its gloss black and not the deep purple it used to be but looks pretty good IMO

post-96314-14202851065459_thumb.jpg

post-96314-14202851308403_thumb.jpg

This is what it was...

post-96314-14202851592202_thumb.jpg

Looked like something from autosalon 2000

nice progress man, good on you for going suspension then engine!
i love the fab work man you have done well there, also glad to see that hideous front bar gone man.. some people have some unusual tastes but each to their own.

last thing i noticed your return fmic pipe hangs a bit low.. have you though of maybe making a lower scuff plate to stop it scraping/catching? i have a lower gtr style front lip that goes on the S1 front bumper that will hide it nicely "hint hint"

hahaha nice job mate, ima keep an eye on your work!

cheers

  • Like 1

Thanks dude yeah seen heaps of ppl go to the track with 300+ kw an no idea how to steer and it just goes to smoke an crap times with the fmic and 12psi of boost it made 200rwkw so that should be enough just to learn to handle the car with.

Yeah that front bar was terrible but the dude who i bought it off was into the autosalon style he has some other thing thats fullon autosalon still lol.

Yeah thats the one issue now im going to have to try and overcome lol. Probably make up a front splitter to try disguise it. Once its all done im going to powdercoat it black as we do powdercoating at work.

Cheers for the imput dude :)

Just ordered so hopefully have it done on the weekend till then have just painted it black lol blends into the shadows.

Also managed to setup my Turbosmart E-Boost 2 today and that is an AMAZING bit of kit i love it im running 10.5psi currently will go to about 12 soon but just want to bump it up gradually let the computer relearn and not just it too fast an kill something and just going from stock 9psi to 10.5 is amazing haha alot more livley and because im able to open the gate later its hitting 10psi at like 2.5K haha

lol nothing like a boost addiction haha... my NA friends just dont understand..

yeah man take it easy on the boost.. my old standard turbo hated anything over 10 (only ran it once to see how it would respond)
which lip did you end up ordering btw? got a link?

next thing on list of to do's... change them horrid orange indicators :closedeyes: nice set of clears would tastefully make the car pop a bit more :wub:

what size wheel/tyre are you running man they look massive!

Yeah this is my first car with boost other than a r31 skidder with an rb20 me n a mate built lol. Yeah mine seems to be going alright on 10psi but at the end of the day im just driving it till it dies i have a near new kinugawa TD06 20g 8cm2 and a TOG steampipe manifold for once this turbo dies then also have 880cc injectors, pfc, turbosmart fpr800, z32 etc waiting to go on lol.

Lip i ordered was 35 with ppstage it just looks like some foam will post more pice when i get it.

Nah i like the orange indicators to an officer driving the opposite way the car amost looks stock its not low and as for your question of wheels etc.... there stock R34 GTT wheels.. nice n light an nissan make strong wheels. Noone looks at the twice draws no attention but with 235/45R17 Kumho KU36's on they have a nice amount of grip.

very good. sounds like a good setup to me man :) all though i think you might be waiting a while... ive heard some standard turbos running 10 psi for years with no troubles... id swap as soon as personally...the standard just doesn't compare.. could flick it off for a couple hundred to put toward something else

oh cool so youve obviously changed the wheels in the photo then haha nice.. was going to say doesn't look like you could fit some wide rubber under them guards on those wheels

yeah fair call on the stock look... i dont seem to have a problem with the boys in blue.. even with how my car looks, they dont even look twice at me. i guess i have those young p platers driving slammed commonwhores on massive wheels with a super cheap auto exhaust tips to thank.. cops looooove picking on them, takes their eye away from us imports

Im sure at 14psi it will die haha nah it has abit of play currently the motors got 170k on it and idk how well its been maintained so i really wouldnt want to sell it to anyone just for my own peace of mind.

Yeah the wheels in the bottom pic were 19's and had ZERO sidewall and i was never going to fit some sticky tyres on them and have any form of grip so flicked them with tyres for like 800 picked up the GTT rims with tyres for 200 and the rest of the cash went on the Kumhos.

Yeah in SA the cops LOVE imports i used to drive a BMW convertible slammed and just outright crazy wheels an never got looked at this car with a full 3" exhaust from turbo to 100cel cat and single mufler its loud and they were all snapping necks with the body kit and since thats gone they hardly look.

  • 1 month later...

Been rather slack on the forum latley. Im terrible with keeping threads updated.

Well i had my first track day on sunday out at Mallala. Day was awesome fun but had several issues. Firstly we tried setting the engine bay on fire lol. When i put the new dump pipe on ot was kinda close to the AC lines so pushed them out the way and strapped them down but with the motor moving around it melted thru them and set the insulation on the firewall on fire lol.

The day was about 40deg and on track temp was in the 50's so was struggaling with overheating. Ended up taking boost down to 8psi and short shifting but other than that it was a good day out.

Got my new seat and harness in it

post-96314-14241585139667_thumb.jpg

post-96314-14241585380864_thumb.jpg

Then put my new steering wheel and quick release hub on

post-96314-14241585751344_thumb.jpg

post-96314-14241585910607_thumb.jpg

post-96314-14241586081926_thumb.jpg

As for engine ive been teaching myself alloy tig so tigged on some breather fittings to rocker covers and finnished my catch can

post-96314-14241597381285_thumb.jpg

post-96314-14241597520864_thumb.jpg

post-96314-14241597642484_thumb.jpg

But next project is going to be remove all the AC gear so condensor, pump, lines etc.. and next event is a motorkhana in march

Yeah im possibly going to start making some for interested parties and i have made a harness bar so that bolts upto the rear reel and bolts up at the base where the rear latch once was because i cant seem to find any for sale currently

Yeah made it heaps lower because of the way i made the mounts i was able to actually sit the seat below the base line. Im just over 6ft so i like a lower seat position with a helmet on and soon to be caged so it sits really nice IMO

Create an account or sign in to comment

You need to be a member in order to leave a comment

Create an account

Sign up for a new account in our community. It's easy!

Register a new account

Sign in

Already have an account? Sign in here.

Sign In Now


  • Similar Content

  • Latest Posts

    • Must have been an absolute nightmare to drive when the power steer was out, the rack ratio/wheel size/caster is all set up for power assistance
    • Welcome to SAU, what are you looking at buying?
    • I checked the injectors again (1 and 2, since they’re easiest to access) to make sure they weren’t clogged. Even though the entire fuel system had been cleaned, I wanted to be certain. Everything looked clean, so I reinstalled and connected everything. When I started the car to confirm everything was okay, it immediately revved up high, so I shut it off straight away. I checked to see if I’d missed a vacuum hose or something, but everything was connected. On the second attempt, the car ran without the high idle, but I noticed a distinct “compressed air” sound coming from the engine bay. Tracing the sound, I pushed injector #6 forward slightly and the noise stopped — it turned out it wasn’t seated properly, despite the fuel rail being bolted down. While holding it in place, the car idled steadily without stalling and ran for over 5 minutes. At this point, I pulled all six injectors out just in case I hadn’t seated them correctly or dirt had gotten onto the O-rings. Unfortunately, I discovered that I had damaged 3 out of 6 injectors (the OEM 270cc ones) during installation. So yes, this was my fault. Since only the pintle caps were damaged, I’ve ordered a Fuel Injector Service Kit from NZEFI to refurbish them. In the meantime, I reinstalled my new injectors – the car now idles fine for over 15 minutes without stalling. I have not attempted to drive it so far. It’s not perfect yet, as it hesitates when the throttle is pressed, but it’s a big improvement. Unplugging the IACV with the new injectors idles at around 800rpm, even with the IACV screw tightened fully. But this is probably due to tune.
    • I wanted to try and preserve the front bumper as long as possible, they're not cheap and are made to order in Japan. Taking inspiration from my previous K11 Micra build where I made an undertray for the Impul bumper, I did the same for this BN Sports bumper but a little slimmed down.  This time round I only made a 'skid plate' (if that's the correct wording/term) for just the bumper surface area, the Micra version covered the gap like an undertray. Starting off with a sheet of mild steel approx. 0.9mm thick 4ft x 2ft in size. I traced around the bumper, cut it out and cleaned the edges. Luckily I was able to get two halves from one piece of metal In the video I installed it as is, but I've since then I've removed it to spray and add a rubber edging trim. The rubber trim is suitable for 1-2mm and it's a really nice tight fit. The bolts had to be loosened due to the plates being too tight against the bumper, the trim wouldn't push on I used some stainless M6 flat headed bolts for a flusher finish (rather than hex heads poking down), I believe this style fastener is used for furniture too incase you struggle to source some. The corner's are a little wider, but this may be an advantage incase I get close to bumping it  The front grill got some attention, finally getting round to repairing it. Upon removal one fixing pulled itself out of the plastic frame, one side is M8 that fixes inside of the frame, where as the other side is M5. Not knowing I could get replacements, I cut down an M8 bolt, threaded it inside the frame along with a decent amount of JB Weld.  The mesh was replaced to match the bumper. One hole on the bonnet/hood had to be drilled out to 8mm to accommodate the new stud, once the glue had set it could be refitted. I think the reason the grill was double meshed was to hide the horn/bonnet latch (which makes sense) but I much prefer it matching the bumper Bumper refitted and it's looking much better IMO The Youtube video can be seen here: https://www.youtube.com/watch?v=bVZP35io9MA
    • The video for the servicing and fuel filter change can be seen here: https://www.youtube.com/watch?v=uLJ65pmQt44 One of the main jobs I wanted to do before the car officially went on the road, was to remove the awful looking blue silicone hoses. There's nothing wrong with having coloured silicone hoses, but I realise as I'm getting older I prefer monotone engine bays with a splash of colour on the engine cover(s). I cover this in a lot more detail in the Youtube video, so unfortunately there's limited photos of the process. The intercooler, upper radiator, boost vacuum and upper breather hoses were all changed to black silicone with mikalor clamps. The only blue left is a blanking cap at the back of the inlet manifold and the GReddy pulleys (which will be replaced for stock when the cambelt gets replaced) While the intercooler pipes were off I gave them a quick clean/polish too A before photo I do have a replacement air filter on its way. Fuse box covers were painted blue, they're now satin black Another job on the list while the bumper was off, is to add some mesh https://live.staticflickr.com/65535/54737966256_99b28bfa30_c.jpg[/img] I was hoping to use some thin wire to secure it, but it seems I've misplaced it and the wire I had was too thick to twist easily. I ended up using cable ties for the time being https://live.staticflickr.com/65535/54737131882_c2b7989dcc_c.jpg[/img] Was pleasant to see this https://live.staticflickr.com/65535/54737131627_8b2aab13b3_c.jpg[/img] The last thing to do was to fix the front grill and re-mesh that to match but I ran out of time The Youtube video can be seen here: https://www.youtube.com/watch?v=R4FsF6tgizE&t=23s
×
×
  • Create New...