Announcements
-
Similar Content
-
Latest Posts
-
By hoodedreeper · Posted
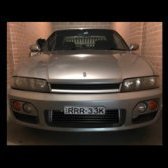
I wanted to try and preserve the front bumper as long as possible, they're not cheap and are made to order in Japan. Taking inspiration from my previous K11 Micra build where I made an undertray for the Impul bumper, I did the same for this BN Sports bumper but a little slimmed down. This time round I only made a 'skid plate' (if that's the correct wording/term) for just the bumper surface area, the Micra version covered the gap like an undertray. Starting off with a sheet of mild steel approx. 0.9mm thick 4ft x 2ft in size. I traced around the bumper, cut it out and cleaned the edges. Luckily I was able to get two halves from one piece of metal In the video I installed it as is, but I've since then I've removed it to spray and add a rubber edging trim. The rubber trim is suitable for 1-2mm and it's a really nice tight fit. The bolts had to be loosened due to the plates being too tight against the bumper, the trim wouldn't push on I used some stainless M6 flat headed bolts for a flusher finish (rather than hex heads poking down), I believe this style fastener is used for furniture too incase you struggle to source some. The corner's are a little wider, but this may be an advantage incase I get close to bumping it The front grill got some attention, finally getting round to repairing it. Upon removal one fixing pulled itself out of the plastic frame, one side is M8 that fixes inside of the frame, where as the other side is M5. Not knowing I could get replacements, I cut down an M8 bolt, threaded it inside the frame along with a decent amount of JB Weld. The mesh was replaced to match the bumper. One hole on the bonnet/hood had to be drilled out to 8mm to accommodate the new stud, once the glue had set it could be refitted. I think the reason the grill was double meshed was to hide the horn/bonnet latch (which makes sense) but I much prefer it matching the bumper Bumper refitted and it's looking much better IMO The Youtube video can be seen here: https://www.youtube.com/watch?v=bVZP35io9MA -
By hoodedreeper · Posted
The video for the servicing and fuel filter change can be seen here: https://www.youtube.com/watch?v=uLJ65pmQt44 One of the main jobs I wanted to do before the car officially went on the road, was to remove the awful looking blue silicone hoses. There's nothing wrong with having coloured silicone hoses, but I realise as I'm getting older I prefer monotone engine bays with a splash of colour on the engine cover(s). I cover this in a lot more detail in the Youtube video, so unfortunately there's limited photos of the process. The intercooler, upper radiator, boost vacuum and upper breather hoses were all changed to black silicone with mikalor clamps. The only blue left is a blanking cap at the back of the inlet manifold and the GReddy pulleys (which will be replaced for stock when the cambelt gets replaced) While the intercooler pipes were off I gave them a quick clean/polish too A before photo I do have a replacement air filter on its way. Fuse box covers were painted blue, they're now satin black Another job on the list while the bumper was off, is to add some mesh https://live.staticflickr.com/65535/54737966256_99b28bfa30_c.jpg[/img] I was hoping to use some thin wire to secure it, but it seems I've misplaced it and the wire I had was too thick to twist easily. I ended up using cable ties for the time being https://live.staticflickr.com/65535/54737131882_c2b7989dcc_c.jpg[/img] Was pleasant to see this https://live.staticflickr.com/65535/54737131627_8b2aab13b3_c.jpg[/img] The last thing to do was to fix the front grill and re-mesh that to match but I ran out of time The Youtube video can be seen here: https://www.youtube.com/watch?v=R4FsF6tgizE&t=23s -
By Mcmannaman · Posted
Hi all,I already introduced myself in the Victoria section, but only saw this section now lol XD New to forums and new to skylines. Hoping to buy my new skyline within October
-


Recommended Posts
Create an account or sign in to comment
You need to be a member in order to leave a comment
Create an account
Sign up for a new account in our community. It's easy!
Register a new accountSign in
Already have an account? Sign in here.
Sign In Now