

Announcements
-
Similar Content
-
-
Latest Posts
-

By Murray_Calavera · Posted
You appreciate it could be pinging and not be audible from inside the cabin on the car right? -
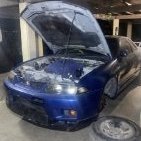 Thanks for all the replies fellas. Gonna finish putting it back together and see how it handles the set up. If it starts pinging it’ll be parked.
 -
 Well, I can recommend the partial AV system translation CD I ordered from Car Audio Workshop in NZ. Whilst it didn't address the date issue, it has conveniently translated on-screen menu items into English, and now allows the GPS-received time to be offset in hours rather than minutes, so I can display Eastern Australian time accurately ( and bump it by another hour when daylight savings starts ).
 -
 Yuh, if it's 45°C outside, my car is driving in it.
 -

By soviet_merlin · Posted
I'd be curious to hear more. Otherwise, have you driven a modern x-trail? I wonder how it compares. Here in Australia they are/were popular for rentals and fleet vehicles. I have been in some and my impression was they are bad. But, this may have been very different in the 2000s at a good trim level. Twenty years is plenty of time to make the model worse. I do very much agree with the 2 silver cars in the garage approach. But, not driving because it's too hot would not leave a lot of time in the year for many Australians. I don't think you need to worry too much unless the car has actual issues with overheating.
-


Recommended Posts
Create an account or sign in to comment
You need to be a member in order to leave a comment
Create an account
Sign up for a new account in our community. It's easy!
Register a new accountSign in
Already have an account? Sign in here.
Sign In Now