Jump to content
SAU Community

Recommended Posts

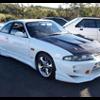
picked up my wheels today, just had a chance to test fit them/see how much guard work is needed, but i need to get some longer wheel nuts first.

Here some crappy pics ( the car is still on the jackstands & wheels only sitting on by a nut each )

will post up better pics once its all sorted

post-71390-0-55420300-1341994587_thumb.jpg post-71390-0-99911200-1341994608_thumb.jpg

Edited by Autumn33

Its still on the jackstands at the moment so pics are quite aids, it will be on the ground later today/tonight so i will post up some better pics then.

but because you asked here you go :)

post-71390-0-91050800-1342154290_thumb.jpg post-71390-0-60362600-1342154398_thumb.jpgpost-71390-0-99797900-1342154556_thumb.jpg ( abit dirty they need a good clean/polish)

Edited by Autumn33

Just got it off the jack stands :) Im thinking I will get it out of the garage for some better pics over the weekend.

I have around 100mm clearance at the front bar so its just legal hight wise.

Im thinking of buying some universal bolt on flares rather than going down the GTR or wide body route but ill wait and see.

picture time! (excuse the messy garage ahaha)

post-71390-0-93175700-1342164464_thumb.jpgpost-71390-0-38784800-1342164481_thumb.jpgpost-71390-0-67090000-1342164490_thumb.jpgpost-71390-0-81399900-1342164502_thumb.jpgpost-71390-0-83660100-1342164513_thumb.jpg

it's interesting, I'll wait till I see it in the flesh to pass my final judgement. I reckon it'll have some bozoku style bossness about it, which I don't mind :)

While we're on the topic of wheels I got me some Rays SSR2s 18x9.5 +38, they were gold but after today they're matt black :D

20120715_150140.jpg

I've got some 245\40\18 Dunlop DZ03G M compunds for them to match the 265\35\18 I've got for the rears :D

What are you doing with your d2r's Pete?

Never really posted any updates in here about our car so thought now might be a good time as there is a fair bit happening. First a bit of background info…

My brother Tom and myself purchased the car, a 1993 R32 GTST, in September 2011 from Victoria, it had an RB25DET which wasn’t engineered so we spent a fair bit of time organising that once we got it back, it was on the road on 11/11/2011 (easy date to remember haha), this is how it looked…

SDC11045.jpg

We didn’t really do anything worth mentioning, just tidied a few things up, got some new wheels and went to a few track days at Baskerville.

SDC11059.jpg

Then we thought we’d enter the drift practice day in May which didn’t end well with the car being written off, I’m sure most of you have seen pictures/videos and I don’t really want to look at them again so won’t post any of that haha.

Luckily it appears to be only structural damage with only minor damage to engine, surprisingly even front end components such as brakes/hubs were not damaged, the chassis seemed to absorb all the impact.

So we started the search for a shell, nearly bought an S13 which would have been a cool project but ended up getting hold of another R32 in June off DanielH (previously owned by Toffy). Now that we’ve started transferring things across I’m kind of glad we went with another R32 as it makes things soo much easier.

IMAG0196.jpg

The shell was not quite rolling with no interior but it didn’t matter as we could transfer a lot over from our wreck. During my mid-semester break from Uni we got a bit done…we put in our subframe and front end so it’s now properly rolling (don’t worry everything was checked thoroughly for damage before being bolted up!).

Tom also pulled the RB25 out of the wreck and it has been pulled down to do a few oil control mods (external oil drain, restrictors, baffled sump, oil pump drive collar), head has been decked and replaced valve stem seals, crankshaft seals etc. and the oil pump drive collar is currently getting done. Also discovered big end bearings and clutch are pretty close to needing replacement so figured now is a good opportunity, and rear housing is cracked on turbo (thanks to Tobbie for sorting us out with that and few other bits and pieces).

We’re pretty keen to get it done and get back out on the track again and just enjoy it, I imagine we’ll be taking it pretty easy to start with after all the effort we’re putting in. I guess the good thing about paying someone else to do the work is it doesn’t hurt as much when things go wrong (if money isn’t an issue) but unfortunately that isn’t an option for us haha. I might try and post a few updates as things get done if I have time.

So i got a pair of flares today thanks Damo (DJRIFT) so decided to do a quick mock up

post-71390-0-49570600-1342887865_thumb.jpgpost-71390-0-82309900-1342887885_thumb.jpg ( there not sitting 100% were they need to be i needed stronger tape haha )

They just need a small lip piece cut off then they will fit mint

Edited by Autumn33

Create an account or sign in to comment

You need to be a member in order to leave a comment

Create an account

Sign up for a new account in our community. It's easy!

Register a new account

Sign in

Already have an account? Sign in here.

Sign In Now


  • Similar Content

  • Latest Posts

    • Stock ECU (or more accurately stock tune) absolutely refuses to go over 10psi and behaves like you have seen. The Nistune is the same if it is the stock tune. If the Nistune chip has been tuned, the resulting tune could be literally anything for any combination of parts. The Nistune just makes the stock ECU Tunable.
    • So stock ECU does not like anything above 10 psi?  That Nistune one is just for "try" if it will be any different, I know it need to be tune for that. I know but YOU may know about these problem but i/we dont. They few little Skylines here let alone people who know anything about tham so that is why iam asking here  
    • So now we have a radiator with no attachments whatsoever. It lifts up with a particularly tight spot between the drivers side air box mount and the lower radiator outlet, but if you've got this far you will sort that too. This is the lower mounts with the rad out so you can see where the rubber bushes go, it is a straight shot upwards Done! Assembly is the reverse of disassembly, with blood less likely to be shed.
    • Right, onto the second last trick. The Air Con condenser is mounted to the front of the radiator and stays in the car when the radiator is removed. There are 2x 10mm headed self tappers holding the top of the condenser to the radiator, remove those The bottom of the condenser is attached to the radiator with clips. You need to lift the condenser out of those clips and clear (up, then forward). f**ked if  could work out how to do that last bit with the front bumper on. I hope you can, and you share the trick.  Bumper removal probably deserves its own thread one day once I've recovered the will to live, but basically you need to remove the wheels, front inner guard liners (clips and 10mm headed bolts), the self tapper between the guard and the bumper at the rearmost point of the bumper (same as an R32 that bit), any remaining clips at the top/front of the grill, an absolute bastard design with a plate that holds the top of the bumper above the headlight each side (only 1 bolt which is tricky to get to, but the plate catches 2 places on the bumper and must be removed....carefully!) and push clips between the bumper and guard under the headlight. If you've done all that you will be faced with wiring for the fog lights on both sides and in ADM Q50 RS at least, 4 nasty tight plugs on the driver's side for the ADAS stuff. So, the clips at the bottom look like this on drivers side (looking from the front) And on the passenger side (also from the front), you can see this one is already out Clearance on both of these are super tight; the condenser needs to move up but the upper rad support mount prevents that, and the radiator can't move down far because it is (rubber) mounted. Once you achieve the impossible and drop the condenser off those mounts so it does not stop the rad moving, you are good to go
    • OK, next the shroud needs to come off and there are a couple of tricks. Firstly, there is a loom from near the passenger side headlight to the fans, coolant temp sensor etc and there is no plug to undo.  In my case I was OK to leave the shroud on top of the engine so I just undid the passenger side fan plug and about 10 of the clips which gave enough free wire to put it aside. The fan plugs were super tight, the trick I used was a small falt screwdriver to push down on the release tab, then a larger flat screwdriver to lever the plug out of the fan unit....be careful with how much force you apply! If you need to remove the shroud altogether for some reason you will have to deal with all the plugs (tight) and clips (brittle)....good luck. I removed all of the clips and replaced them with cable ties that I will just cut next time. Also, in the Red Sport / 400R at least, the intake heat exchanger reservoir hose is bolted to the shroud in 2 places with 10mm headed bolts; so remove them (the hose stays in the car; no need to undo it at the t fittings down at the radiator lower mount. Once you've dealt with the HX hose and the wiring loom, there are 3x 10mm headed self tappers holding the top of the shroud to the radiator; remove those.   The shroud then lifts out of the bottom mounts where it sits on the radiator, up and onto the engine out of the way. Simples
×
×
  • Create New...