Jump to content
SAU Community

Recommended Posts

Hey

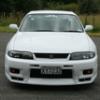
I am just about to purchase a 1998 40th aniversary r33 gts25t coupe and received some pictures from the buyer yesterday, in one of the pics it look like the dash is not fitting properlly, i have posted up a pic ,the part i am talking about is in the red circle

Let me know if you think this dosent look right

Cheers

dash.jpg

post-16657-1154468843.jpg

Edited by nizmo_freek
Link to comment
https://www.sau.com.au/forums/topic/128435-does-this-look-dodgy/
Share on other sites

as above, pay close consideration to the overall quality of the car. There's a FAQ on buying a skyline and what to look for, read it.

I recently bought a 40th anniversary myself and it only had 33,xxxkm on the clock. After looking over it myself for signs of wear (general condition of engine bay, underbody mechanicals, and interior wear esp seat, steering wheel, gear knob, indicator stalks) I was satisfied the k's were genuine. A thorough inspection by State Roads also indicated that the condition was consistent with odometer reading.

The dash in the car you're looking at could have been apart to fit an alarm, or stereo (the R33 has one huge trim piece that wraps right around the instrument panel). Maybe it just hasn't been clipped back on properly.

I love that steering wheel!

so do i :)

Have just uploaded a bigger pic, looks like the dash hasnt been put back on properly or something, maybe its just the picture (optical illusion)

hmmm...i wouldnt automatically take that as dodgy. we've had my dash off several times so far, and not for anything dodgy....alarm installs, gauge installs...maybe that one just needs to be pushed back into place

Jason,

In a circumstance like this you have to trust the bloke on the ground who is inspecting the car. Unfortunately second guessing via a few photos is too hard. What did the buyer say? Is the car a goodun? Does eveything else check out? Did he say what he thought was going on in the photo? So many questions, so little time...

maybe its just the pic making it look dodgy?

this was mine at compliance just after i had it imported..

IMG_0969.JPG

looks kind of the same, and my dash/cluster is fine...perfect fit

thats the same steering wheel as on my r34 gtt.........genuine nissan/momo.....WTF

does anyone know if these steering wheels were an option and on what models??????

post-1416-1154504884.jpg

post-1416-1154504907.jpg

post-1416-1154504933.jpg

hey mate

it looks like it may have had some wires running throught it

maybe from a monster tacho or boost guages. ive seen this done before

but thats just at first glance. could be anything, next time u go to see the car give it a push and see if it clicks back into place

The car has done 74000kms, it still has the nissan cambelt sticker on the cam cover if you know what i mean, the owner said that the car is very straight, it seems to be in very good condition but i am still waiting for some more decent pics, it is completly standard apart from an alarm (maybe that is why the dash may have been pulled apart and not put back together properly) and stereo, the owner is a member of skylinesdownunder and ive read threw his old post and it says that he had a problem with the boost gauge going when the rear wiper was going (sounds a bit strange, could also be another reason why the dash could have been taken apart).

I have not been able to view the car in person yet as it is a 7hour drive from were i live lol, so im judging the car buy the pictures i have received (12pics) and by what the owner has told me about the car. I may be flying up to pick up the car next weekend, hopefully the car is exactly how it has been described as i dont want to fly up there to find a dodgy car.

Edited by nizmo_freek

Heres some more pics of the car, i will be getting a AA (dont know if you guys have the AA over the in aussie lol) check done on the car before i buy it just to see if theres anything wrong with the car

Yeah - def get someone at that place to check it out for you..

NRMA will do it and send you a fax with the details on it and mail it to you.. good for piece of mind..

as for the momo steering wheel - factory option for SII R33 and I guess R34..

Def replaced the handbrake + gearstick leather..

Edited by Links
thats the same steering wheel as on my r34 gtt.........genuine nissan/momo.....WTF

does anyone know if these steering wheels were an option and on what models??????

I found this steering wheel in FAST! it IS a factory option!! amazing...

Create an account or sign in to comment

You need to be a member in order to leave a comment

Create an account

Sign up for a new account in our community. It's easy!

Register a new account

Sign in

Already have an account? Sign in here.

Sign In Now


  • Similar Content

  • Latest Posts

    • Can I suggest you try EBC directly again and link them to as many competitor catalogues as you can to show their listing is incorrect, eg https://dba.com.au/product/front-4000-series-hd-brake-rotor-dba42304/ If you have access to an R33 GTST VIN and your VIN, you could also use a Nissan Parts lookup like Amayama to show them the part number is different between 33 GTST and 34 GTT which may get their attention
    • So i got reply from EBC and they just this site where you can clearly see those 296mm fronts on R34 GTT. I send them photos and "quotes" that 296mm are not for 34 GTT and they are too small. But it will be very hard to return them cuz nobody here knows 100% and they just copy those EBC catalogue :-D https://ebcbrakesdirect.com/automotive/nissan/skyline-r34
    • Hi, is the HKS  Tower Bar still available ? negotiable ? 🤔
    • From there, it is really just test and assemble. Plug the adapter cables from the unit into the back of the screen, then the other side to the car harness. Don't forget all the other plugs too! Run the cables behind the unit and screw it back into place (4 screws) and you should now have 3 cables to run from the top screen to the android unit. I ran them along the DS of the other AV units in the gap between their backets and the console, and used some corrugated tubing on the sharp edges of the bracket so the wires were safe. Plug the centre console and lower screen in temporarily and turn the car to ACC, the AV should fire up as normal. Hold the back button for 3 sec and Android should appear on the top screen. You need to set the input to Aux for audio (more on that later). I put the unit under the AC duct in the centre console, with the wifi antenna on top of the AC duct near the shifter, the bluetooth antenna on the AC duct under the centre console The GPS unit on top of the DS to AC duct; they all seem to work OK there are are out of the way. Neat cable routing is a pain. For the drive recorder I mounted it near the rear view mirror and run the cable in the headlining, across the a pillar and then down the inside of the a pillar seal to the DS lower dash. From there it goes across and to one USB input for the unit. The second USB input is attached to the ECUtec OBD dongle and the 3rd goes to the USB bulkhead connected I added in the centre console. This is how the centre console looks "tidied" up Note I didn't install the provided speaker, didn't use the 2.5mm IPod in line or the piggyback loom for the Ipod or change any DIP switches; they seem to only be required if you need to use the Ipod input rather than the AUX input. That's it, install done, I'll follow up with a separate post on how the unit works, but in summary it retains all factory functions and inputs (so I still use my phone to the car for calls), reverse still works like factory etc.
    • Place the new daughterboard in the case and mount it using the 3 small black rivets provided, and reconnect the 3 factory ribbon cables to the new board Then, use the 3 piggyback cables from the daughterboard into the factory board on top (there are stand offs in the case to keep them apart. and remember to reconnect the antenna and rear cover fan wires. 1 screw to hold the motherboard in place. Before closing the case, make a hole in the sticker covering a hole in the case and run the cable for the android unit into the plug there. The video forgot this step, so did I, so will you probably. Then redo the 4 screws on back, 2 each top and bottom, 3 each side and put the 2 brackets back on.....all ready to go and not that tricky really.      
×
×
  • Create New...