Jump to content
SAU Community

Recommended Posts

Bit queit in here

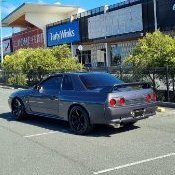
Was going to go snap some HDR photos of the skyline tonight but when I got to where I was going I noticed it had a coolant leak and the temp gauge had shot up. Bit worrying but think I managed to catch it quick enough. Lost about half the coolant so at least something was still in there. Can only find readings of about 97 on the logs so fingers crossed I avoided a bit of devastation.

Might try again once im sure my car is ok. Have to go get the replacement for the source of the problem tomorrow. Was supposed to have a different fitting for it ages ago but hadnt come through yet. Lucky it was only a short drive

Yes it is very quiet on here indeed. I don't no what's going on anymore I'm stuck in my little bubble, don't get to see anyone as I am renovating my house and saving to get my shed/workshop built. Once the shed is up a GTR will be going in it. ;)

Where about's was the leak Cal? If you don't already have one invest in a air/coolant bleeder tank, they reduce your temps a fair bit and will removal all the air pockets from the system. Very handy when you start giving the car a fair flogging.

My brother and I have been discussing what our final round of modifications for the N1 Dragger will be, cost effective for maximum gain and get as close as to 7's as possible and make it twice as hard for these guys down south to beat us. The car is getting full gutted no interior trim at all just a Motec dash and a steering wheel, that will gain 50+kg weight. Will be changing from the 17" rims and going to a smaller 15" rims with bigger rubber = bigger run out and a higher MPH across the line. Finally for the engine, seeing as the Turbo system is completely maxed out and the intake temps are climbing. We are thinking about putting a 200HP Direct port Nitrous System in to give us that little bit extra power and lower intake temps back to where they should be. Then all our focus will be on the new chassis when it arrives very soon, it will be a busy year but we are expecting add more records to our resume. AMS's R35GTR your going down!!!!!!

Nah the leak was the fitting on the wastegate head (it has the option of water cooling)

We modded it, cut the 90 degree fitting off the hose and put a straight in, then was supposed to have a 90 degree fitting straight onto the wastegate but the hose guy didnt have any on him, had just used them all at his previous job funnily enough. So it has had 2 x 45 degree fittings on it in the mean time. The way they were sitting and vibrations just caused it to come loose by the look of it so it wasnt a drama to fix, just a shame I never noticed it straight away. It still had coolant in it which was lucky, and checking the logs from the link the temp only got up to around 96 degrees so pretty confident at the moment that no harm was done. HOPEFULLY

How much extra power do you expect with the NOS cooling the combustion down? Or is it all about pushing a bit more boost/timing in with the cooler combustion temps?

Ah yeah 96 degrees should be fine mate it should've done any damage. Let me know how the water-cooled wastegate performs I'm interested to see what the engine temps would do under extreme abuse.

NOS will let us run nearly 100% duty cycle on the wastegate solenoid and will allow us to put more timing in, as long as the intake temps stay in the safe range.

  • 2 weeks later...

Looks like I might be in need of a new boost gauge. My drift one looks like its out a few psi. I like the fact it has a digital display as well as LED segments that act like an analog gauge around the outside. But really anything that is half decent, and has a peak recall and/or alarm would be perfect. If it lights up blue that would be even better :) lol

Reccomendations? Anyone have one they are trying to get rid of?

  • 3 weeks later...

Hey there fellas, relatively new skyline owner here and just joined the forums.
Any chance you guys have any meets at all going on soon? I rarely see other skylines around and I would absolutely LOVE to be part of a meet sometime.
Got my Black 34 GT in November last year, RB25DE Neo being a P plater and all and I bet every car there would f**king smoke me but hey, i'd still love to lose if its against more skylines.

  • 2 weeks later...

hey mate welcome to the group. if your on facebook add jdm mackay, and mackay imports club. taija runs jdm and matty runs mic. both supra owners but we all hang out and do cruises via them. we don't organise many cruises on here,

  • 1 month later...
  • 4 weeks later...

I need colourful cars to take photos of, but anyway, super hard trivia. Where was this taken?

14137614291_d7ad9ff5d4_k.jpgEdit-3155 by 89CAL, on Flickr

First person to guess right gets to look at my photo again........

And one that I found a while ago that I took with the DSLR, Its not great, but reminds me of when my engine was all pretty

14131960881_7921499c65_k.jpgIMG_0910 by 89CAL, on Flickr

Maybe this will breathe some life back into this thread....

Create an account or sign in to comment

You need to be a member in order to leave a comment

Create an account

Sign up for a new account in our community. It's easy!

Register a new account

Sign in

Already have an account? Sign in here.

Sign In Now


  • Similar Content

  • Latest Posts

    • Did this end up working? Did you take some pictures?
    • And finally, the front lower mount. It was doubly weird. Firstly, the lower mount is held in with a bracket that has 3 bolts (it also acts as the steering lock stop), and then a nut on the shock lower mount itself. So, remove the 3x 14mm head bolts , then the 17mm nut that holds the shock in. From there, you can't actually remove the shock from the lower mount bolt (took me a while to work that out....) Sadly I don't have a pic of the other side, but the swaybar mounts to the same bolt that holds the shock in. You need to push that swaybar mount/bolt back so the shock can be pulled out past the lower control arm.  In this pic you can see the bolt partly pushed back, but it had to go further than that to release the shock. Once the shock is out, putting the new one in is "reverse of disassembly". Put the top of the shock through at least one hole and put a nut on loosely to hold it in place. Put the lower end in place and push the swaybar mount / shock bolt back in place, then loosely attach the other 2 top nuts. Bolt the bracket back in place with the 14mm head bolts and finally put the nut onto the lower bolt. Done....you have new suspension on your v37!
    • And now to the front.  No pics of the 3 nuts holding the front struts on, they are easy to spot. Undo 2 and leave the closest one on loosely. Underneath we have to deal with the wiring again, but this time its worse because the plug is behind the guard liner. You'll have to decide how much of the guard liner to remove, I undid the lower liner's top, inside and lower clips, but didn't pull it full off the guard. Same issue undoing the plug as at the rear, you need to firmly push the release clip from below while equally firmly gripping the plug body and pulling it out of  the socket. I used my fancy electrical disconnect pliers to get in there There is also one clip for the wiring, unlike at the rear I could not get behind it so just had to lever it up and out.....not in great condition to re-use in future.
    • Onto the rear lower shock mount. It's worth starting with a decent degrease to remove 10+ years of road grime, and perhaps also spray a penetrating oil on the shock lower nut. Don't forget to include the shock wiring and plug in the clean.... Deal with the wiring first; you need to release 2 clips where the wiring goes into the bracket (use long nose pliers behind the bracket to compress the clip so you can reuse it), and the rubber mount slides out, then release the plug.  I found it very hard to unplug, from underneath you can compress the tab with a screwdriver or similar, and gently but firmly pull the plug out of the socket (regular pliers may help but don't put too much pressure on the plastic. The lower mount is straightforward, 17mm nut and you can pull the shock out. As I wasn't putting a standard shock back in, I gave the car side wiring socket a generous gob of dialectric grease to keep crap out in the future. Putting the new shock in is straightforward, feed it into at least 1 of the bolt holes at the top and reach around to put a nut on it to hold it up. Then put on the other 2 top nuts loosely and put the shock onto the lower mounting bolt (you may need to lift the hub a little if the new shock is shorter). Tighten the lower nut and 3 upper nuts and you are done. In my case the BC Racing shocks came assembled for the fronts, but the rears needed to re-use the factory strut tops. For that you need spring compressors to take the pressure off the top nut (they are compressed enough when the spring can move between the top and bottom spring seats. Then a 17mm ring spanner to undo the nut while using an 8mm open spanner to stop the shaft turning (or, if you are really lucky you might get it off with a rattle gun).
    • You will now be able to lift the parcel shelf trim enough to get to the shock cover bolts; if you need to full remove the parcel shelf trim for some reason you also remove the escutcheons around the rear seat release and you will have to unplug the high stop light wiring from the boot. Next up is removal of the bracket; 6 nuts and a bolt Good news, you've finally got to the strut top! Remove the dust cover and the 3 shock mount nuts (perhaps leave 1 on lightly for now....) Same on the other side, but easier now you've done it all before
×
×
  • Create New...