Jump to content
SAU Community

Recommended Posts

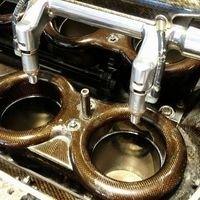
Has anyone played with this on the 26? i have some nice phenolic gaskets to insulate the inlet plenum and will do a few runs on the dyno and the track and log the results for those who may be interested in this cheap power upgrade. I have always used them on my SR's but they required much more than just the gaskets as the throttle body and aac valve all needed the water passages bypassed aswell, The GTR doesnt.

products_gaskets.jpg

official blurb if you dont know what phenolic gaskets are; http://www.gizzmoelectronics.com/product_gasket.htm

Edited by URAS
  • 2 weeks later...
given the air speed of WOT into the manifold, I don't think a hell of a lot of heat would transfer off the plenum to the injested air charge...

you would be suprised, hondas get fairly large gains in regards to total power percentages. Dsport did some testing a while back.

in GTR i wont know til sat till i put it on CREATDS dyno, i dont expect much but i expect it will be 90 dollars well spent in reducing inlet charge over a period of time.

Although on your average honda, Bar the K-Series and F20C, the Intake manifold sits on the back of the motor, and has none, to sweet f**k all airflow around it. Its kinda getting all the heat of the engine bay thrown at it.

I put a HONDATA gasket on my ITR, and i believe the only difference it made was less available funds on my card, and a few cuts and scratches getting the bitch in there :thumbsup:

Although on your average honda, Bar the K-Series and F20C, the Intake manifold sits on the back of the motor, and has none, to sweet f**k all airflow around it. Its kinda getting all the heat of the engine bay thrown at it.

I put a HONDATA gasket on my ITR, and i believe the only difference it made was less available funds on my card, and a few cuts and scratches getting the bitch in there :)

did you re-route the other heat sources fron the inlet manifold.... like water etc... i have seen plenty of excellent honda data, but many do not understand the preocesses and only fit the gasket.

On the topic of phenolic spacers, when the 5.0 was new to the mustang, one of the popular mods was a phenolic spacer between the upper and lower halves of the intake manifold. I remember seeing test results showing a definate improvement.

James.

did you re-route the other heat sources fron the inlet manifold.... like water etc... i have seen plenty of excellent honda data, but many do not understand the preocesses and only fit the gasket.

That "mod" is already done on Integra Type R's from factory. The only one you need to re-route is the cold start line that warms up the throttle body. So thats more than likely why the ITR doesnt respond as well as other Hondas.

heres the latest dyno i will post up a table later comparing the two datalogs of inlet temp and timing.

with the new gaskets inlet temps were reduced by a substantial amount, to the point that the turbo outlet pipes would were so hot they would scald and the plenum was COOL to touch after 21 runs......... if you dont believe me check our the run number on the dyno sheet :P

The cooler charge allowed us to dial in another 3-5 degrees of peak timing throughout the peak torque and top end IGN map areas.

post-34927-1180350300_thumb.jpg

Edited by URAS
On the topic of phenolic spacers, when the 5.0 was new to the mustang, one of the popular mods was a phenolic spacer between the upper and lower halves of the intake manifold. I remember seeing test results showing a definate improvement.

James.

I believe in this case, the gains were mostly due to the "thick"gasket(up to 5cm thick) increasing plenum volume and reducing flow discrepencies between the cylinders, and or increasing runner length

  • 2 years later...

Any advice on actual fitting these gaskets assume they would need some gasket sealant etc.

Whst sorta torque values standard?

also as they are alot thicker than standard any issues with the stud length being too short??

any advice appreciated

Create an account or sign in to comment

You need to be a member in order to leave a comment

Create an account

Sign up for a new account in our community. It's easy!

Register a new account

Sign in

Already have an account? Sign in here.

Sign In Now


  • Similar Content

  • Latest Posts

    • Hi...so a "development" here aswell The swap is "done" and car went "test drive" BUT it seems the clutch(maybe gearbox?) is a little bit sad? I bought this clutch kit https://justjap.com/products/xtreme-heavy-duty-organic-clutch-flywheel-kit-nissan-skyline-r31-r32-r33-push-type "Problem" is that the first gear is hard to put into and it seems that the clutch is not disengaged. It was not the problem with the old clutch...(or like sometime the first gear would not get as easy specialy when the fluid was cold) So? Can it be like...bad "install" or is the clutch wrong ((it should not have been) i done research to get the right one) Or is this "normal" with new clutch and needs to be break in? 
    • @Duncan I can try  and thanks i did not thought about VIN and part numbers for 33/34. @GTSBoy yeah it looks like iam gonna do that  
    • Forgot to include this but this is the mid section of my steering rack that looks like it has a thread/can be turned with that notch mentioned in the post:
    • Hey everyone, Wanted to pick some brains about this issue I'm having with rebuilding my 33 rack (PN is 49001-19U05). All of the tutorials/videos I've seen online are either R34 or S Chassis racks which seem to be pretty straightforward to disassemble but this process doesnt carry over to my rack. Few of the key differences that I've noted The pinion shaft on the other racks bolt on with 3 torx bolts: Whereas my rack bolts on with 2 allen head bolts: These changes are pretty inconsequential but the main difference is how you pull the actual rack out of the housing. The other skyline/s chassis racks can be taken out by tapping the rack out of the body with a socket and it just slides right out. I'm unable to do that with my rack because there's a hard stop at the end that doesn't let the seal/shaft be tapped out. Can also see a difference in the other end of the rack where mine has a notch that looks like you're able to use a big wrench to unthread 2 halves of the rack whereas the other racks are just kinda set in with a punch. My rack: Other racks: TLDR; Wanted to know if anyone has rebuilt this specific model of steering rack for the R33 and if there were any steps to getting it done easier or if I should just give this to a professional to get done. Sorry if this post is a bit messy, first one I've done.
    • I would just put EBC back on the "I would not use their stuff" pile and move on.
×
×
  • Create New...