Jump to content
SAU Community

Recommended Posts

Gday,

Just got my car tuned after being off the road for about 3 years. Ive put an RB26 engine (and an R33 gearbox) in an R32 gtst. The tune is a preliminary one, so ive gotta run the car in and go back in about 1500kms so they can turn the boost up.

The car made 345 rear wheel kilowats on 17 psi and 98 octane. There should be more to come, but after driving it home from Silverwater in the wet, im not sure more power is a good idea in a rear wheel drive application! As soon as it gets to atmospheric, it spins the tyres in the wet; even at 100km/hr on the freeway. Pretty scary, as ive been driving a 100kw carolla for the last 3 years! Anyway, have a look at the dyno sheet. Im just happy to have it on the road.

The specs are as follows:

R33 RB26 (prepped block etc, compression is 9.0:1)

ARP studs and bolts throughout

General head reconditioning but no porting or polishing

Standard cams

HKS cam gears

CP Pistons 20 thou over

Prepped standard rods

N1 oil pump

Tomei sump baffle and head oil restrictor

R33 gtst 5 speed

Jim Berry modified Nismo 5 puck clutch

Autronic SM4 computer

Autronic boost control

Garrett GT35r turbo with 1.06 turbine housing HPC coated

Tial 44mm external wastegate with 17psi spring

Tial 50mm BOV

600x300x100mm intercooler

Earls 16 row oil cooler

Stainless manifold bought from GCG. Modified with extra support brackets and HPC'd

3.5inch dump, HPC'd and wrapped

3.5 inch Trust exhaust

Walbro in tank pump (255l/hr i think)

Surge tank with Bosch 044 in line (i also used the HICAS lines as fuel lines)

Sard 700cc injectors

Edelbrock fuel reg and modified standard fuel rail

Ford falcon twin thermo fans with 50mm alloy radiator.

I think thats it.

Just gotta get it engineered and registered now.

Shaun

PS Im really happy with Dave and Jim at Silverwater Automotive; theyre very good at what they do and looked after me well.

post-11456-1204183016_thumb.jpg

post-11456-1204183226_thumb.jpg

Edited by Shaun
  • Replies 60
  • Created
  • Last Reply

Top Posters In This Topic

Thanks mate,

I dont think i can use aftermarket cams in the current head because, due to a previous engine failure, the head had to be machined significantly (tunnel bored on camshaft bearing surfaces). This means that larger cams would reduce the valve to piston clearance too much. Anyway, thats what the head machinist said. Ill be looking around for a cheap second hand head and do it up while this one is still in the car.

Shaun.

LOL, i just read dead32's sig :thumbsup: In this case the RB26 is surely Jen Hawkins :blink:

Have you had a chance to drive it in the dry yet? Interested to hear what rim size and tyres you are running. Whether you are still running std R32 diff ratio or changed to R33 diff ratio. What shocks you are running and what rear end alignment you are running.

Very interested to read how an R32 GTSt with this sort of power can, or cannot hook up :(

Having seen the results for the 1.06... what was your reason for choosing it?

Do you think the .82 would be a better choice? (Or maybe twins?)

Just seems to me a tad late to have 250rwkw/5000rpm 300rwkw/5700

Should be coming on 1000-1500rpm sooner possibly?

I wouldn't worry about stock cams, nothing wrong with them at all, maybe just have a bit more of a fiddle with the cam gears :(

Good to see ya set-up finally running with all the drama's you've had with getting to the end, must be worth it to drive home :D

LOL, i just read dead32's sig :D In this case the RB26 is surely Jen Hawkins :(

Have you had a chance to drive it in the dry yet? Interested to hear what rim size and tyres you are running. Whether you are still running std R32 diff ratio or changed to R33 diff ratio. What shocks you are running and what rear end alignment you are running.

Very interested to read how an R32 GTSt with this sort of power can, or cannot hook up :(

Roy,

I havent driven it in the dry yet, ill update you when i do. Im using 17in Enkei Tarmac Evo's with 255 rears. I was wondering about the diff ratio, as ive still got the standard R32 diff in it atm. It just felt a bit wierd to drive, i find it difficult to explain; like it was revving higher than it should have been for the speed i was doing. Having said that, it could have been my speedo that was slightly out due to the sender modification. Do you think it would benefit from the r33 diff (i dont know much about the different diffs and their ratios).

Its got whiteline springs and standard everything else at the moment. Ive got Sydneykids bilsteins and sway bars to go in it yet. Ive removed the hicas, but as for rear end alignment, im not sure; nothing too radical, as it for street use.

When it spun the wheels (at whatever speed), it didnt kick out at all, it just stayed straight which was good.

Nismoid,

Yeah, ive had some dramas and bad luck, so its good to finally make some progress.

I agree with you. I originally had the 0.82 rear on the turbo, as i thought that this would be a really streetable (for a single) package. After my last engine failure, i was advised by those who have more experience than me to change to the 1.06ar, as boost was too early with my higher compression ratio. I must admit, i was hoping the boost threshold would have been lower, but this is something i can play around with later. Actually, i dont even know if they played with the cam gears this time. They might be waiting til i bring it back.

There's no denying that twins are an excellent way to go, and if i knew what i know now, maybe i would have gone the gtss or 2530 route, but ive always wanted a single and external gate. Its done now and im happy for it.

R33 cruiser,

I dont even know how much its cost me as i dont add it up. It riuns the enjoyment! But like all of us, i wonder why i bother sometimes. Im suprised im still enthusiastic about it after 4 years.

Ive done all the mechanical install and fabrication work, so that saves a lot of money. I actually dont think you can put a price on the skills you develop when performing major mods yourself. But if i had to guess, i reckon about 50 grand including bringing the car over from Japan. That includes all the mods to the rb20 before it tho.

Shaun.

Edited by Shaun

awsome man great news at least now I know what Ill be looking at once mine is up and running. Im using vertually the same parts you are except ive got a gt3082r with a 1.06 on it if we can make 320rwkw before we put cams in it ill stoked...anyways good luck cant wait to see the final tune results ps. post more pics up lol

awsome man great news at least now I know what Ill be looking at once mine is up and running. Im using vertually the same parts you are except ive got a gt3082r with a 1.06 on it if we can make 320rwkw before we put cams in it ill stoked...anyways good luck cant wait to see the final tune results ps. post more pics up lol

Sounds good. I had a gt30 (with 0.82) on the rb20 engine and it was great. Boost didnt come til about 4200 on the rb20, so it should be nice with the extra capacity. Good luck with it.

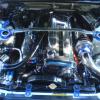
Some more pics:

post-11456-1204248974_thumb.jpg

post-11456-1204249063_thumb.jpg

post-11456-1204249133_thumb.jpg

post-11456-1204249480_thumb.jpg

Awesome to hear this is running, have been following its progress, and staring at your engine bay for a GooD while!!!!! :)

You must be itching to give it a good hiding in the dry :yes:

3540 repreZent!!!

edit: fark that looks sooo good in white

Edited by GeeTR
Awesome to hear this is running, have been following its progress, and staring at your engine bay for a GooD while!!!!! :D

You must be itching to give it a good hiding in the dry :P

3540 repreZent!!!

edit: fark that looks sooo good in white

Thanks mate, cant wait to take it for a spin in the dry. Yeah, i spent some time polishing; once you polish one thing, you've gotta polish the next! Im just disappointed that i didnt paint the engine bay during the build. I can always do it later though.

Shaun.

  • 2 weeks later...

I'm going to bump this up a bit..

I'm considering going the single route..

which gt35 do you have?

i'm kinda looking at the GT3582R with probably the .82 rear or if someone suggest's better otherwise.

would be going onto a stock(i think) 34 n1 motor. with cams and looking at dry sump.

i would like some response, but also aim for at least 350-400kw @wheel mark.

thats a real good amount of power for standard cams

im under going a simlar setup with my RB26 but im using a GT35 with anti surge but with a smaller exhaust housing compared to u and im also using HKS step 1 camshafts and camgears

Edited by STR8E180

Create an account or sign in to comment

You need to be a member in order to leave a comment

Create an account

Sign up for a new account in our community. It's easy!

Register a new account

Sign in

Already have an account? Sign in here.

Sign In Now


  • Similar Content

  • Latest Posts

    • Hi, is the HKS  Tower Bar still available ? negotiable ? 🤔
    • From there, it is really just test and assemble. Plug the adapter cables from the unit into the back of the screen, then the other side to the car harness. Don't forget all the other plugs too! Run the cables behind the unit and screw it back into place (4 screws) and you should now have 3 cables to run from the top screen to the android unit. I ran them along the DS of the other AV units in the gap between their backets and the console, and used some corrugated tubing on the sharp edges of the bracket so the wires were safe. Plug the centre console and lower screen in temporarily and turn the car to ACC, the AV should fire up as normal. Hold the back button for 3 sec and Android should appear on the top screen. You need to set the input to Aux for audio (more on that later). I put the unit under the AC duct in the centre console, with the wifi antenna on top of the AC duct near the shifter, the bluetooth antenna on the AC duct under the centre console The GPS unit on top of the DS to AC duct; they all seem to work OK there are are out of the way. Neat cable routing is a pain. For the drive recorder I mounted it near the rear view mirror and run the cable in the headlining, across the a pillar and then down the inside of the a pillar seal to the DS lower dash. From there it goes across and to one USB input for the unit. The second USB input is attached to the ECUtec OBD dongle and the 3rd goes to the USB bulkhead connected I added in the centre console. This is how the centre console looks "tidied" up Note I didn't install the provided speaker, didn't use the 2.5mm IPod in line or the piggyback loom for the Ipod or change any DIP switches; they seem to only be required if you need to use the Ipod input rather than the AUX input. That's it, install done, I'll follow up with a separate post on how the unit works, but in summary it retains all factory functions and inputs (so I still use my phone to the car for calls), reverse still works like factory etc.
    • Place the new daughterboard in the case and mount it using the 3 small black rivets provided, and reconnect the 3 factory ribbon cables to the new board Then, use the 3 piggyback cables from the daughterboard into the factory board on top (there are stand offs in the case to keep them apart. and remember to reconnect the antenna and rear cover fan wires. 1 screw to hold the motherboard in place. Before closing the case, make a hole in the sticker covering a hole in the case and run the cable for the android unit into the plug there. The video forgot this step, so did I, so will you probably. Then redo the 4 screws on back, 2 each top and bottom, 3 each side and put the 2 brackets back on.....all ready to go and not that tricky really.      
    • Onto the android unit. You need to remove the top screen because there is a daughterboard to put inside the case. Each side vent pops out from clips; start at the bottom and carefully remove upwards (use a trim remover tool to avoid breaking anything). Then the lower screen and controls come out, 4 screws, a couple of clips (including 3 flimsy ones at the top) and 3 plugs on the rear. Then the upper screen, 4 screws and a bunch of plugs and she is out. From there, remove the mounting brackets (2 screws each), 4 screws on the rear, 2 screws top and bottom and 3 screws holding in the small plates on each side. When you remove the back cover (tight fit), watch out for the power cable for the fan, I removed it so I could put the back aside. The mainboard is held in by 1 screw in the middle, 1 aerial at the top and 3 ribbon cables. If you've ever done any laptop stuff the ribbon cables are OK to work with, just pop up the retainer and they slide out. If you are not familiar just grab a 12 year old from an iphone factory, they will know how it works The case should now look like this:
    • Switching the console was tricky. First there were 6 screws to remove, and also the little adapter loom and its screws had to come out. Also don't forget to remove the 2 screws holding the central locking receiver. Then there are 4 clips on either side....these were very tight in this case and needed careful persuading with a long flat screw driver....some force required but not enough to break them...this was probably the fiddliest part of the whole job. In my case I needed both the wiring loom and the central locking receiver module to swap across to the new one. That was it for the console, so "assembly is the reverse of disassembly"
×
×
  • Create New...