Jump to content
SAU Community

Recommended Posts

Hey guys

Ive been getting a few p.m's recently asking about the reults ive had with my HKS 3037 Pro S turbo, instead of answering them i thought why not make a new thread lol.

Anyway i had the car tuned yesterday so here are the results

Mods:

Stock Internal RB25DET

Stock intake/ehxaust manifolds

HKS 3037 Pro S turbo kit, 56T A/R 0.68

HKS adjustable internal wastegate

HKS Stainless steel split dump pipe

HKS Front pipe

3" decat pipe

HKS Silent High Power stainless steel catback exhaust

HKS 3" alloy intake pipe

Apexi Power FC

Apexi Power FC Boost control kit

Apexi Power Intake Pod filter

Blitz LM Front Mount Intercooler

Nissan Z32 AFM

Nismo fuel pump

Nismo 555cc injectors

R.I.P.S oil catch tank

Exedy heavy duty clutch

Splitfire coils

Alloy radiator

NGK BCPR6ES spark plugs

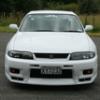
The car made 270rwkw on 17psi and running on crap 95octane fuel, Tuned by Andre Simons of Speedtech Motorsport

Picture016.jpg

Picture017.jpg

Im very happy with it considering the fuel im using.

What you guys think?

Link to comment
https://www.sau.com.au/forums/topic/209907-hks-3037-pro-s-results/
Share on other sites

top results mate :D

getting a 3076r strapped on atm. my power target is exactly what you got - 270rwkw at 17psi.

how well behaved is it on the road?

Actually its real nice on the road, 2nd tends to just grip on and the car takes off, but will spin the wheels if you try to, 1st actually grips pretty well to from what i have felt so far, i havnt really tried 1st that much yet to be honest.

Boost comes on fast and it just takes off, its dosent kick in like a switch at all, its a bit hard to explain, but even in 5th gear it still hauls!

why are you only running 95 oct fuel?

Thats all we have in my town, i could have used 98 but that would mean i would have to drive 15mins to the petrol station everytime i want to fill up which is a hassel.

98 would have been great though, if we had it here i would have used it for sure.

Edited by nizmo_freek

98 would for sure. No doubt about better fuel equaling more power if the tune is there to support it.

Dyna pack read a bit higher than out Dyno Dynamic from what most comparo's show here being 15psi/270rwkw usually is what people make here on 17psi with the same turbo etc.

Great result, boost holds nicely too, very minimal spike.

Good to hear the delivery is good, i would have expected a tad snappy with the smaller rear personally... but then that could be the tune somewhat as less ignition is flattening it off just enough for perfect traction by the sound of it.

Would make a good street car :D

Hey mate, nice results!

Could you post up pics of the turbo in your engine bay?? I have one of these on order and should be here in a week or two :D It would be great to see what it looks like

Hey mate

Heres some pics, its all i have at the moment, kinda hard to poke around in the bay with a camera trying to get decent pics, but if you need anymore p.m me and ill try ad get some.

I dont have the turbo heat sheild installed in these pics, i took if off so the tuner coul play around with the acuator a bit.

100_2088.jpg

100_2089.jpg

100_2090.jpg

DSC_1508.jpg

DSC_1514.jpg

DSC_1515.jpg

DSC_1517.jpg

DSC_1518.jpg

DSC_1519.jpg

DSC_1527.jpg

Cheers for the comments guys :P, really happy with the car.

Edited by nizmo_freek

great power figure, do u mind giving us the ball park figure of total cost. boost does hold nicely n i'm sure u great a mixture of great power along with good responce! nice streetable r33!! hame

great power figure, do u mind giving us the ball park figure of total cost. boost does hold nicely n i'm sure u great a mixture of great power along with good responce! nice streetable r33!! hame

Do you mean a price for just the turbo kit? or everything like turbo, injectors, afm, intercooler, clutch, exhaust etc etc??

both! :)

Im looking at a very similar setup and would love to know what sort of price ill come in at.

Cheers

Turbo kit was around $4000nzd, which is alot cheaper than other places are selling them for (i have seen gt-rs kits sell for over 4g), then add atleast 6g nzd for all the supporting mods, thats exhaust, cooler, fuel system, ignition, clutch, etc etc, i could have done it alot cheaper by using cheaper parts, like custom steel exhaust, cheap chinese cooler, cheap fuel pump, etc etc, but i chose to spend a bit extra and get things that fit perfect and have been proven plenty of times to work, it could be done alot cheaper if you wanted though.

:thumbsup:

Create an account or sign in to comment

You need to be a member in order to leave a comment

Create an account

Sign up for a new account in our community. It's easy!

Register a new account

Sign in

Already have an account? Sign in here.

Sign In Now


  • Similar Content

  • Latest Posts

    • So stock ECU does not like anything above 10 psi?  That Nistune one is just for "try" if it will be any different, I know it need to be tune for that. I know but YOU may know about these problem but i/we dont. They few little Skylines here let alone people who know anything about tham so that is why iam asking here  
    • So now we have a radiator with no attachments whatsoever. It lifts up with a particularly tight spot between the drivers side air box mount and the lower radiator outlet, but if you've got this far you will sort that too. This is the lower mounts with the rad out so you can see where the rubber bushes go, it is a straight shot upwards Done! Assembly is the reverse of disassembly, with blood less likely to be shed.
    • Right, onto the second last trick. The Air Con condenser is mounted to the front of the radiator and stays in the car when the radiator is removed. There are 2x 10mm headed self tappers holding the top of the condenser to the radiator, remove those The bottom of the condenser is attached to the radiator with clips. You need to lift the condenser out of those clips and clear (up, then forward). f**ked if  could work out how to do that last bit with the front bumper on. I hope you can, and you share the trick.  Bumper removal probably deserves its own thread one day once I've recovered the will to live, but basically you need to remove the wheels, front inner guard liners (clips and 10mm headed bolts), the self tapper between the guard and the bumper at the rearmost point of the bumper (same as an R32 that bit), any remaining clips at the top/front of the grill, an absolute bastard design with a plate that holds the top of the bumper above the headlight each side (only 1 bolt which is tricky to get to, but the plate catches 2 places on the bumper and must be removed....carefully!) and push clips between the bumper and guard under the headlight. If you've done all that you will be faced with wiring for the fog lights on both sides and in ADM Q50 RS at least, 4 nasty tight plugs on the driver's side for the ADAS stuff. So, the clips at the bottom look like this on drivers side (looking from the front) And on the passenger side (also from the front), you can see this one is already out Clearance on both of these are super tight; the condenser needs to move up but the upper rad support mount prevents that, and the radiator can't move down far because it is (rubber) mounted. Once you achieve the impossible and drop the condenser off those mounts so it does not stop the rad moving, you are good to go
    • OK, next the shroud needs to come off and there are a couple of tricks. Firstly, there is a loom from near the passenger side headlight to the fans, coolant temp sensor etc and there is no plug to undo.  In my case I was OK to leave the shroud on top of the engine so I just undid the passenger side fan plug and about 10 of the clips which gave enough free wire to put it aside. The fan plugs were super tight, the trick I used was a small falt screwdriver to push down on the release tab, then a larger flat screwdriver to lever the plug out of the fan unit....be careful with how much force you apply! If you need to remove the shroud altogether for some reason you will have to deal with all the plugs (tight) and clips (brittle)....good luck. I removed all of the clips and replaced them with cable ties that I will just cut next time. Also, in the Red Sport / 400R at least, the intake heat exchanger reservoir hose is bolted to the shroud in 2 places with 10mm headed bolts; so remove them (the hose stays in the car; no need to undo it at the t fittings down at the radiator lower mount. Once you've dealt with the HX hose and the wiring loom, there are 3x 10mm headed self tappers holding the top of the shroud to the radiator; remove those.   The shroud then lifts out of the bottom mounts where it sits on the radiator, up and onto the engine out of the way. Simples
    • Ok, disregard my “rate them” comment, sorry for my unrealistic input
×
×
  • Create New...