Jump to content
SAU Community

Recommended Posts

i know i haven't posted in this thread yet but do you have any more info on how to change the mounting points or is that a bit of a secret between mates?

i have a R32 GTSt and i have read that a r34 rear cradle is a good upgrade for traction as the control arm mounting points are in better positions geometry wise. is what you have had done similar to running a later model sub frame?

thanks for any help you are able to give me.

no secrets from us, this thread is all about sharing our dodgy ideas with the world.

But there are 3 main changes to the rear subframe

1/ lower the front mounting for the lower control arm. this is the same change nissan made between r32 and r33.

2/ make the rear roll centre adjustable - we did this by adding additional bolt holes on the subframe so you can bolt the arms on higher than standard

3/ remove hicas rack and replace it with fixed toe arms like S13 non hicas runs.

lots of pics of all of them above.

we are tackling the (much harder) front now. we are making custom lower and upper control arms for the front - lower are pretty simple with rose joints and brackets to suit which will let it sit lower, upper arm is trickier so we are going fixed length (we will cut and reweld if they are too long) which much smaller inner and outer end mounts. this should let us go up to 50mm lower at the front with the adjustment inner and outer.

anyway...we will put up pics when we are done with the front

Duncan what did you end up doing with the brake master cylinder??

The pedal box from my old car is available noe if you have not decided. We almost had it 100% perfect but it blew the front master cylinder seals at the last circuit club day so only had rears for the day.

Your welcome to try it out if you havent already come up with something

no secrets from us, this thread is all about sharing our dodgy ideas with the world.

But there are 3 main changes to the rear subframe

1/ lower the front mounting for the lower control arm. this is the same change nissan made between r32 and r33.

2/ make the rear roll centre adjustable - we did this by adding additional bolt holes on the subframe so you can bolt the arms on higher than standard

3/ remove hicas rack and replace it with fixed toe arms like S13 non hicas runs.

lots of pics of all of them above.

we are tackling the (much harder) front now. we are making custom lower and upper control arms for the front - lower are pretty simple with rose joints and brackets to suit which will let it sit lower, upper arm is trickier so we are going fixed length (we will cut and reweld if they are too long) which much smaller inner and outer end mounts. this should let us go up to 50mm lower at the front with the adjustment inner and outer.

anyway...we will put up pics when we are done with the front

thanks for that. i wasn't sure if the workshop that did it wanted it to be a known fact.

i have run with a hicas lock bar for over a year but i will change it to the no hicas arms. how did you get the hub end to mount up properly? as they have a stud in them for the tie rod end to mount to? was it just a matter of pressing that stud out?

i run my car low as buggery now and have always liked it that way but am only just finding ways to improve it at that height. is it easy to solid mount the sub frame? i see you can gain around 25mm height but does that affect the diff at all?

i have a slightly different set up in the front in my GTST but i have had issues with suspension travel with the car so low. the upper control arm (which is now replaced with an adjustable dog bone type) is nearly folded up against the upright. after playing with the car tonight i have decided to weld in a box section and mount the upper arm higher to return it more standard like settings. because its a GTST i have plenty of room behind the strut towers to do this. i am also getting some adjustable rose jointed tie rod ends to eliminate bump steer and some press in roll centre adjusters for the lower control arms as they differ to the GTR ones.

thanks for the help.

I'm not familiar with the gtst front suspension but it is very difficult to raise the front upper arm in a gtr without major work. remember if you move the top arm but not the lower arm by the same amount you are messing with the factory roll couple/angles.

Hey Brad ld love to get my hands on it, I need to give you a bell about the screens in the next couple of days anyway.

Unfortunatly after the next 2 weekends work is going to slow down on this car (yes that is possible lol). I'm too busy with work and Mark is moving....

how are u guys going about lexan on the rear window, do you buy it already shaped etc or make it to suit? it looks like a rather tight curve on the outer edges to form up, im gonna have to pull windows for cage work now so if lexan isnt too hard i might as well go for it. Any info appreciated from Duncan or even Risking (sorry i dont know your name mate?). Any idea of cost for the sheeting to do it? any special requirements for thickness, type of lexan? i dont want it scratching up within a week so something half decent is prefered.

Also duncan have u got a pic of the lower arms for the hicas removal on the side that bolts to the cradle? i cant seem to see exactly how u have made them up for a bolt to go through. Im assuming a square box section is used and spaced off the cradle to allow the use of a nut and bolt? or is it threaded into the cradle. A pic or two would be most helpful if u get a chance, i been trying to suss it out for weeks how u have done it :P

I have one spare.. i think passenger side..

just sold some others from the junk car.

and now some news from my heap....

i finally removed the bottom end today...i think i broke the car this time last year!! pulled off that nice clutch i had never seen before and dropped it off at the engine builders..

might pull the motor apart tomorrow. and see what the failure was.. didnt take too long really since i had pulled off everything else since its been sitting there.

Edited by Angus Smart

Tonights adventures in valve stem seals was not for the faint hearted.

Started out this morning around 10am with a blue slip inspection which did not go as planned. No issues with the half finished LPG conversion and no problems with smoke, in fact there has been no smoke since I changed the running in oil to regular oil, but he did have an issue with the pod filters and the after market exhaust, so it was back home to change them back to standard.

Then on to pick up the Green Slip only to find that their systems were down so that took ages. Then the RTA was packed and that took ages. On to pick up tie rod ends only to find that the guy forgot to order them so another hour wasted as they went and picked them up. So, long story long, and it's 6 pm before I get started.

After removing all the crap and the cams, Mark from Hills produced his nifty little tool which removes the valve caps and the fitting for compressed air via the spark plug hole to hold the valves up. Mark's instructions and step by step method was foolproof if done in sequence, well almost foolproof...

All went well for the first 3 cylinders until Mark was showing me how to lock up so that he could go home, and was just putting a valve cap back on when suddenly there was this whistling noise coming from the valve and I looked down in horror to see no valve where one should have been! It seems that part of the lock up procedure is to turn off the power (as you would) which also unfortunately turned off the compressor which was slowly losing pressure until there was not enough to hold up the valve anymore.

Needless to say I was crapping my pants at the stage, when Mark produced this tiny little magnet, a bent piece of wire and the coolest little video camera you've ever seen unless it's your doctor's and he's planning on sticking where the sun don't shine. Half an hour of jiggling through the spark plug hole and he had the valve back up though the correct hole. Phewww, new pair of undies and it was back to work.

So... 12:45 AM and the valve stem seals are all changed and the cams are back on. A bit more to do tomorrow and it will be back up and running.

The post mortem is that the seals were not too bad, but there were 5 or 6 seals that did show some evidence of some leaking, so it was not a wasted exercise.

I have done the exact same thing!

Apprentice drained the water traps out whilst I was doing springs on an RB25 and it dropped two cylinders worth of valves, I use a similar tool but it divides into two and can hold the two TDC cylinders up at once.

haw001 Yesterday, 12:57 AM

I changed the running in oil to regular oil,

What do you use for running in oil? Minerail based? And what's your take on the procedure for running in? Everyone seems to have their own method. I know some people who do the running in on the dyno and others that insist on the old 1000km rule of thumb. Just wondering what else people do.

Edited by Evocoop

Create an account or sign in to comment

You need to be a member in order to leave a comment

Create an account

Sign up for a new account in our community. It's easy!

Register a new account

Sign in

Already have an account? Sign in here.

Sign In Now


  • Similar Content

  • Latest Posts

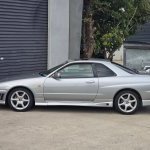
    • Thank you GTSBoy and MBS206 I have done the compression test with the motor out of the vehicle, reason for the test was to see if I needed to remove the head and do rings etc while its out. I'm in the process of respraying the vehicle and tidying up a few things. Story behind it all is I've just purchased the skyline and it was running when I got it, never drove it on the street though as I wanted to pull it down and do it all up again before registering it. the gentleman I purchased it from told me the motor has a forged bottom end and has a decent tune through it but I was going to pull the sump off anyway to see if it is a forged bottom end. that's why I thought id do a compression test beforehand. 
    • Man, I'm kind of amazed that the price of the turbo has not changed in 7 years. Everything else is inflating beyond reason, but not this? Good on Tao / hypergear I guess? Anyways, good luck with the sale!
    • I'm selling my brand new, in the box, never used Hypergear ATR45 - and I had some additions I paid for a few yrs back when I purchased it. Never ended up having the rest of the money to add all the mods at once, so I just ended up slowly selling each part. I originally had it internally gated, with the dump pipe, however I found it was incompatible with what I was going to use it for, so I contacted (I think Ken) from Hypergear, and he and I messaged back and forth & he got me to ship the turbo back, where they modified it & made it externally gated, and gave me the 5 bolt dump pipe attachment for custom welding. (Photos below) This turbo like I said has never touched the inside of an engine bay, it's completely brand new, never used, been sitting in the same box it arrived in, covered in plastic & all. Below are the photos of it: And while the guys at Hypergear were making it in-shop, they sent me some photos of the process: I'm looking at selling this just because I'm in need of the money right now, and don't have plans on modifying the 34 anytime soon - and from reviews & peformance sheets, this turbo had amazing results back when I was researching. The turbo was purchased in 2018 for $1.9k, with the mods I got added on. Looking at the website now, for the same turbo they sell (ATR45SAT), with the current addons it adds up to $1830 for the turbo Current addons included: - Bolted dump adaptor - Ball bearing CHRA - Braided oil feeding line So I'm looking to possibly sell it for around $1800, with shipping included in that 1.8k, It cost me around $120 to ship - so yeah thought I'd throw it out there and see if anyone was interested in purchasing. Cheers!
    • Turn up your speakers https://youtu.be/5_GK5ChNjOs?feature=shared
×
×
  • Create New...