Jump to content
SAU Community

Recommended Posts

I have just started the process of replacing my turbo in my R32 with a HW35W holset turbo. there has beenquite a bit of stuff on them floating around lately and I needed something that would produce near 300rwkw on my RB30det.

The standard turbo has been removed and the first tash was to see if it would actually fit in the standard lowmount position without major modification.

As suspected the compressor housing fouls on the exhaust manifold. it fouls on one of the standoffs that are cast in the manifold for the heat sheild to screw into. it also fouls on one of the runners and a spacer will be needed to make it fit. Apart from that it clears the engine mounts and everything else easily and looks right at home in the engine bay. I will have to make up the following bits

1. Dump/front pipe, The exhaust flange of the holset is a 5 bolt that LOOKS like an XR6T but is slightly different and wont fit. this means I have to make a flange from a steel plate. not really a big deal.

2. new turbo intake pipe, the mouth of the holset is 4" so a silicon reducer and some 3" pipe will do the job nicely.

3. compressor outlet pipe will have to be modified. it needs an elbow welded to it. once again not really a big deal.

4. I have to find the right oil fitting bit it will screw right onto my existing braided line.

There will have to be a spacer between the manifold and the turbo and I estimte it will have to be around 20mm thick. I guess I will have to make that. but should not really be a drama..

The 1 thing need a bit advice with is the studs in the manifold. the 4 that connect to the turbo. they will have to be removed and replaced with ones 20mm longer. as these are not a standard part I have no idea where to look for them.

Also How do you remove the existing ones? do they screw out? and if so do they unscrew anti clockwise?

I will keep this thread updated with pics and info as the job is done.

Cheers!

The 1 thing need a bit advice with is the studs in the manifold. the 4 that connect to the turbo. they will have to be removed and replaced with ones 20mm longer. as these are not a standard part I have no idea where to look for them.

Also How do you remove the existing ones? do they screw out? and if so do they unscrew anti clockwise?

Great work Nic - have a go. Should have some prospect of a driveable match to the 30DET, depending on impeller and housing specs. They seem so variable depending on original fitment. Make sure you post some pics up, and this thread should probably be moved into the 3 litre section eventually.

If your housing is split pulse, then the spacer plate should be cut to accomodate that. You might be surprised what's available from the US, as there is a reasonable number of these things being installed on BMWs. Worth a quick search before asking someone to do a one-off, considering the labour costs associated, and also you're likely to get something laser cut and a very accurate match to the ports on manifold and turbine.

For studs look to any half decent exhaust shop, truck parts supplies (maybe, but usually not many metric parts available), or an engine reconditioning workshop.

Studs will just screw out, they run a conventional right hand thread. Use either a double lock nut, or vice grips clamped on nice and tight. Recommend spraying some WD40, Inox or Lanoline on the studs and leave it penetrate a day or two before having a go, and don't be that surprised if you have one break.

Cheers Dale will do..

the turbo is the higher flowing hx35 compressor and the 12cm housing. I am not really after huge power bu it still should make 300rwkw.

thanks for the tips on the studs, I will hunt around for them, I am lucky enough to have access to a full workshop so I should be able to make all the bits I need.

On a side note,

I can't believe I never noticed this before but the factory RB20 manifold is like a split pulse design with 3 cylinders feeding each port. and the turbo I am fitting has a split pulse housing. I was going to knife edge the exhaust housing but now it looks like a split t3 spacer will do the trick!

ive just done exactly the same turbo swap, we opted to make an adapter flange to instead of forkin out around the $100mark for one off egay, all i can say i ur lucky you dont have to make a T4/T3 split pulse flange haha not fun! anyway i think you will be very happy with the tubo once its running, i am. if you need pictures off anything let us no.

oh and also i was lucky enough to get an exhaust flange that a fella in the uk had laser cut for only $25, so have a hunt around and you mite be able to find somthing like that?

Hi zach,

yep if you could take some photos for me that would be great! I am interested in looking your dump pipe and the intake pipe to the turbo. did you use a 3" steel pipe and a 3 to 4 silicon reducer?

Have you had it dynoed yet? I remember you said it replaced a gt40 or something? if you have not had it dynoed, what sort of power do you estimate it is making and at what boost level?

cheers mate!

I have all the bits I need on order now and should have the install completed by the end of next weekend,

Looking at the standard RB20/25 manifold, it is a SPLIT PULSE design.... am i the first to notice this? and why did i not notice this before? 3 runners go to each side and interestingly, each runner has close to the same internal volume. There is an expansion slot/cut in the middle of the split in the manifold. I am going to weld this up. I am then going to make a T3 split pulse spacer that is 20mm thick. otherwise the compressor will foul on the exhaust manifold.

The other modifications needed to make it fit on the manifold are to remove the manifold heatshield and cut one of the manifold standoffs that the heat shield bolts onto. then the heatshield has to be cut to clear the compressor housing.

20mm spacer is about the minimum and maximum at the same time. this leaves the turbo about 8mm clearance to the manifold and about 55mm clearance between the turbo and the strut tower. so there is plenty of clearance but by no means is this a small turbo,

everywhere else looks to be fine, it clears the cross member (this is on an RB30det mind you so I have an extra 28mm clearance as my block is 28mm taller than an RB20.

The oil supply for my HX35 has a fitting I removed and then the standard nissan banjo will fit but you will need a new banjo bolt. the new bold needs to be 12mm with a thread pitch of 1.5. i bought the bolt from pirtek for about $9

the oil drain is the same as your stock turbo.

the compressor inlet is 4" so a silicon reducer will be used and i will be making up a new intake from the airbox to the turbo.

the compressor outlet is a vband flange and it will be ground down and a silicon hose will be clamped to the housing. but an elbow will be needed as the stock nissan turbo has this fitted from factory.

the dump pipe is being made from scratch and this will be the biggest item to make as I have to make the flange from scratch. I have bought 8mm steel plate and 3" mandrel bends. This will be my first attempt at serious welding and will have to be done on a gassless MIG so it will not be pretty but will be strong and have good penetration.

Thats about it, the only other thing that has to be done is block off the water supply lines, one on the drivers side of the engine that goes around the rear of the block and one that bolts to the passengers side of the block.

I will also have to upgrade my injectors and afm before it can be tuned and I will be capping power at 270rwkw to keep the stock RB30 bottom end alive. I MAY lean on it a bit harder on the dyno just to see what it is capable of but the DSM guys have already done this and have proven 500rwhp is doable from these turbos. this is on a 4G63 so even on a 2 litre these make insane HP.

The best thing about the install is the car will still look stock to the untrained eye and will make 300odd rwkw :) I know you dont believe me it will look stock :) but i will take some photos when I am done to show you what I mean

Cheers!

You're definitely not the first to notice the fact the sets of 3 cylinders are separated in the factory log manifold, I've pondered it and decided that I'd still rather use a custom manifold if I went to a larger twin scroll turbo though it is interesting to note and I am sure it has its advantages even with a single entry turbo.

I look forward to hearing how the HX35 goes as I got SO close to getting one for my own Skyline years ago before I ended up settling on the GT30R.

The HX35W (for wastegate :dry:) designation indicates it is internally gated. Any pics I've seen show only one valve, however none of the BMW installations have complained of poor boost control that I've seen. Most often there has been a bit of biff n barge about whether the owner has got optimal performance from a truck turbo on a petrol engine, whether they should have spent more money and got something "better" etc.

When I first became aware of these units, the biggest problem fitting them that I could determine was likely to be physical size - but evidently they require spacing much the same as the Garrett GT30 IW units.

Edited by Dale FZ1
Looking at the standard RB20/25 manifold, it is a SPLIT PULSE design.... am i the first to notice this? and why did i not notice this before? 3 runners go to each side and interestingly, each runner has close to the same internal volume. There is an expansion slot/cut in the middle of the split in the manifold. I am going to weld this up.

the compressor outlet is a vband flange and it will be ground down and a silicon hose will be clamped to the housing. but an elbow will be needed as the stock nissan turbo has this fitted from factory.

the dump pipe is being made from scratch and this will be the biggest item to make as I have to make the flange from scratch. I have bought 8mm steel plate and 3" mandrel bends. This will be my first attempt at serious welding and will have to be done on a gassless MIG so it will not be pretty but will be strong and have good penetration.

Nic you might find that by welding up that slot in the collector divider that some stressors are introduced into the manifold. Could be counterproductive if it induces cracking, and you might find that the manifold requires facing after the heating/cooling of the weld process. Main point is that the gap is so small I wonder if it would produce any quantifiable result for the effort?

A cast alloy elbow could be easily and cheaply welded to the compressor outlet., making for a bit tidier plumbing. I did so with my GT3037, no problems.

The dump pipe flange might be better done with either 10mm or even 12mm plate. More metal to play with should = less movement/warping when you weld. I think the result will be better than using that cast V band outlet you see them sometimes come with. That casting does not look like a good flowing bit of gear, more suited to quick removal for servicing than anything. Work on a big diameter dump - 3.5 inch should fit in that area without much problem.

Otherwise all good, keep us posted.

Edited by Dale FZ1

thanks for the support guys,

I got a bit of work done tonight.

I did end up getting thicker plate for the rear dump flange and cut it and after a lot of work ended up with the bolt holes and a 3" hole cut to fit the dump pipe. it needs a bot of work but will be good when finished, Ideally I would have gone the standard rear plate and dump but i could not locate one apart from new oem and it was a couple of hundred a 2 weeks away so i made my own.

and Dale I think you might be right about the manifold, I will leave the expansion gap there. it's only 6mm long and 3mm wide so shouldn't cause problems.

I did however find the actuator for the internal gate needed to be modified to fit. this was because the compressor housing fouled it in the position i wanted to use. so it was cut and new holes drilled. but it fits nicely now. the actuator has a screw threaded rod so its going to be easy to adjust boost for what i want. I was going to mad it anyway as the standard pretension on the gate is 24psi. its now set to about 12psi and there is enough thread on the rod to increase it to around 19psi so still a good level of adjustment

Sorry about the lack of pics so far, I will have some up on the weekend.

I'm also at about the same point as you, only my holset has a hx40 compressor and a hc1 turbine (same as hx35 without the internal wastegate).

The spacer I need for the manifold is 40mm thick. I was going to make a spacer with a piece of steam pipe in the middle to fit a wastegate, but it is just too tight.

It will however fit with the 40mm spacer and I will weld a steam pipe elbow to the turbine housing.

Has anyone got any good links for the welding of mild steel to cast, whats best tig, stick, maybe oxy-acet).

Best of luck with the internal gate mate and I hope it will keep boost regulated properly, if it dosen't you can always weld to the exhaust housing and do an external gate like I'm doing.

A lot of the DSM guys reccomend porting the internal gate to almost match the size of the flapper, and radius the entry. I seem to remember somebody having trouble getting the boost to stay below 20psi on the internal gate, and after porting it would hold down to 10psi no problem. This is on a little 2.0L remember.

How do you find the stiffness of the HX35 actuator?

The spring is rock hard or fairly soft? (can be pulled out easily providing u are holding on to something with it i.e vice grips)

The wastegate spring is rock hard. to even move it 5mm you need vice grips.

I now have the turbo bolted to the manifold and it is a tighter fit that first measured. I made a 20mm split pulse spacer out of a a pair of 10mm T3 flanges and bit of flat bar 6mm thick. then I had to make longer studs. I used hi tensile threaded rod and cut 4 pieces then chamfered the edges and bolted them into the manifold with hi temp locktite. I have also finished the dump flange and will make the dump pipe over the next couple of evenings.

There are some bits I did not envisage,

1. the power steering lines from the resivoir to the pump on the low pressure side do not clear the compressor snout!!!!! I will have to have a flexible ps hose to rectify this but it's not really a big drama.

2. even after modifying the actuator is STILL does not fit!!! it also fouls on the power steering canister.

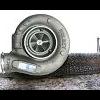
I can explain how much bigger one of these turbos are so I will just do it with a picture...

dr650vshx35.jpg

to the left is a TD04. (same size as RB25 turbo) to the right is a Holset HX35

Waxer52,

Good luck with your install, If you need a spacer that big I am guessing you will have to put the turbo and manifold on the car in 1 go otherwise you will never squeeze the turbo in there. That's also a big spacer! make sure you have some good bolts and the spacer is strong enough to bare the weight of the turbo. Add some photos to this thread when you get a chance...

Cjmartz2k,

Yep I thought of boring the wastegate flap, and might end up doing it. there is not much material between the flap and the edge of the hole alreays. piossibly 2mm each side. but even taming 1mm off this will increase the flow of the hole by 26%!! so it might be a good idea,

My workshop looks like it was hit by a bomb made of skyline parts, metal shavings and beer bottles at the moment

Yeah that size stuff was the deciding factor on me going GT30R instead of HX35, I had one right there to go with but wussed out - the GT30R is enough of a bitch to work around if I need to change gaskets etc haha.

Create an account or sign in to comment

You need to be a member in order to leave a comment

Create an account

Sign up for a new account in our community. It's easy!

Register a new account

Sign in

Already have an account? Sign in here.

Sign In Now


  • Latest Posts

    • So, I started this repair and got as far as "fixing" the holes with some fibreglass. God all those years working on boats came back quickly. I decided I'd reach out to some rust guys just to see what they would say about it. I came across a guy about 40 mins away and went to see him. He said the windscreen needs to come out, that there might be some more bits around the windscreen and he'd quote them at the time. But his quote was $300 to remove and replace windscreen and $3k for the damage he can see. He said he could respray the roof for $1200 and the bonnet for another $800 (somebody has previously rattle canned it, its horrendous). This is $5300 + any small additional bits. It's a lot, I get that and the name of one of my fave youtube channels 'Not Economically Viable' comes to mind.  I'm not being financially rational, but I've taken him up on the quote. He's opening a new shop in November with more room, so we're waiting for that. I'll leave the currently missing headliner out until then. I'm looking forward to it being fixed and having the paint looking nice again (lots of clear coat issues on the roof too). / flame suit on.
    • Oh and some up-and-comings; New rear drivers wheel bearing. I'll do that this weekend while the diff is out. The car is already up and the d/c axles and missing exhaust will help with space. This is the last bearing for me to do and I've been dragging my feet on it. I also have some new EBC blue stuff pads for the car and some new brake fluid. I haven't ever flushed the fluid in this car and looking forward to it. I have 600 degree fluid to put in. Not exactly "race fluid" but better than the typical stuff I have been using.
    • A proper clutch/plate type mechanical diff with quite a lot of pre-load and high locking % is better for drifting. Much more consistent in its behaviour. A helical can be annoyingly vague and inconsistent in how it responds under the sorts of abuse found in drifting.
    • Some updates here. I pulled the entire interior out, minus some trim to respray the seats with Colourlock dye. It turned out really nice though I accidentally let the dog in the car after and she scratched up the front seat.  This is what it looked like before, the colour was just washing out everywhere but thankfully the leather was in good nic. Then after the respray   And after the bloody dog jumped in The headliner is out waiting to be retrimmed, but it will stay out now until Nov - see why below. I replaced the stereo/headunit with a period-styled Android headunit. I have no after pics, but I'll get some. This is because of the missing pixels. I tried to fix this twice with replacement ribbon cables but couldn't. Also the bluetooth interface I'd bought for this was crap. Then there's the rusty roof. Pics and info in this other thread. I have decided to get this repaired professionally, but I'll update that thread. This is why the headliner will stay out for now. I'll be getting the roof and bonnet resprayed at the same time the rust is fixed. I also had an interesting issue with my drivers door lock.  For a small period I was having issues getting any 12v power to the car - I mean *any*. It would have no dash lights, nothing. It happened while I was at the shops and I couldn't get in the car. So, we had 2 problems. The most pressing here is that I was locked out. I have only a single physical key hole on the car, the drivers door and no amount of turning would unlock the car. Surely it doesn't need power for this? The second issue is why am I losing all power periodically, The battery isn't dead, its almost like the battery isn't even there. Two issues that were surprisingly easy to fix. You fellow BMW over-engineering lovers will appreciate this. The lock in the door has 5 states; mechanical lock, electric lock, neutral, electric unlock, mechanical unlock achieved at -90 degrees, -45 degrees, 0 degrees, 45 degrees and 90 degrees. Although, the unlock is towards the front of the car, so opposite for LHD countries. Sticking the key in and turning 45 left or right is what is used 99% of the time. It activates the central locking etc. 90 degrees is for dead battery access and, obvs, only un/locks the one door. But because the mechanical lock is never used and is 27 years old, it seizes up. I was totally unable to turn the key far enough to get to the mechanical unlock (At the time of locking myself out, I didn't even know this was a thing). I eventually did it with some vicegrips and teflon spray.  I made a quick vid for other E39 peeps.   The battery issue is totally new to me also - It wasn't making sufficient contact between the post and the terminal. The terminal was bolted on tight, but the car wouldn't have power. After checking the battery with my multimeter I accidentally contacted the terminal and the battery post and the car got power. The battery was only a few years old and in good condition. I cleaned the post and the terminal with a wire brush, bolted it back on tight and never had the issue again. I'm still surprised that despite having solid contact it didn't work. Also, the car was getting Warragamba sized pools of water in the back when it rained. My initial concern was another rust problem. But when I went out on Weds while it was raining and while I had no headliner in I could see a steady stream of water coming through the roof mounted aerial. As this aerial is for the (now removed) car phone I pulled it out and whacked a blanking grommet in the hole. It seems fine now. I'm thinking I might get the hole permanently filled when the rust is fixed. Moving forward and things in progress; The tailgate needs some attention. I have taken all the trim off to clean it all and address some small rust spots. I have partially done all of this but I'll finish it up hopefully this weekend. As all the trim are now entirely devoid of trim clips I have bought a heap of strong velcro and I'm hoping it does a good enough job as any of this trim in good condition is super expensive and usually in Europe as we dont have many of the wagons here. Suspension and brakes!!! This is exciting. In the front; New control arms New sway bar links New lower Eibach springs (the only modification I'm planning on this car) M Sport shocks (these came with the car and will replace the longer shocks in the car) New top mounts Used 540i calipers (stock brakes suck!) New 540i disks and pads (22x296 mm for 528 and 30x334 mm for 540i) New front wheel bearings (thank all that is holy for bolt on bearings!) Annnnd in the back; New control arms New sway bar links Adjustable air suspension arms (fool the car into what the current height is so the self levelling suspension can match the new front ride height) New ball joints I'll also be doing a brake fluid flush while I'm in there. I'm planning on switching the car over to the 16's that came with it so I can clean up and respray the M Sport 17's. They've lost a lot of colour over the years and have some gutter rash. None of this will start until the E90 is back.
    • You mean you will regret it for drifting duties? I don't quite follow.
×
×
  • Create New...