Jump to content
SAU Community

Recommended Posts

Those crank pulleys are done up real tight for a good reason. The oil pump is chain driven from the crank, but the sprocket on the crank is not keyed like the timing chain sprockets. Make use torque it up to the recommended values. I think it's about 270 ft/lb. Apparently it can cause issues if it' done up too tight too, have a search on NICO, heaps of info there.

No probs. Thanks for the info, I'll have to check.

I learned that the hard way on my 26, chewed the crank keyway and key out due to bolt coming loose (not enough ftlbs=350).

Even more so with this setup then, otherwise no oil pressure?!?

PICS= interesting topic lol.

It's fun spending other people's money!!

First up brand new os gikken competition twin plate, with sprung center. I was going to use and exeedy type flywheel and clutch as we have a near new one on hand but the owner wanted fresh tougher stuff!

post-12712-1250754658_thumb.jpgpost-12712-1250755694_thumb.jpg

5 Stud conversion kit. Got this because, the choice of wheels opens right up, and fitting bigger brakes and discs from the skylines is a lot easier to do. I redrilled the previous 5 stud discs to 4 stud, now it's bolt straight on! Pull the dust cap, remove the split pin and get a 30mm socket on the nut. Spindle just slides off, too easy! New 5 stud spindle on, with a new split pin, dust cap on, disk on and bolt the caliper on.

Just need some s14 5 stud rear discs because silvias/180's don't have drum type hand brakes like the skylines.

post-12712-1250754858_thumb.jpgpost-12712-1250754890_thumb.jpg

post-12712-1250754904_thumb.jpgpost-12712-1250754924_thumb.jpg

post-12712-1250755019_thumb.jpg

Just the rears to do later. Just 4 bolts at the back of the hub assy to undo, instead of 4 bolts with a big nut like the skylines. My GTR 16's fitted to the front, and front guards are going to go back to stock as per owners request.

post-12712-1250755036_thumb.jpg

  • 4 weeks later...

Got more stuff back now. Water pump and gearbox bellhousing, adapter plate and fasteners.

post-12712-1252668501_thumb.jpgpost-12712-1252668530_thumb.jpg

Adapter plate fits sweet, and no need to space the flywheel etc.

post-12712-1252668551_thumb.jpgpost-12712-1252668567_thumb.jpg

Clean gears!, and spigot bearing fitted after pulling out auto bushing.

post-12712-1252668588_thumb.jpgpost-12712-1252668604_thumb.jpg

Adapter plate fitted to back of block.

attachment=245399:VH45_build_up_011.jpg]

Adapter plate bolted in and flywheel fitted.

post-12712-1252668656_thumb.jpgpost-12712-1252668674_thumb.jpg

Clutch installed and clearance around starter hole.

post-12712-1252668695_thumb.jpgpost-12712-1252668717_thumb.jpg

Bell housing test fitted after grinding bumps off inside of bellhousing to clear ring gear, starter bolted on with spacer plate.

post-12712-1252668741_thumb.jpgpost-12712-1252668764_thumb.jpg

A spacer plate for the starter motor was needed as we used a turbo flywheel, which is bigger in diameter than a non turbo flywheel.

post-12712-1252668623_thumb.jpg

post-12712-1252668638_thumb.jpg

Bolted up gearbox after fitting new input shaft seal etc.

post-12712-1252740496_thumb.jpgpost-12712-1252740511_thumb.jpg

Here's the auto trans crank bushing, also had to chop a bit off the end of the input shaft due to machining of bellhousing.

post-12712-1252740527_thumb.jpgpost-12712-1252740543_thumb.jpg

Test fitting of engine and gbox, and view of the eng mounts. Still have to weld in the rest of the mounts.

post-12712-1252740568_thumb.jpg

Under the car....

post-12712-1252740601_thumb.jpgpost-12712-1252740641_thumb.jpg

Neat fit!!. Also have to get a smaller brake booster to clear the cam cover.

post-12712-1252740661_thumb.jpgpost-12712-1252740678_thumb.jpg

The clutch cylinder is hitting on the cam cover so it'll have to be moved up.

post-12712-1252740693_thumb.jpgpost-12712-1252740725_thumb.jpg

You can see how far forward the eng mount is compared to the crossmember mount.

post-12712-1252740744_thumb.jpg

Once a booster and flare spanners are purchased more stuff will get done.

post-12712-1252740625_thumb.jpg

  • 2 weeks later...

Good stuff! I'm digging those UAS engine mounts, I might change mine to those too...

And a Pulsar brake booster might fit. You're running close with the clutch master too :)

Have fun making the extractors :)

  • Like 1
  • 3 weeks later...

Thanks Chris, the mounts are pretty rigid, the engine didn't move when I removed the eng crane! :D

Well here's what was done most of this weekend:

Removed CA18 crossmember, and fitted RB20 crossmember, now the power steering lines are out of whack.

Engine mounting points now line up, moved engine forward a bit to suit, now the shifter will fit through stock hole as well.

Changed the clutch master cylinder, brake booster and cylinder for more compact items, clutch master is R31, booster and master cylinder is an r33 non abs one.

Fitted new chain guides, oil seal, water pump etc.

Measured up and centered engine and gbox for mounts to be made up. Cut up the steel plate to required shapes for each side and Mig welded them up, then painted. Mounted to engine urethane mounts then, bolted them to engine and crossmember.

A side bonus for me was when I crawled under to size up the gbox xmember, I thought I'd try the stock CA18 manual original xmember for fitment, the bloody thing bolted straight on the chassis, and lined up with the VG30 gearbox perfectly!! :P

Pics:

post-12712-1255859042_thumb.jpgpost-12712-1255859077_thumb.jpg

post-12712-1255859166_thumb.jpgpost-12712-1255859255_thumb.jpg

post-12712-1255859287_thumb.jpgpost-12712-1255859359_thumb.jpg

post-12712-1255859387_thumb.jpgpost-12712-1255859410_thumb.jpg

post-12712-1255859524_thumb.jpgpost-12712-1255859559_thumb.jpg

Extractors I won't have time to do as I have to head overseas soon, so the owner aka Farch will have to sort it! Check these collectors out though, I told him to get these! work of art!!

post-12712-1255859971_thumb.jpgpost-12712-1255859990_thumb.jpg

  • 3 months later...
  • 2 months later...

Roughly 20kg more than the SR20DET setup (intercooler, turbo, piping etc). So it's not bad.

Engineer came around to inspect the car and he was very happy with everything so far. :D

Gearshifter is in and tailshaft is in. Pics to come soon, once the extrac-tam-mators are in lol.

Farch can't wait to drive it lol!! Still a bit to do.

  • 2 weeks later...

Exhaust is done, twin 2.5inch into a single 3inch, with twin cats, 4 into 1 headers.

Finished the main wiring to get the engine running, had to cross check the 180sx and vh45 wiring codes and fix a couple of wires, so now it starts and runs. Sounds sweet!!! I'll put up a link to youtube soon.

Also fitted the alternator and made some brackets to attach to the block. There is clearance!

post-12712-1272705104_thumb.jpgpost-12712-1272705464_thumb.jpg

post-12712-1272705487_thumb.jpgpost-12712-1272705518_thumb.jpg

post-12712-1272705553_thumb.jpgpost-12712-1272705590_thumb.jpg

post-12712-1272705627_thumb.jpgpost-12712-1272705660_thumb.jpg

post-12712-1272705694_thumb.jpgpost-12712-1272705734_thumb.jpg

Finished the cooling system by cutting radiator hoses to fit the outlets on the block and radiator. Also got a belt that fits the alternator, just needs thermo fans. Adjusted clutch pedal and took it for a quick spin with no brakes or seats!

Just the handbrake to pull it up. It sounds tough and goes hard, and no traction lol.

Putting up more youtube vids.

basically it started when i got my ca tuned again and it got 225kw and on the way home started making tapping nosies at part throttle and lost power, when i got home an hour later it looking like i had done a main bearing. after riding around in GTRseans R32 all of these years i was getting sick of torque of the ca, as a joke i said "why don't i just put a v8 in it." and sean sugested that he's up for a challenge and if i organised the engine and equipment he would help me with the making of engine mounts and all the unforseen things. after a few visits to MRC who is putting a twin turbo VH45 in his R31 and lucky enough had a stock vh45 and auto gear box that had just been put in a 300zx, and doing a few measurements to make sure we fit between the rails i had an engine and gearbox sitting in my garage and a ca18det with no where to go (ps pulling apart and selling)

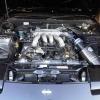
the following pictures are of sean and me test fitting the v8. we are currently ( by we i mean sean) trying to complete the custom bell housing to suit the 300zx manual gearbox i bought for it.

niccce!

Create an account or sign in to comment

You need to be a member in order to leave a comment

Create an account

Sign up for a new account in our community. It's easy!

Register a new account

Sign in

Already have an account? Sign in here.

Sign In Now


  • Similar Content

  • Latest Posts

    • So.... the K&N air box thingo was too big, ended up gifting it to a mate, well, by gifting it he actually supplied food and beer at the pub,  which was nice, as it will not sit on a shelf in the garage for the next 10 years I did trim up some of the existing stuff to neaten it all up and gave it some wrinkle paint, unfortunately it currently has a used and abused mish mash of different types of hose clamps, 4 big fat T bolt type (shit), and a few normal clamps of vairing sizes and brands, but..... only until the 6 constant tension black worm clamps that I ordered from EFI solutions turn up next week Currently the current hose clamps are triggering me hard, LOL Is this the final version, probably not, I really want just 2 silicone pieces, a straight bit of silicone from the filter to the MAF is easy and will happen as soon as I head into Just Jap tomorrow, the problematic part is a 30° silicone bend from the MAF to the TB that I can connect the engine breather from the head, I found that there are bulk head fittings for boat bilge pumps that should work, but until I can get a 30° silicone bend the alloy pipe, and the 11ty thousand hose clamps, are there for the foreseeable future 4 hose clamps are golden, 6 are grudgingly acceptable, the 8 currently holding it all together is just taking the piss    I've also ordered 60 more retaining wall blocks for the front yard, I mis-gonculated the height that was required to get above the base of the Photinia's (red robin's) that are the hedge behind the front fence, currently it is 2 blocks high, and about 1/2 a block short, so going 3 blocks high will be above the base of the red robin's, and allow some room for mulch
    • It is the stock air box with the panel filter. Everything else is stock except the exhaust at this point, as I also went back to the cleaned 270cc injectors. I will check the RPM when the IACV is unplugged and report back.
    • As MBS suggested if this is happening when the engine is cold you're going to want to remove the intake air regulator and verify resistance + that the shutter is physically opening and closing. At -20C should be fully open, 20C half open, over 60C fully closed. At 20C should be 70-80 ohms. For AAC valve testing using a Consult cable see if you can raise and lower the idle by commanding more or less AAC duty cycle. Hopefully it's pretty linear as well, shouldn't be like 30% AAC valve is barely idling and 40% is 1500 rpm.
    • Bloody apprentices! 🙄
    • Not sure yet.  Was considering speedtek because it was rated to 800hp, but when I did some research about him I don't think I will go for that🤣 So maybe giken gear set, but I'm afraid it won't be strong enough🙄
×
×
  • Create New...