Jump to content
SAU Community

Recommended Posts

And this is the reason I bought a JDM GTR. Willall Racing. Proffessional service, parts, & backup. I knew I could never leave the car standard (not with all the yummy bits available for the R35!) & was going to track race the car, so didnt see the point paying a bit more for ADM warranty only to have it voided.

Also, the JDM has the full launch (lunch!) control (is awesome fun), the CD slot (need help with that 70RTY - which one is source button?) & the JDM has a better resolution MFD. I also like how it talks to you in Japanese!

70RTY I saw your car advertised & think the lighter wheels look great with the white pearl paint. You have done well. Enjoy.

Sammy here is some more information on your transmission :P

The first picture is of the damaged seal in the Clutch Basket. This seal effectively holds the required shift pressure in the clutch pack, and when it fails (notice the tear in the outside of the seal?) the driving experience will be like driving a conventional manual with the clutch half depressed the whole time. This is not solely an early model issue, as the very same seal is used even in the current version of the GR6 transmission, and over time they will suffer these same kinds of issues. Failure is related to the manufacture of the seal itself and possibly the abrasive nature of the high zinc content GR6 factory transmission fluid.

seal1.jpg

Our replacement seal system (we have a full set for the GR6) uses a different engineering approach to achieve a very high precision and high durability seal that uses field proven high pressure technology to ensure a more effective long term and temperature resistant sealing process across many years. The Willall GR6 performance seal has a stiffer structure and more positive engagement combined with a long life cycle to provide the best performance ;)

seal2.jpg

Hey Martin

Thanks for the pictures. That gives me a much better idea of what happend. Seen pictures on Nagtroc with a guy in Bangkok who looked to have an almost exact part issue as this one. Looks like this GR6 transmission has some issues here and there even without launching. At least we got you to fix them if they blow up on us now :-)

It certainly did feel like changing gears with a manual with clutch half in. Slow clunky changes.

Can't wait to try out the new tranny fluid especially if its smoother. Damn can't wait to drive my car again LOL.

Just heard your shipping it back today or tomorrow. Will post some pictures once she's back on the road running with the new transmission cooler.

congrats on the purchase. yeah john munro is right. getting a JDM R35 is worth it just to have a nice japanese female voice say good morning and goodnight each day and tell you what day of the week and what date it is! lol.

I wouldn't worry about the gearbox too much. the second R35 I bought in to aus went to giant on this forum and has seen more trackdays and rallys in this last year and a bit than most would see in a lifetime and it's held up fine. having said that the dealer that I stored the car at in japan before shipping did perform a 'gearbox system update' before it left which I understand is just a clutch map update or similar.

and yes, once it's run in have a go at launch mode. it's awesome. so much fun it should be illegal!

I have driven some very special cars lately (ford GT40 supercar, the new one, porche 911, latest m3, lambo gallardo etc) and can tell you none accelerate quite like the R35. some claim to have more power and less weight but somehow the GTR seems faster. it has plenty of power any time you need it. and you'll get used to the paddles and flipping down through each gear as you pull up from 5th or 6th for a second gear corner.

you are not missing too much with the bose system either. to my (basic) ear it was not amazing. and the basic system is not too bad. about on par for cars in it's bracket.

I see you have the basic silver wheels. I've hated them on just about every colour, but on the white they actually look quite nice. and dunlops are a good tyre, though on road the bridgestones did seem a little quieter and little less prone to tramline to me (i've had both).

as for the warranty the chances are if anything went badly wrong nissan would find a way to get out of it using some clause of abuse or misuse or your part or try and come to a 'compromise' with you to pay half knowing that if you ever chose to fight them in court you'd be up against a big legal team (Minter Ellison for nissan, look them up, and don't ask how I know that!!! lol).

The Cobb AP is a good little gadget and if you are not planning on taking mods any further than a chip and exhaust then it's probably the best option. get the cobb AP and a midpipe of some kind. if you are planning to get a little more serious in future then definitely consider the haltech platinum. it's a nice piece of gear and has many, many features that will be useful when winding up the wick.

Anyway, enjoy the car. they truly are an amazingly capable car for the money and are a great drive on the road and on the track.

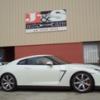
While I was at J&S Autocare a guy with a tidy R34 GTT pulled in just to say hello - got to love the Skyline community!

hehehe, that was me. I was doing significantly more boring stuff (than playing with an r35) at the computer shop next door. Nice ride.

Amazing! I wish i was there when the guy at the servo asked if it was a real one. What sort of fuel figures did you get on they way home from Melbourne? Love the white body on silver wheels, its the combo i have with my R33 and black tint will finish it of nicely. Was it much of a hassle to get it registered? Enjoy!

On the freeway it is easy to get a fuel consumption of 10L/100km if you are gentle with the throttle.

Getting it registered was actually fairly painless (except for stamp duty, THAT was painful) but I was well prepard with all the appropriate forms and paperwork etc filled out before I went into Qld transport. In addition to their forms they wanted to see RAWS compliance paperwork, contract of sale, evidence of CTP insurance as well as physically checking the VIN and engine number.

At this point in time, the car yard I purchased from are not considering getting in anymore R35s - I not sure if that is possible anymore.

  • 1 month later...
yeah I think if you're going to mod it, well you might as well buy JDM and save $50k :whistling:

11 R35 GT-R currently on carsales website.

hmmm, maybe you should contact the two sellers selling their JDM's on carsales - they are both asking 185K, and it doesn't even include the on-road cost like stamp duty. This will end up more like $192,000 - that's quite steep if you ask me.

Create an account or sign in to comment

You need to be a member in order to leave a comment

Create an account

Sign up for a new account in our community. It's easy!

Register a new account

Sign in

Already have an account? Sign in here.

Sign In Now


  • Similar Content

  • Latest Posts

    • Did this end up working? Did you take some pictures?
    • And finally, the front lower mount. It was doubly weird. Firstly, the lower mount is held in with a bracket that has 3 bolts (it also acts as the steering lock stop), and then a nut on the shock lower mount itself. So, remove the 3x 14mm head bolts , then the 17mm nut that holds the shock in. From there, you can't actually remove the shock from the lower mount bolt (took me a while to work that out....) Sadly I don't have a pic of the other side, but the swaybar mounts to the same bolt that holds the shock in. You need to push that swaybar mount/bolt back so the shock can be pulled out past the lower control arm.  In this pic you can see the bolt partly pushed back, but it had to go further than that to release the shock. Once the shock is out, putting the new one in is "reverse of disassembly". Put the top of the shock through at least one hole and put a nut on loosely to hold it in place. Put the lower end in place and push the swaybar mount / shock bolt back in place, then loosely attach the other 2 top nuts. Bolt the bracket back in place with the 14mm head bolts and finally put the nut onto the lower bolt. Done....you have new suspension on your v37!
    • And now to the front.  No pics of the 3 nuts holding the front struts on, they are easy to spot. Undo 2 and leave the closest one on loosely. Underneath we have to deal with the wiring again, but this time its worse because the plug is behind the guard liner. You'll have to decide how much of the guard liner to remove, I undid the lower liner's top, inside and lower clips, but didn't pull it full off the guard. Same issue undoing the plug as at the rear, you need to firmly push the release clip from below while equally firmly gripping the plug body and pulling it out of  the socket. I used my fancy electrical disconnect pliers to get in there There is also one clip for the wiring, unlike at the rear I could not get behind it so just had to lever it up and out.....not in great condition to re-use in future.
    • Onto the rear lower shock mount. It's worth starting with a decent degrease to remove 10+ years of road grime, and perhaps also spray a penetrating oil on the shock lower nut. Don't forget to include the shock wiring and plug in the clean.... Deal with the wiring first; you need to release 2 clips where the wiring goes into the bracket (use long nose pliers behind the bracket to compress the clip so you can reuse it), and the rubber mount slides out, then release the plug.  I found it very hard to unplug, from underneath you can compress the tab with a screwdriver or similar, and gently but firmly pull the plug out of the socket (regular pliers may help but don't put too much pressure on the plastic. The lower mount is straightforward, 17mm nut and you can pull the shock out. As I wasn't putting a standard shock back in, I gave the car side wiring socket a generous gob of dialectric grease to keep crap out in the future. Putting the new shock in is straightforward, feed it into at least 1 of the bolt holes at the top and reach around to put a nut on it to hold it up. Then put on the other 2 top nuts loosely and put the shock onto the lower mounting bolt (you may need to lift the hub a little if the new shock is shorter). Tighten the lower nut and 3 upper nuts and you are done. In my case the BC Racing shocks came assembled for the fronts, but the rears needed to re-use the factory strut tops. For that you need spring compressors to take the pressure off the top nut (they are compressed enough when the spring can move between the top and bottom spring seats. Then a 17mm ring spanner to undo the nut while using an 8mm open spanner to stop the shaft turning (or, if you are really lucky you might get it off with a rattle gun).
    • You will now be able to lift the parcel shelf trim enough to get to the shock cover bolts; if you need to full remove the parcel shelf trim for some reason you also remove the escutcheons around the rear seat release and you will have to unplug the high stop light wiring from the boot. Next up is removal of the bracket; 6 nuts and a bolt Good news, you've finally got to the strut top! Remove the dust cover and the 3 shock mount nuts (perhaps leave 1 on lightly for now....) Same on the other side, but easier now you've done it all before
×
×
  • Create New...