Jump to content
SAU Community

Recommended Posts

Hey guys,

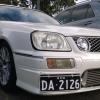
After installing my new front mount, the front bar requires some fairly decent modification, which

i expected. However, i was wondering what the best tool would be for the job? I was thinking an

angle grinder with a really fine cutting blade, but just thought before i do that id see what everyone

else uses...

Cheers

Link to comment
https://www.sau.com.au/forums/topic/281728-cutting-front-bar/
Share on other sites

i don't know about anyone else who has used an angle grinder, or if the stagea front bars are made of the same material as standard 180sx front bars, but the plastic melted with the heat from the cutting disk and made a stringy fairy floss like mess :devil:

kinda cool though

a fine bladed hacksaw! or an airsaw if you have one, will make the job easier. but you migth have problems making round edges with it......

Was thinking a fine bladed hacksaw would be the best bet... but those sharp edges :D

i don't know about anyone else who has used an angle grinder, or if the stagea front bars are made of the same material as standard 180sx front bars, but the plastic melted with the heat from the cutting disk and made a stringy fairy floss like mess :devil:

kinda cool though

Problem solved!! ;)

Edited by iamhe77

the only fmic install i've done was in an s13 silvia. i cut the reo with an angle grinder and the plastic bumper with a dremel.

i don't know about anyone else who has used an angle grinder, or if the stagea front bars are made of the same material as standard 180sx front bars, but the plastic melted with the heat from the cutting disk and made a stringy fairy floss like mess :devil:

kinda cool though

watch out for this ^^^ lol. when i took to mine with the dremel, i had to set up a fan to blow the smoke away. it's toxic, smells like shit and burns your eyes. plus you get the fairy floss effect all over your dremel :D

Just do it with the angle grinder, it cuts through it like a hot knife through butter and if you careful you can get it pretty neat. You may wish to give the edges a bit of a hand sand once your done though. Also you might want to tape up the painted areas your not cutting for a bit of protection just in case anything happens. Tape is heaps cheaper than a new paint job :P

I've always just used a hacksaw blade and shaved off the fuzzy bits at the end with a scraper blade or stanley knife blade.

Hacksaw blade allows you to take your time, but you still need a steady hand.

Definitely tape the edge of your cut though, straight edge gives a nice guide and you won't mark surrounding paint accidentally.

Good luck!

Hahahahaha, I wonder if that spaghetti string-like mess trailing in the breeze would add to the illusion of speed when Alex is driving around. :)

HEY! There is no illusion of speed required thank you very much!

Go easy on that Days front bar, I went too far!!!

Yeah im basically gonna lose the whole number plate thingo in the middle,

as well as the two vertical parts that come down to each side.

I think im going to go the thin cutting blade on the grinder, with the really

thin ones they go through pretty quickly....thanks for everyones ideas :P

HEY! There is no illusion of speed required thank you very much!

Yeah im basically gonna lose the whole number plate thingo in the middle,

as well as the two vertical parts that come down to each side.

I think im going to go the thin cutting blade on the grinder, with the really

thin ones they go through pretty quickly....thanks for everyones ideas :)

:) the wife's stag has the dayz front bar and i think we'll end up doing the same :( it's probably the only kit i've seen on a car that i've liked :(

G`Day All iam now in middle of modding my Front Bar stock,i have found another nissan bar to cut up & replace the crap in centre of the bar i shall take Photo`s as i go,but iam one for STANLEY KNIFE Tape all that your going to cut so you can follow LINE`S,I did price someone else to mod bar & when told $300/$350 i said thank`s will try it my self,cheer`s chuckie.

How thick is intercooler?

My Greddy 75mm fits with slats (even thou i cut 'em :happy: )

Keep The Vertical slats!

It's just over 80mm, but also where the slats are is where the silicone hose

kinda buldges out, so they have to go...

HEY! There is no illusion of speed required thank you very much!

Yeah im basically gonna lose the whole number plate thingo in the middle,

as well as the two vertical parts that come down to each side.

I think im going to go the thin cutting blade on the grinder, with the really

thin ones they go through pretty quickly....thanks for everyones ideas :thumbsup:

How thick is intercooler?

My Greddy 75mm fits with slats (even thou i cut 'em :) )

Keep The Vertical slats!

Create an account or sign in to comment

You need to be a member in order to leave a comment

Create an account

Sign up for a new account in our community. It's easy!

Register a new account

Sign in

Already have an account? Sign in here.

Sign In Now


  • Similar Content

  • Latest Posts

    • Ok i will get those 310mm. I found one but on a different site. This is the description on those...is it ok? Technical parameters: - Axle: front. - Disc type: ventilated. - Number of holes: 5. - Disc diameter: 310mm. - Total height with center: 54mm. - Thickness (new/min.): 30/28mm. - Designed for brake calipers manufacturer: Sumitomo.
    • You Gregged a whole racetrack!?
    • Look for broken wire or bad connector at the motor. Might not be it, but is worth starting there, as it is easy.
    • Hi everyone, I’m having an issue with my R32 GT-R. Sometimes, when the car goes over a bump or experiences some vibration, the 4WD warning light comes on the dashboard. When I check the code from the control unit in the trunk, it shows Code 19 – ETS Motor. However, everything seems to be working fine — if I turn off the engine and restart the car, the light goes away and everything functions normally. Has anyone experienced this before? Where should I start troubleshooting this issue? Thanks in advance!
    • I'm back from the dyno - again! I went looking for someone who knew LS's and had a roller dyno, to see how it shaped up compared to everything else and confirm the powerband really is peaking where Mr Mamo says it should. TLDR: The dyno result I got this time definitely had the shape of how it feels on the road and finally 'makes sense'. Also we had a bit more time to play with timing on the dyno, it turns out the common practice in LS is to lower the timing around peak torque and restore it to max after. So given a car was on the dyno and mostly dialled in already, it was time for tweaking. Luis at APS is definitely knowledgable when it came to this and had overlays ready to go and was happy to share. If you map out your cylinder airmass you start seeing graphs that look a LOT like the engine's torque curve. The good thing also is if you map out your timing curve when you're avoiding knock... this curve very much looks like the inverse of the airmass curve. The result? Well it's another 10.7kw/14hp kw from where I drove it in at. Pretty much everywhere, too. As to how much this car actually makes in Hub Dyno numbers, American Dyno numbers, or Mainline dyno numbers, I say I don't know and it's gone up ~25kw since I started tinkering lol. It IS interesting how the shorter ratio gears I have aren't scaled right on this dyno - 6840RPM is 199KMH, not 175KMH. I have also seen other printouts here with cars with less mods at much higher "kmh" for their RPM due Commodores having 3.45's or longer (!) rear diff ratios maxing out 4th gear which is the 1:1 gear on the T56. Does this matter? No, not really. The real answer is go to the strip and see what it traps, but: I guess I should have gone last Sunday...
×
×
  • Create New...