Jump to content
SAU Community

Recommended Posts

Rough specs atm

Engine/drivetrain:

RB25det NEO with R33 5 speed

3037S turbo

AM Performance high mount manifold

HKS 38mm gate

braided lines

NISTUNE ecu turned by Jeff The Speed Lab

50mm R32 alloy rad

ISC Intercooler

Bosch 044 pump

650cc injectors

r33 Throttle body

Splitfires + hks sparkplugs

R34 Crossmember with custom engine mounts and brackets

4 puck Exedy racing clutch

KAAZ 2way lsd

Custom tailshaft (made by me)

Suspension/brakes:

8/6 JIC FLT-TAR coilovers, body adjustable

NP Racing steering knuckles

NP Racing offcet 20mm rack spacer (effectivly simulates moving the rack forward 20mm)

My own modded s14 LCA's

S15 brakes front and rear

D2 castor rods (about to be scrapped, Cazman ones on the way)

Cazman traction rods

Cusco rear camber arms

Cusco toe arms

Modified subframe and raised up

GTR rear sway bar

Hydro handbrake

Braided brake and clutch lines

Wheels:

17X9.5 +3 front

18X9.5 -7 rear

Body:

Origin front bar

Origin front guards +25mm

Origin rear overfenders +50mm

Vertex rear bar

Seamwelded and AM Performance Roll Cage.

Expected power: roughly after 280-300 rwkw.

Manifold in pics below is just a crappy Ebay manifold... not the finished AM Performance manifold. this project is not yet finished and is a little while off yet, i will update it as i go.

Copy past from ns.com

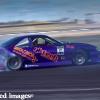
I'm bringing back an old Drift car from SA... and this time its going to be driven properly and harder then the previous owners did :cool: This is Madcaps old car and i plan on building it and driving it into something more of an animal that it was back in its day :down:

For those of you tuning in late.... i used to be into sprinters (owned 3 of them) then got me a ceffy from Darren Appleton. which i absolutely loved. going to longer wheel base really suited me and i threw this car around like all f**k... even won a comp in it and it was the most basic set up car you could ask for... had coilovers... lsd... 200 rwkw and that was it lol.

then i got the 32. spent some time and money on her and it was also an awesome car.... served me well so reliable and i still have it too! was so so so so much fun to drive and i never broke anything on it.

needed to buy a house... this meant selling a car... could not sell the 32 so i sold all the parts off it and turned it back into a street car. bought my house and the drift bug was still there so i built up my daily KE (didnt need a daily any more cause i got a work van then) the KE turned into a bit of an animal and came out quit well. However every time i drove it i just wasnt happy with it or my driving. i kept changing stuff but i got to the point where i realised that the snappy nature of the KE didnt suit my driving style.

soooooooo.... i sold it! took a week to sell and i couldnt believe it haha.

6134_1115920731312_1025781561_30289119_6583636_n.jpg

image0272.jpg

yes my shed looks like a bomb site atm... thats another work in progress also.

the gay blue is going... it will be painted ATC red (same as my rolla and jakes car) All Type Crash and AM Performance will be backing me and expect decent things! got an RB25 with a 3037s turbo kit, high mount manifold, hks gate and screamer happening.

image0461.jpg

image0290.jpg

image0294.jpg

image0295.jpg

image0303g.jpg

image0324.jpg

image0325.jpg

image0326.jpg

image0327v.jpg

image0330.jpg

image0335.jpg

image0337.jpg

image0338.jpg

image0339.jpg

image0340.jpg

image0341y.jpg

image0342.jpg

image0380.jpg

image0388.jpg

image0389g.jpg

image0390.jpg

image0392.jpg

image0394.jpg

image0401.jpg

image0402.jpg

image0415.jpg

image0424.jpg

image0460k.jpg

Link to comment
https://www.sau.com.au/forums/topic/291010-s14-with-neo-rb25-drift-car/
Share on other sites

New radiator and Cooler mounted now

anyway, got the rad fitted, and fits sweet as. i ended up having to trim a section out of the top rad support, theres a stack of room at the bottom for clearance but not much at top in terms of fan clearance. However once trimmed, now there is :P

image0483.jpg

image0480.jpg

image0481.jpg

image0482q.jpg

image0488.jpg

image0487.jpg

the KE was awesome fun both to drive and to build. However i never felt comfortable driving it. i think i much prefer the longer wheelbase style drift and missed driving the 32... So instead of building the 32 back up (as i still have it) i wanted to go with an s14, as they are a better chassis then the s13 and 32's. plus parts are everywhere. Should be fun as hell!

  • 2 weeks later...

Done some more... car is even more stripped now lol but getting there, all rubbed back and ready for paint work, Paint will be done next weekend hopefully so decided to pull the glass out to make it easier to paint + cage work also.

image0503.jpg

image0502.jpg

image0504.jpg

Drilled the holes for riveting on the guards. took a bit of time to make sure it lines up ok. gonna look pretty good and flush once its done :)

image0497.jpg

image0498l.jpg

Made my own tailshaft too with the help of Scotty rowe who machined up a sleeve for me. its basically cut and shut together as the s14 front section of the tailshaft is 450mm from flange to uni center and this just so happened be the exact length i needed for the RB25 box, so we cut the s14 yoke off and machined up a sleeve with a step on it which was a tight fit for the tubing, knocked it into the shaft and then knocked the yoke onto the sleeve so its all dead straight. then ran a weld around it.

this is pretty much how i did the one in my R32 and also jake jones Sil80. no issues at all and dont worry about balancing since its such a short shaft.

image0496.jpg

image0505.jpg

Massive thanks to Paul Sil-014 and Scotty Rowe for their help in the past week,

Thought you recessed the rad a bit to avoid the clutch fan from inadvertantly jamming it. I am doing a similar build with an RB26DETT swap and I am wondering whether I should have just trimmed and mocked up the rad before I sent the car to the paint room, damn!!!!

Create an account or sign in to comment

You need to be a member in order to leave a comment

Create an account

Sign up for a new account in our community. It's easy!

Register a new account

Sign in

Already have an account? Sign in here.

Sign In Now


  • Similar Content

  • Latest Posts

    • From there, it is really just test and assemble. Plug the adapter cables from the unit into the back of the screen, then the other side to the car harness. Don't forget all the other plugs too! Run the cables behind the unit and screw it back into place (4 screws) and you should now have 3 cables to run from the top screen to the android unit. I ran them along the DS of the other AV units in the gap between their backets and the console, and used some corrugated tubing on the sharp edges of the bracket so the wires were safe. Plug the centre console and lower screen in temporarily and turn the car to ACC, the AV should fire up as normal. Hold the back button for 3 sec and Android should appear on the top screen. You need to set the input to Aux for audio (more on that later). I put the unit under the AC duct in the centre console, with the wifi antenna on top of the AC duct near the shifter, the bluetooth antenna on the AC duct under the centre console The GPS unit on top of the DS to AC duct; they all seem to work OK there are are out of the way. Neat cable routing is a pain. For the drive recorder I mounted it near the rear view mirror and run the cable in the headlining, across the a pillar and then down the inside of the a pillar seal to the DS lower dash. From there it goes across and to one USB input for the unit. The second USB input is attached to the ECUtec OBD dongle and the 3rd goes to the USB bulkhead connected I added in the centre console. This is how the centre console looks "tidied" up Note I didn't install the provided speaker, didn't use the 2.5mm IPod in line or the piggyback loom for the Ipod or change any DIP switches; they seem to only be required if you need to use the Ipod input rather than the AUX input. That's it, install done, I'll follow up with a separate post on how the unit works, but in summary it retains all factory functions and inputs (so I still use my phone to the car for calls), reverse still works like factory etc.
    • Place the new daughterboard in the case and mount it using the 3 small black rivets provided, and reconnect the 3 factory ribbon cables to the new board Then, use the 3 piggyback cables from the daughterboard into the factory board on top (there are stand offs in the case to keep them apart. and remember to reconnect the antenna and rear cover fan wires. 1 screw to hold the motherboard in place. Before closing the case, make a hole in the sticker covering a hole in the case and run the cable for the android unit into the plug there. The video forgot this step, so did I, so will you probably. Then redo the 4 screws on back, 2 each top and bottom, 3 each side and put the 2 brackets back on.....all ready to go and not that tricky really.      
    • Onto the android unit. You need to remove the top screen because there is a daughterboard to put inside the case. Each side vent pops out from clips; start at the bottom and carefully remove upwards (use a trim remover tool to avoid breaking anything). Then the lower screen and controls come out, 4 screws, a couple of clips (including 3 flimsy ones at the top) and 3 plugs on the rear. Then the upper screen, 4 screws and a bunch of plugs and she is out. From there, remove the mounting brackets (2 screws each), 4 screws on the rear, 2 screws top and bottom and 3 screws holding in the small plates on each side. When you remove the back cover (tight fit), watch out for the power cable for the fan, I removed it so I could put the back aside. The mainboard is held in by 1 screw in the middle, 1 aerial at the top and 3 ribbon cables. If you've ever done any laptop stuff the ribbon cables are OK to work with, just pop up the retainer and they slide out. If you are not familiar just grab a 12 year old from an iphone factory, they will know how it works The case should now look like this:
    • Switching the console was tricky. First there were 6 screws to remove, and also the little adapter loom and its screws had to come out. Also don't forget to remove the 2 screws holding the central locking receiver. Then there are 4 clips on either side....these were very tight in this case and needed careful persuading with a long flat screw driver....some force required but not enough to break them...this was probably the fiddliest part of the whole job. In my case I needed both the wiring loom and the central locking receiver module to swap across to the new one. That was it for the console, so "assembly is the reverse of disassembly"
    • But first....while I was there, I also swapped across the centre console box for the other style where the AV inputs don't intrude into the (very limited !) space.  Part# was 96926-4GA0A, 284H3-4GA0B, 284H3-4GA0A. (I've already swapped the top 12v socket for a USB bulkhead in this pic, it fit the hole without modification:) Comparison of the 2: Basically to do the console you need to remove the DS and PS side console trim (they slide up and back, held in by clips only) Then remove the back half of the console top trim with the cupholders, pops up, all clips again but be careful at the front as it is pretty flimsy. Then slide the shifter boot down, remove the spring clip, loose it forever somewhere in the car the pull the shift knob off. Remove the tiny plastic piece on DS near "P" and use something thin and long (most screwdrivers won't fit) to push down the interlock and put the shifter down in D for space. There is one screw at the front, then the shifter surround and ashtray lift up. There are 3 or 4 plugs underneath and it is off. Next is the rear cover of the centre console; you need to open the console lid, pop off the trim covering the lid hinge and undo the 2rd screw from the driver's side (the rest all need to come out later so you can do them all now and remove the lid) Then the rear cover unclips (6 clips), start at the top with a trim tool pulling backwards. Once it is off there are 2 screws facing rearwards to remove (need a short phillips for these) and you are done with the rear of the console. There are 4 plugs at the A/V box to unclip Then there are 2 screws at the front of the console, and 2 clips (pull up and back) and the console will come out.
×
×
  • Create New...