Jump to content
SAU Community

Recommended Posts

id say they are still trying to work out why the main caps keep fretting.

good luck.

Another option will be available in 4 weeks from another company that are full counterweight (12) instead of 8. Sweedish highest quality 4340 billet steel forged, finished and balanced in the US.

Edited by Swiper the Fox

Hi guys,

I don’t get on here much anymore. Someone informed me I should make an appearance on this thread.

These forums are a brilliant source of information, a wealth of knowledge and a great place to express your interest in all things automotive , but they also harbour a lot of misinformation, accusations and innuendos.

So if you have any queries about this topic just email me direct, its easier.

Now there has been a big delay with the first trial engine due to incorporating a trial billet main cap design at the same time. Will post pics later today.

These caps require tunnelling boring and the machine shop that did it for me the 1st time made the tunnel a couple thou too big, so it had too go back and be modified. This all has taken a lot longer than expected.

Anyway I have only just received the block back last week so assembly will start soon with the prototype crank etc.

In the process of designing this setup I have decided to make 2 kits available – one will be 95mm and the other will be 93 mm. As the 95 mm stroker does require some block clearancing and isn’t a straight drop in kit . The 93mm crank is going to be full counter weight and will be an easier install.

Both cranks will be available by them selves or in a complete kit with rods and pistons to suit.

These things take time and I am more anxious than you guys to get this finalised as there are numerous other cranks I have in mind to stroke.

I know my pricing will be extremely competitive so hang in there if your interested.

Brad

[email protected]

Edited by Spoolup
Hi guys,

I don't get on here much anymore. Someone informed me I should make an appearance on this thread.

These forums are a brilliant source of information, a wealth of knowledge and a great place to express your interest in all things automotive , but they also harbour a lot of misinformation, accusations and innuendos.

So if you have any queries about this topic just email me direct, its easier.

Now there has been a big delay with the first trial engine due to incorporating a trial billet main cap design at the same time. Will post pics later today.

These caps require tunnelling boring and the machine shop that did it for me the 1st time made the tunnel a couple thou too big, so it had too go back and be modified. This all has taken a lot longer than expected.

Anyway I have only just received the block back last week so assembly will start soon with the prototype crank etc.

In the process of designing this setup I have decided to make 2 kits available – one will be 95mm and the other will be 93 mm. As the 95 mm stroker does require some block clearancing and isn't a straight drop in kit . The 93mm crank is going to be full counter weight and will be an easier install.

Both cranks will be available by them selves or in a complete kit with rods and pistons to suit.

These things take time and I am more anxious than you guys to get this finalised as there are numerous other cranks I have in mind to stroke.

I know my pricing will be extremely competitive so hang in there if your interested.

Brad

[email protected]

no accusations and innuendo Brad...just guessing what may have been happening as im quite aware of what you are trying to achieve and the pitfall associated with it. Good to see you back with some news for interested parties after a couple of months absent...so the crank you have pictured on your website is not actually the correct design as the picture is of an eight counterweight item...its a little confusing.

Couple of thou out and two months plus to rectify...id sack your machinist as thats pretty crook. If you want to use a decent one PM and ill give you some info on who you could use.

Personally id ditch the 95mm item and put all your effort into the 93mm one as the 95mm is going to be a cluster fu(k to get right.

Edited by Swiper the Fox

Paul - I wasnt just directing my comments to you, but in general.

The crank in the pics is one of the trial 95mm stroke cranks I have - its actually quite easy to install just not a direct plug and play.

The tunneling boring issue was done by someone I dont usually use - as your aware not alot of places offer that service so I had to go to someone else.

The guys I use for all my other machining are slow but extremely pedantic and it would take alot for me to change.

Where are you situated ? as I am in Qld ?

As soon as I have this trial engine assembled and running etc, and Im happy with the install and worked out all the bugs, both cranks will be produced available in full counter weight.

At present Im still confident the 95mm, 8 counterweight cranks I have will work fine for what they were designed for.

Edited by Spoolup
Paul - I wasnt just directing my comments to you, but in general.

The crank in the pics is one of the trial 95mm stroke cranks I have - its actually quite easy to install just not a direct plug and play.

The tunneling boring issue was done by someone I dont usually use - as your aware not alot of places offer that service so I had to go to someone else.

The guys I use for all my other machining are slow but extremely pedantic and it would take alot for me to change.

Where are you situated ? as I am in Qld ?

As soon as I have this trial engine assembled and running etc, and Im happy with the install and worked out all the bugs, both cranks will be produced available in full counter weight.

At present Im still confident the 95mm, 8 counterweight cranks I have will work fine for what they were designed for.

OK things are all good from both ends then...sweet.

Im in the exact same position as you in regards to machine shop...my guys are craftsmen but they have a slow and steady approach...gets a bit frustrating sometimes but better than having to send stuff back due to rough tolerances...if its not exact it doesn't leave their shop. I have to send tunnel bore jobs to Sydney (we are in Newcastle) as their is little demand for the work up here to justify the huge outlay for quality machinery to perform it correctly (im actually off to sydney tomm to personally oversee an N1 block be fixed).

Are the cranks finished here in Australia? and where is the parent material sourced from?

Cranks are made of billet 4340 - manufactured and finished in China. Same as the conrods I sell

I have the steel analysed on a mass spec here in Aus in a NATA certified lab. It always meets the 4340 std.

Sizing is checked here in Aus also.

The majority of conrods and cranks in the world today are made in China.

Yes the billet caps will be available also as a kit - they are made here in Aus.

Argos are made in Aus

Eagle, Scat, Brian Crower, some of the Jap brands are made in China - Paul and I have had this discussion before :-)

Not many pistons are made in China - yet

That is interesting most conrods are made in china, I guess they've picked up their game?

Paul - where are argo rods made and mahle pistons?

just get an r35 which has the vg38 & be done with it HA!

VG38? do you mean VR38?

besides, i like the sound the RB makes :3some: so its good that we are seeing development along this path. i think one day someone will shoehorn the VR38 into the 32,33, 34 skyline body - but just think of the cost!!!

u know what i mean :3some:

maybe the 32gtr will become like the classic datsun 1600 where ppl are squeezing sr's & fj's into them lol

u couldnt do that to a japanese supercar which hit the market @ 125k back in 89...i wonder what the value of 125k 20yrs ago would equivalent to in todays market?

anyway, waaaay off topic now, sorry brad.

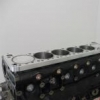
pics of main caps

WOW, you have balls posting pictures of something you have clearly just copied from me!!

Maybe its OK in China to copy anything and have no shame or morals about it but I sure didn't expect it from you.

Stop any production or use of those mains caps immediately and I hope you have a good lawyer and best you get him to get in touch with me smartly.

Rob

Guest
This topic is now closed to further replies.


  • Similar Content

  • Latest Posts

    • Even more fun, leave all the ADAS stuff plugged in, but in different locations, hopefully avoid any codes!   And honestly, all these new cars with their weird electronics. Pull all the electronics out Duncan, and just shove an aftermarket ECU and if needed a trans controller in, along with a PDM. Make it run basic but race car styled!
    • To follow up a question from earlier too since I had the front bar off again (fking!) This is what is between the bumper and the drivers side wheel And this is the navigator side, only one thing but its a biggy! So basically....no putting coolers in the wheel arches without a lot of moving other stuff. Assuming I move to properly race prepping this car I'll take that job on and see how the computers respond to removing a whole bunch of ADAS modules
    • So I prepped the car for another track day on Wednesday (will be interesting to see coolant temps post flushing out and the larger reservoir, with a forecast of 3-14 being 20o cooler than last time I took it out). Couple of things to mention; since I am just driving the car and not taking a support vehicle, I took the rear seats out and just loaded the back up Team Trackday style. Look at all that space! To cover off removing the rear seat....it is weird (note the hybrid is probably different because it wouldn't have folding rear seats) Basically, you remove the lower seat base, very similar to a r series but it is a clip that pulls forward to release the base rather than it being bolted down. Easy Then, you need to remove the side section of the rear seat on each side. There is a 14mm head nut at the bottom of the side piece, the it slides upwards off a hook at the top to release; you also need to unhook the seatbelt from the loop at the top. Then the centre piece is weird. You need to release/fold the seats forward with the tab in the boot on each side From there, there are 2,x12mm headed bolts holding the rear of each seat to the folding bracket, under the trim between the rear seat and the boot (4x christmas tree clips there, they suck). The seat is out but you can see where the bolts attach to the bracket
    • As discussed in the previous post, the bushes in the 110 needed replacing. I took this opportunity to replace the castor bushes, the front lower control arm, lower the car and get the alignment dialled in with new tyres. I took it down to Alignment Motorsports on the GC to get this work done and also get more out of the Shockworks as I felt like I wasn't getting the full use out of them.  To cut a very long story short, it ended up being the case the passenger side castor arm wouldn't accept the brand new bush as the sleeve had worn badly enough to the point you could push the new bush in by hand and completely through. Trying a pair of TRD bushes didn't fix the issue either (I had originally gone with Hardrace bushes). We needed to urgently source another castor arm, and thankfully this was sourced and the guys at the shop worked on my car until 7pm on a Saturday to get everything done. The car rides a lot nicer now with the suspension dialled in properly. Lowered the car a little as well to suit the lower profile front tyres, and just bring the car down generally. Eternally thankful for the guys down at the shop to get the car sorted, we both pulled big favours from our contacts to get it done on the Saturday.  Also plugged in the new Stedi foglights into the S15, and even from a quick test in the garage I'm keen to see how they look out on the road. I had some concerns about the length of the LED body and whether it'd fit in the foglight housing but it's fine.  I've got a small window coming up next month where I'll likely get a little paint work done on the 110 to remove the rear wing, add a boot wing and roof wing, get the side skirt fixed up and colour match the little panel on the tail lights so that I can install some badges that I've kept in storage. I'm also tempted to put in a new pair of headlights on the 110.  Until then, here's some more pictures from Easter this year. 
    • I would put a fuel pressure gauge between the filter and the fuel rail, see if it's maintaining good fuel pressure at idle going up to the point when it stalls. Do you see any strange behavior in commanded fuel leading up to the point when it stalls? You might have to start going through the service manual and doing a long list of sensor tests if it's not the fuel system for whatever reason.
×
×
  • Create New...