Jump to content
SAU Community

Recommended Posts

  • Replies 43
  • Created
  • Last Reply

Top Posters In This Topic

lol no i just looked for that photo now

i got the idea to ziptie my front bar when i smashed it and CBF paying to fix it as it will just smash again

wheels are 10in, +20 offset... could even take some spacers too, gotta love GTR guards

the hella flush boys would not approve of my wheel/guard clearance but much more practical at this height... front lip on GTR is impossible not to damage if car is very low and it gets driven everyday

i love the LMs, bought myself a set of 17x9 +20 from japan

if you are thinking of lower offset just unbolt the centers and slot them in from behind the wheel

that gives you a bit more lip, a chance to polish the lip properly while the faces are off and lowers the offset by approx 8 to 12mm

i'm going to be doing that to my wheels when they come from japan in 2-3 months

front lip on GTR is impossible not to damage if car is very low and it gets driven everyday

i hear that.

awesome looking car man. your mate did great work. if only more "professional" detailers were this good.

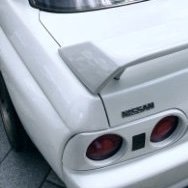
Hey there guys, I detailed Nick's car, firstly Nick. Thanks. It was a pleasure to work on, also thanks need to go to Zolts for lending a hand.

Those LM's are a beautiful wheel and the PWC does a fantastic job so very easy, it is quite simply THE BEST wheel cleaner on the market IMO.

I kid you not, spray on leave to dwell then high pressure hose off.

It is in stunning condition for a car of it's age a credit to Nick and it's previous owner.

In all honesty I could have spent another 4 or 5 hours on the car and it would have come up better but time did not allow. I really would have liked to remove the wheels and clean them inside and out as well as tidy up the wheel wells, spend some more time removing old crusty polish/wax from the seals and panel gaps, it was really caked in there. Nick if you want it done again sometime down the track I'll get you to leave it with me for a week-end and I can go to town on it!!

For those after a run down and products here goes;

Wash (Nick kindly washed it for me)

Wheels with Final Inspection (F.I.) Power Wheel Cleaner (PWC)

Clay Magic claybar and lubricant (the most important step)

1 pass with Menzerna Final Finish on F.I. black pad with Festool Rotex I had expected to do 2 passes but the paint responded very well to the one pass (again time was an issue)

50/50 Isopropyl Alchohol/distilled water wipe down to remove polish residue and prep paint for sealant.

1 layer of F.I. Seal synthetic sealant which should give 3 months protection, possibly longer given the car is garaged 90% of the time.

Seal needs to be applied the left 12 to 15 minutes to cure then wiped down with a damp microfibre cloth then with a dry microfibre.

Seal is a great product, so slick as Nick said you really have to feel how silky it is. Sure the preperation is 95% of the finish but Seal just makes all the hard work on the machine worthwhile.

Headlights were polished with Final Finish on black pad, they had some light haze but certainly not bad, just gives them a crisper finish. I certainly could have done 2 stage polish and they would have come up better again with some Z14.

Nothing but the best Aquatouch Microfibre cloths touched the car, I have a bag of 50 ish used ones I have to wash!!

For those asking if I can do thier cars, yes I can, although I have 4 in waiting ATM, IS200, E46 M3, F6 and a C63. I do this as a hobby and really enjoy it, a great stress relief from a fairly demading office work life.

If you want to PM questions please do (although might take me a few days to reply so be kind!!), if there is demand I can post up some pics of some other cars I have done in the past.

Cheers

Daz.

OMFG I miss this car!

I kept it dry, polished and wrapped up in cotton wool. It is really a credit to Damian (ph1) from Queensland who built it! It's precisely what a tuned GT-R should be in my opinion, built before the ridiculous hoon focused bullshit police state we currently live in. Lumpy cams, 4" exhaust, brutal power delivery, big flames out the exhaust, and plenty of 'giggle factor'.

http://www.flickr.com/photos/23433918@N05/...57624097250579/

Nice work guys, looks hot!

Al: I felt so bad when I ran into you, your car was so clean... mine looked like ass

Nathan: Yep you kept it in A1 condition... I haven't changed a thing... when Benno rebuilt it I asked him to keep it all the same... even though I think he would have liked to make it a bit more 'street' friendly... the only thing that I'm hanging to change is the rear spring rate, its waaay too hard... racepace secret squirrel spec revalve on the teins coming soon

I've been pulled over a few times but no trouble, I drive it daily as well... I think a clean driving record and the fact I'm a bit older helps

the plan was always to do motorsport in it but my lovely wife wants me to get a separate car as track hack... she says its too 'nice' to put backwards through a tyrewall and I think she's probably right

i love the LMs, bought myself a set of 17x9 +20 from japan

if you are thinking of lower offset just unbolt the centers and slot them in from behind the wheel

that gives you a bit more lip, a chance to polish the lip properly while the faces are off and lowers the offset by approx 8 to 12mm

i'm going to be doing that to my wheels when they come from japan in 2-3 months

that's actually a really good idea, cheers!

Al: I felt so bad when I ran into you, your car was so clean... mine looked like ass

Nathan: Yep you kept it in A1 condition... I haven't changed a thing... when Benno rebuilt it I asked him to keep it all the same... even though I think he would have liked to make it a bit more 'street' friendly... the only thing that I'm hanging to change is the rear spring rate, its waaay too hard... racepace secret squirrel spec revalve on the teins coming soon

I've been pulled over a few times but no trouble, I drive it daily as well... I think a clean driving record and the fact I'm a bit older helps

the plan was always to do motorsport in it but my lovely wife wants me to get a separate car as track hack... she says its too 'nice' to put backwards through a tyrewall and I think she's probably right

I agree the rear does bounce around a bit, series 3 xenons, front lip and maybe bar slots would be good too.

Hey there guys, I detailed Nick's car, firstly Nick. Thanks. It was a pleasure to work on, also thanks need to go to Zolts for lending a hand.

Those LM's are a beautiful wheel and the PWC does a fantastic job so very easy, it is quite simply THE BEST wheel cleaner on the market IMO.

I kid you not, spray on leave to dwell then high pressure hose off.

It is in stunning condition for a car of it's age a credit to Nick and it's previous owner.

In all honesty I could have spent another 4 or 5 hours on the car and it would have come up better but time did not allow. I really would have liked to remove the wheels and clean them inside and out as well as tidy up the wheel wells, spend some more time removing old crusty polish/wax from the seals and panel gaps, it was really caked in there. Nick if you want it done again sometime down the track I'll get you to leave it with me for a week-end and I can go to town on it!!

For those after a run down and products here goes;

Wash (Nick kindly washed it for me)

Wheels with Final Inspection (F.I.) Power Wheel Cleaner (PWC)

Clay Magic claybar and lubricant (the most important step)

1 pass with Menzerna Final Finish on F.I. black pad with Festool Rotex I had expected to do 2 passes but the paint responded very well to the one pass (again time was an issue)

50/50 Isopropyl Alchohol/distilled water wipe down to remove polish residue and prep paint for sealant.

1 layer of F.I. Seal synthetic sealant which should give 3 months protection, possibly longer given the car is garaged 90% of the time.

Seal needs to be applied the left 12 to 15 minutes to cure then wiped down with a damp microfibre cloth then with a dry microfibre.

Seal is a great product, so slick as Nick said you really have to feel how silky it is. Sure the preperation is 95% of the finish but Seal just makes all the hard work on the machine worthwhile.

Headlights were polished with Final Finish on black pad, they had some light haze but certainly not bad, just gives them a crisper finish. I certainly could have done 2 stage polish and they would have come up better again with some Z14.

Nothing but the best Aquatouch Microfibre cloths touched the car, I have a bag of 50 ish used ones I have to wash!!

For those asking if I can do thier cars, yes I can, although I have 4 in waiting ATM, IS200, E46 M3, F6 and a C63. I do this as a hobby and really enjoy it, a great stress relief from a fairly demading office work life.

If you want to PM questions please do (although might take me a few days to reply so be kind!!), if there is demand I can post up some pics of some other cars I have done in the past.

Cheers

Daz.

what orbital buff did you use? how much do they cost?

what would you recommend on a budget?

killer job Daz! Great gloss from the silver!

Surprised it only need FF on black... had to hit mine with IP on Orange, followed by FF on black and i try and keep good care of the paint :)

Seal is a fantasic product, i've got 3 layers on at the moment. I'll most likely be down at the RE night if anyone wants to see in the flesh in case Nick's car isn't there.

You got much Menz left? Damian's got CAP medium out now and ultra fine is coming soon, meant to be better than Menz.

what orbital buff did you use? how much do they cost?

what would you recommend on a budget?

given Daz isn't on here much..

Festool Rotex150 - great piece of kit (i actually borrowed Daz's festool of him to finish my car with the recent detail)

~$800, rough price.

It's a forced rotation machine so a bit more tricky.

I would highly recommend the Bosch GEX150T, arugably the same running gear as the Festool but about half the price.

Should be getting one this week sometime.

Create an account or sign in to comment

You need to be a member in order to leave a comment

Create an account

Sign up for a new account in our community. It's easy!

Register a new account

Sign in

Already have an account? Sign in here.

Sign In Now


  • Similar Content

  • Latest Posts

    • Even with the piston at TDC there was room for it to drop, but I don't think it can drop fully into the cylinder, the problem you have is that you need something pushing against the valve to hold it up so you have enough room to put the new stem seal on and the spring etc.  I used compressed air only because putting rope in the cylinder seemed a bit risky to me, I know people have done it countless times before like this. Overall it's a pain in the ass job. Honestly you'd probably be better off taking the head off because the risk of dropping something in the engine and the finicky-ness of it all is very stressful. If you are going to attempt it though i 10000% recommend a 36050 valve spring/keeper tool. I had both the traditional lever type and after doing 1 cylinder it was absolute pain to get those valve keepers in place, even with 2 people. That 36050 is amazing, you do have to push hard to get them in place but it works perfectly almost every time. Back to my actual issue I think my engine is just tired and old and the rings have gone bad. The comp numbers (cold, no oil) were: Cyl 1 -129psi Cyl 2 - 133psi Cyl 3 - 138psi Cyl 4 - 137psi Cyl 5 - 157psi Cyl 6 - 142psi   Cylinder 5 and 6 having the most carbon on them.
    • Who did you have do the installation? I actually know someone who is VERY familiar with the AVS gear. The main point of contact though would be your installer.   Where are you based in NZ?
    • Look, realistically, those are some fairly chunky connectors and wires so it is a reasonably fair bet that that loom was involved in the redirection of the fuel pump and/or ECU/ignition power for the immobiliser. It's also fair to be that the new immobiliser is essentially the same thing as the old one, and so it probably needs the same stuff done to make it do what it has to do. Given that you are talking about a car that no-one else here is familiar with (I mean your exact car) and an alarm that I've never heard of before and so probably not many others are familiar with, and that some wire monkey has been messing with it out of our sight, it seems reasonable that the wire monkey should be fixing this.
    • Wheel alignment immediately. Not "when I get around to it". And further to what Duncan said - you cannot just put camber arms on and shorten them. You will introduce bump steer far in excess of what the car had with stock arms. You need adjustable tension arms and they need to be shortened also. The simplest approach is to shorten them the same % as the stock ones. This will not be correct or optimal, but it will be better than any other guess. The correct way to set the lengths of both arms is to use a properly built/set up bump steer gauge and trial and error the adjustments until you hit the camber you need and want and have minimum bump steer in the range of motion that the wheel is expected to travel. And what Duncan said about toe is also very true. And you cannot change the camber arm without also affecting toe. So when you have adjustable arms on the back of a Skyline, the car either needs to go to a talented wheel aligner (not your local tyre shop dropout), or you need to be able to do this stuff yourself at home. Guess which approach I have taken? I have built my own gear for camber, toe and bump steer measurement and I do all this on the flattest bit of concrete I have, with some shims under the tyres on one side to level the car.
    • Thought I would get some advice from others on this situation.    Relevant info: R33 GTS25t Link G4x ECU Walbro 255LPH w/ OEM FP Relay (No relay mod) Scenario: I accidentally messed up my old AVS S5 (rev.1) at the start of the year and the cars been immobilised. Also the siren BBU has completely failed; so I decided to upgrade it.  I got a newer AVS S5 (rev.2?) installed on Friday. The guy removed the old one and its immobilisers. Tried to start it; the car cranks but doesnt start.  The new one was installed and all the alarm functions seem to be working as they should; still wouldn't start Went to bed; got up on Friday morning and decided to have a look into the no start problem. Found the car completely dead.  Charged the battery; plugged it back in and found the brake lights were stuck on.  Unplugging the brake pedal switch the lights turn off. Plug it back in and theyre stuck on again. I tested the switch (continuity test and resistance); all looks good (0-1kohm).  On talking to AVS; found its because of the rubber stopper on the brake pedal; sure enough the middle of it is missing so have ordered a new one. One of those wear items; which was confusing what was going on However when I try unplugging the STOP Light fuses (under the dash and under the hood) the brake light still stays on. Should those fuses not cut the brake light circuit?  I then checked the ECU; FP Speed Error.  Testing the pump again; I can hear the relay clicking every time I switch it to ON. I unplugged the pump and put the multimeter across the plug. No continuity; im seeing 0.6V (ECU signal?) and when it switches the relay I think its like 20mA or 200mA). Not seeing 12.4V / 7-9A. As far as I know; the Fuel Pump was wired through one of the immobiliser relays on the old alarm.  He pulled some thick gauged harness out with the old alarm wiring; which looks to me like it was to bridge connections into the immobilisers? Before it got immobilised it was running just fine.  Im at a loss to why the FP is getting no voltage; I thought maybe the FP was faulty (even though I havent even done 50km on the new pump) but no voltage at the harness plug.  Questions: Could it be he didnt reconnect the fuel pump when testing it after the old alarm removal (before installing the new alarm)?  Is this a case of bridging to the brake lights instead of the fuel pump circuit? It's a bit beyond me as I dont do a lot with electrical; so have tried my best to diagnose what I think seems to make sense.  Seeking advice if theres for sure an issue with the alarm install to get him back here; or if I do infact, need an auto electrician to diagnose it. 
×
×
  • Create New...