Jump to content
SAU Community

Recommended Posts

Its out now Bob.

I have an interesting photo to post up this arvo.

Thanks....... I bought it today.

This may be a bit risky so if a moderator wants to delete it then I understand.

Cheers,

Bob.

643ddbaf.jpg23da5e92.jpg

bob - yours is definitely more brown

151HHZ is more purple

RBNT is more red

Yeah..... It has a fair bit to do with lighting and paint depth.

Here's one of the Kerry Packer owned cars............

2c1f2818.jpg

Non factory paint on 20 year old cars is not uncommon.

One of my rear guards defineately has more mica in it from a previous repair and one of the front guards at least has also been painted.

Those Harrops would be awesome though!

As for the indicators I was looking a couple of years ago as one of my lenses is slightly cracked (my bad) and I thought I read they were the same as the ADM 300zx. Trying to find pics on the net.

Check out this link they kinda look familiar from a distance.

http://www.aus300zx.com/forum/showthread.php?t=310734

Edited by gtr fan

On to the clear indicators, Ive no idea why they were changed nor do I know why one of the previous 2 owners had the brake calipers sprayed gold although it might have been to match some wheels, either way, silly move. Its just another one of the things I will rectify when time (motivation) permits.

what colour are u going to paint the calipers? gloss black always looks nice, although, the factory finish is closely matched to the wheels (deep gun metal grey)

Hi guys , John has the dirty car (chassis no 16141 )and it has had a repair in the front b4 he bought it and is planing a full respray, but they do look very different in person . he has photos of the car from targa that show the Harrops and Simmons wheels so we think its been there

on another note I think I've found some new centre aerials out of the UK

Edited by brad_gtr
on another note I think I've found some new centre aerials out of the UK

Are you sure they have stock?

I've contacted all the websites that list them but none have stock.

My mate also needs one so if you could share your info in would be appreciated.

Bob.

Hi guys , John has the dirty car (chassis no 16141 )and it has had a repair in the front b4 he bought it and is planing a full respray, but they do look very different in person . he has photos of the car from targa that show the Harrops and Simmons wheels so we think its been there

on another note I think I've found some new centre aerials out of the UK

Does he know who owned the car whilst in Targa? Or is the a rego number in those photos?

I have a targa book which spans the first 10 or so years and thers a couple of GTR's in there. Might be able to identify which it was??

Hi guys , John has the dirty car (chassis no 16141 )and it has had a repair in the front b4 he bought it and is planing a full respray, but they do look very different in person . he has photos of the car from targa that show the Harrops and Simmons wheels so we think its been there

on another note I think I've found some new centre aerials out of the UK

Brad, is john on the forums? If not he should be! Any chance of getting the targo photos put up? gtr fan might recognise it.

Ill grab one! Was it Aerpro by chance?

Marko, Ill just find a pair of gunmetal calipers at some stage.

Aerial wasn't Aerpro , Autoflex, they said they had 4 in stock, so will see when they get here, 2 will be for sale then

john not on forums yet, hopefully he will send me the photo to show everyone

Hi guys.

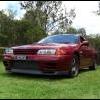
I am the owner of the filthy red/maroon car next to the clean one. I can confirm it was dirty.

I have owned it since 2004 and have done about 60.000km since then - ODO has a grand total of 201,000km on it.

The orginal logbook was with the vehicle when I bought it and it said the following:

Delivered directly from Nissan Australia to Fox Transport Pty Ltd.

The service history for the first 60,000km of it's life is blank and only started about 1995 or 96 (typing this from memory) at which point Gary Rogers Nissan began it's regular servicing. My suspicion is Fox's mechanic was doing the servicing inhouse but have not been able to confirm this.

The Harrops are unbelieveable (even after all these years). Have had it around Queensland Raceway a couple of times and no fade whatsoever.

Also has had an engine oil cooler fitted that looks like its been on for years.

It had Simmons on it when I bought it (Harrops too big for the standard wheel) but they were stuffed (cracked)

As far as the Targa goes - a mate showed me the official video of the 1993 Targa and there is a very similar car with Simmons and a painted bumper lip driven by one K Bartlett. A guy from Octogaon (who runs the Targa) seemed to think mine was the car but I've never been able to get any confirmation

Glad to see the old beast has created some interest.

Welcome John,

I take it your car was a former Linsay Fox car?

From what I can see Kevin and Peter Bartlett entered the GTR in Targa 1993 and were assigned Targa number 720. It still has the non painted lip.

Also Jim Richards and Barry Oliver were running another Burgundy GTR (#832), which looks the same (same sponsors etc)but I can't be sure if the shot is in 1993 or 1994 targa.

I think both these cars ran in 1994 as well. I have the dvd so I will see if I can see Kevins car and if it has a painted lip.

Both cars running aftermarket wheels, can't get a clear shot on Kevins car but Jim's wheels are definately simmons.

  • Like 1

I found a very bad quality video of the 93 Targa and Barletts car didn't have the painted lip as you said - bad memory on my part as I hadn't watched it since 2006. Jim Richards was driving a Porsche 968 in the video and I think rollcages were required after 93 after some BIG shunts in the 93 Targa (300ZX, Austin Healy, 911)

I have no idea if it has had a re-spray but someone must have painted the front lip and did a dodgey repair of the front left (part of the bumper reo was missing).

i found the original delivery docket and i was pretty close:

Manufactured: 28 June 1991 (Chassis 16141)

1st registered: 12/10/1992 with victorian rego

Owner: Linfox Transport (Aust) P/L

Dealer: Nissan Australia, Burwood Road, Hawthorn

Colour Code: AH3 Burgundy

Given the colour differences with the other photos and the prang (which I intend to get properly repaired) it may very well have had a respray before I bought it in 2004.

Be great if i could see a clear shot of the wheels on Bartlet's car because I think that's the key.

Good to see there are still a good number of ADM GTR's being enjoyed and preserved

Hi John and welcome to the forum.

It's very refreshing to find someone honest in regards to their car and its history.

Over the years I've encountered plenty of people that swear on a stack of bibles that "their" car was different and made that way........... Blah Blah........

These Aussie delivered R32's are very thin on the ground so it's nice to know who owns what etc....

Cheers,

Bob.

Kevin Bartlett also helped design an ECU chip for ADM GTR's. I had one in my original ECU replaced it years ago with power fc as it started to play up.

I think a Guy who owned or worked at Eagle Automotive Asquith NSW had something to do with Bartlett and this chip. I only remember this through someone I knew at the time and that before I owned my car it was maintained there. But I never got in touch with this shop.

Also John I would think your probably was the targa car. With the Harropps, Simmons and oil cooler. Were the simmons painted / colour coded to the car with the lip polished alloy? As I am pretty sure thats what the wheels looked liked.

Edited by gtr fan

We should get a list of known aust gtr's as I'd like to know how many are still in 1 piece...in this thread there are about 5 gtr's right?

The other aust gtr's that I know of is the falken promo car and kier wilsons silver 8sec gtr. What other known examples are out there?

Create an account or sign in to comment

You need to be a member in order to leave a comment

Create an account

Sign up for a new account in our community. It's easy!

Register a new account

Sign in

Already have an account? Sign in here.

Sign In Now


  • Similar Content

  • Latest Posts

    • Hi, is the HKS  Tower Bar still available ? negotiable ? 🤔
    • From there, it is really just test and assemble. Plug the adapter cables from the unit into the back of the screen, then the other side to the car harness. Don't forget all the other plugs too! Run the cables behind the unit and screw it back into place (4 screws) and you should now have 3 cables to run from the top screen to the android unit. I ran them along the DS of the other AV units in the gap between their backets and the console, and used some corrugated tubing on the sharp edges of the bracket so the wires were safe. Plug the centre console and lower screen in temporarily and turn the car to ACC, the AV should fire up as normal. Hold the back button for 3 sec and Android should appear on the top screen. You need to set the input to Aux for audio (more on that later). I put the unit under the AC duct in the centre console, with the wifi antenna on top of the AC duct near the shifter, the bluetooth antenna on the AC duct under the centre console The GPS unit on top of the DS to AC duct; they all seem to work OK there are are out of the way. Neat cable routing is a pain. For the drive recorder I mounted it near the rear view mirror and run the cable in the headlining, across the a pillar and then down the inside of the a pillar seal to the DS lower dash. From there it goes across and to one USB input for the unit. The second USB input is attached to the ECUtec OBD dongle and the 3rd goes to the USB bulkhead connected I added in the centre console. This is how the centre console looks "tidied" up Note I didn't install the provided speaker, didn't use the 2.5mm IPod in line or the piggyback loom for the Ipod or change any DIP switches; they seem to only be required if you need to use the Ipod input rather than the AUX input. That's it, install done, I'll follow up with a separate post on how the unit works, but in summary it retains all factory functions and inputs (so I still use my phone to the car for calls), reverse still works like factory etc.
    • Place the new daughterboard in the case and mount it using the 3 small black rivets provided, and reconnect the 3 factory ribbon cables to the new board Then, use the 3 piggyback cables from the daughterboard into the factory board on top (there are stand offs in the case to keep them apart. and remember to reconnect the antenna and rear cover fan wires. 1 screw to hold the motherboard in place. Before closing the case, make a hole in the sticker covering a hole in the case and run the cable for the android unit into the plug there. The video forgot this step, so did I, so will you probably. Then redo the 4 screws on back, 2 each top and bottom, 3 each side and put the 2 brackets back on.....all ready to go and not that tricky really.      
    • Onto the android unit. You need to remove the top screen because there is a daughterboard to put inside the case. Each side vent pops out from clips; start at the bottom and carefully remove upwards (use a trim remover tool to avoid breaking anything). Then the lower screen and controls come out, 4 screws, a couple of clips (including 3 flimsy ones at the top) and 3 plugs on the rear. Then the upper screen, 4 screws and a bunch of plugs and she is out. From there, remove the mounting brackets (2 screws each), 4 screws on the rear, 2 screws top and bottom and 3 screws holding in the small plates on each side. When you remove the back cover (tight fit), watch out for the power cable for the fan, I removed it so I could put the back aside. The mainboard is held in by 1 screw in the middle, 1 aerial at the top and 3 ribbon cables. If you've ever done any laptop stuff the ribbon cables are OK to work with, just pop up the retainer and they slide out. If you are not familiar just grab a 12 year old from an iphone factory, they will know how it works The case should now look like this:
    • Switching the console was tricky. First there were 6 screws to remove, and also the little adapter loom and its screws had to come out. Also don't forget to remove the 2 screws holding the central locking receiver. Then there are 4 clips on either side....these were very tight in this case and needed careful persuading with a long flat screw driver....some force required but not enough to break them...this was probably the fiddliest part of the whole job. In my case I needed both the wiring loom and the central locking receiver module to swap across to the new one. That was it for the console, so "assembly is the reverse of disassembly"
×
×
  • Create New...